Windows 11 media creation tool: how to install/upgrade
Содержание:
- Upgrade to Windows 11 using Media Creation Tool
- Download Windows 11 Media Creation Tool
- How to use the Media Creation Tool to download an ISO file with the latest Windows 10 setup
- Как пользоваться
- Windows 10 Installation Media Tool
- How to Upgrade or Get Windows 10 without Installation
- Что вы должны знать, прежде чем идти вперед
- Скачиваем оригинальный образ Виндовс 10 через Rufus
- What is Media Creation Tool?
- Use Windows Media Creation Tool to Upgrade Your PC
- Результат
- Media Creation Tool Создание загрузочного флеш-накопителя с Windows 10/
- Windows 10 Media Creation Tool FAQ
- What You Will Require?
- What is Windows 11 Media Creation Tool?
- How To Use Windows 11 Media Creation Tool
- Выводы статьи
Upgrade to Windows 11 using Media Creation Tool
Chandan Pandit
September 3, 2021 11:20 PM
Windows
The beta build of Windows 11 has started rolling out to Windows Insider users. Windows 11 brings many improvements over the normal Windows 10 such as a new redesigned home interface, a new Microsoft store with native support for Android apps, a re-touched taskbar and icons, and more. The stable rollout of Windows 11 might happen in late 2021 or early 2022. Many users are willing to try Windows 11 on their PC, but they are not officially eligible for that. Well, for those, Windows 11 Media Creation is a helpful tool. The Media Creation tool can upgrade its system to Windows 11 seamlessly.
The Windows Media Creation tool allows users to sideload Windows 11. It’s more like flagship a custom ROM in Android with the help of TWRP recovery. For some sets of people, the creation tool is easy to use and operable, but it might come out as a bit complicated for beginners. So, in this post, we’ll de deciding on How to upgrade your system to Windows 11 using Windows 11 Media Creation Tool.
Important steps before proceeding
- After installing Windows 11 using the Media Creation tool, all of your user data might get cleared. So, make sure to take the backup of your data, so you won’t face any problem if your user data gets cleared.
- A good network connection is always recommended. It’s must require to install Windows 11 and to create a bootable USB Drive.
- If you’re creating the bootable USB instead of installing Windows 11, a USB Drive with a minimum of 8GB of RAM is always suggested.
Download Windows 11 Media Creation Tool
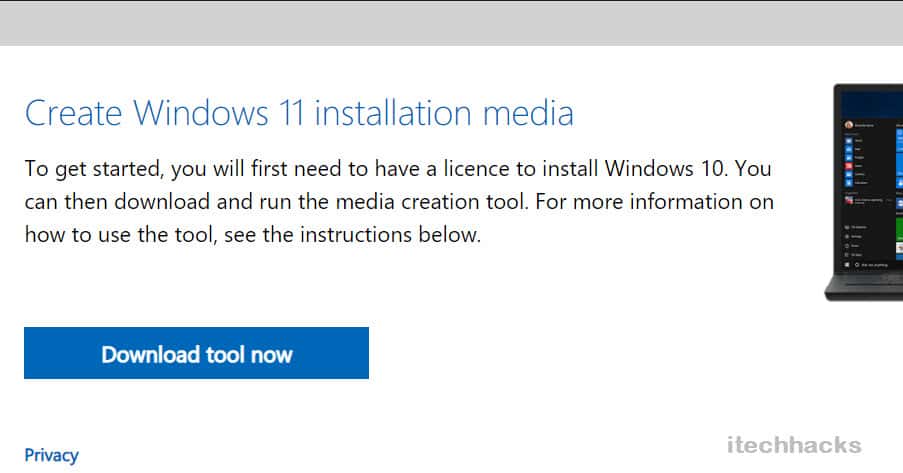
First of all, make sure you have registered in the Windows Insider program. To download the official file, you will need a Windows Insider account, So make it first. Now go to this official page and download the Windows 11 installation media. Click on Windows 11 icon and then click on the download tool now. Your Windows 11 Installation media will be now downloaded successfully in minutes (depending upon your network speeds).
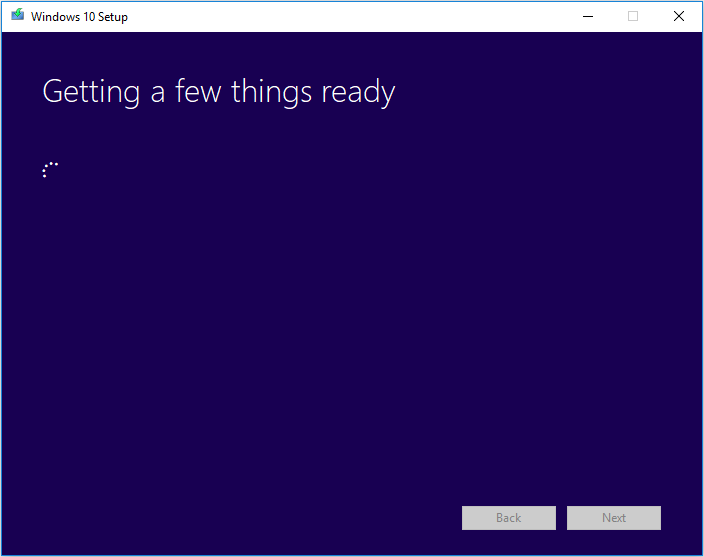
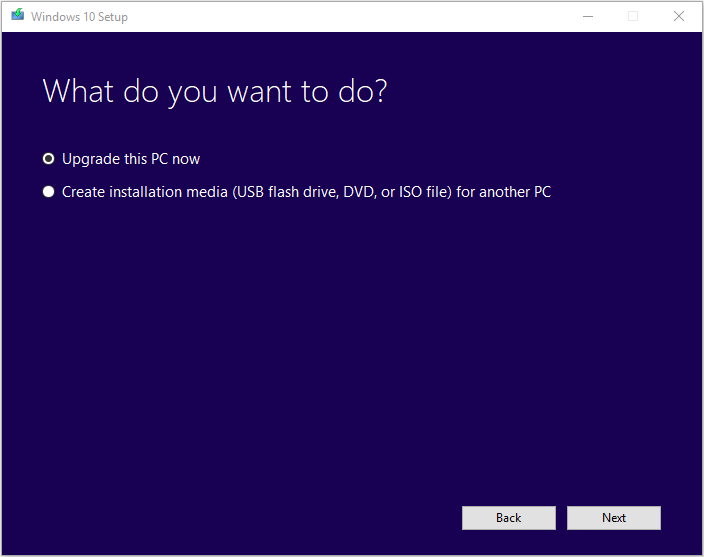
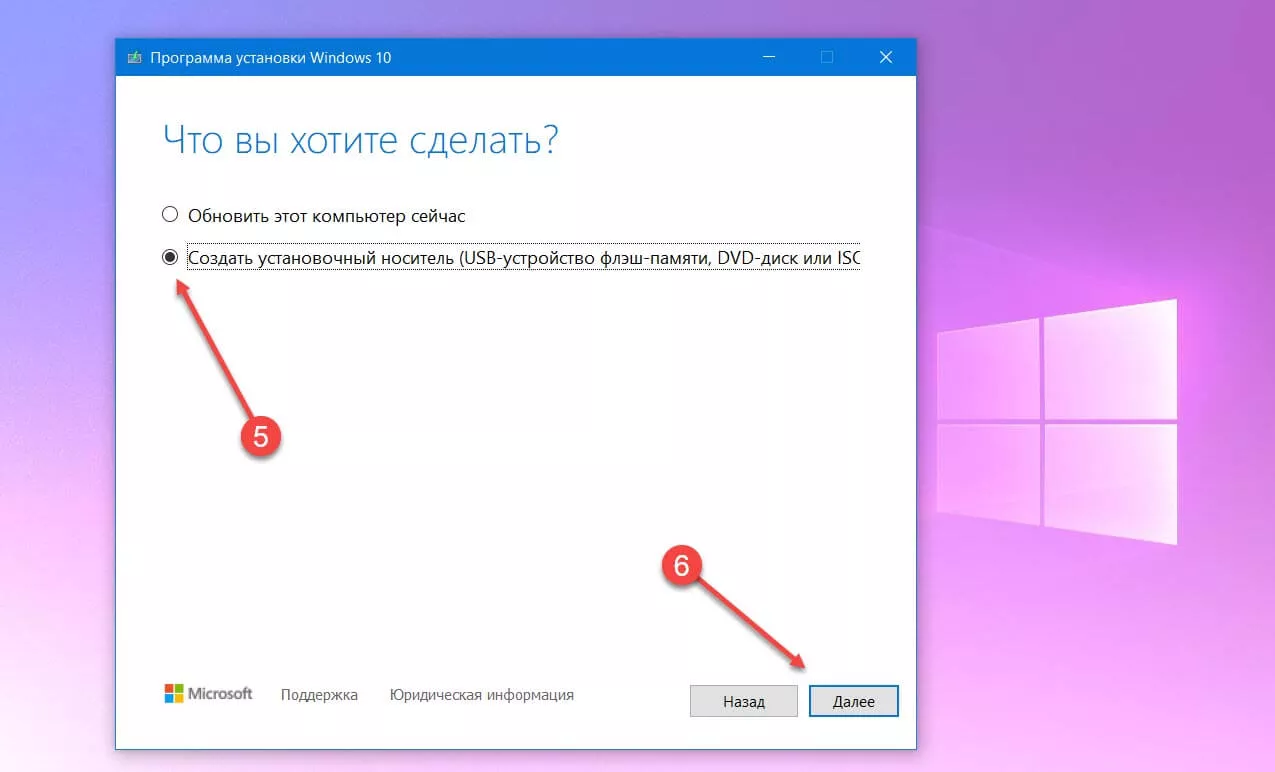
After installing the file, run it on your PC system. After this, you’ll get a prompt saying “Getting a few things ready!”. Now, you’ll see two options: “Upgrade the PC Now” and “Create Installation Media (USB flash drive, DVD, or ISO file) for another PC”.
You can choose the option accordingly, if you choose “Upgrade the PC Now”, then your system will be upgraded to Windows 11. While, on the other hand, if you choose “Create installation media” then it will create a bootable file instead of upgrading your system.

Upgrade the PC Now
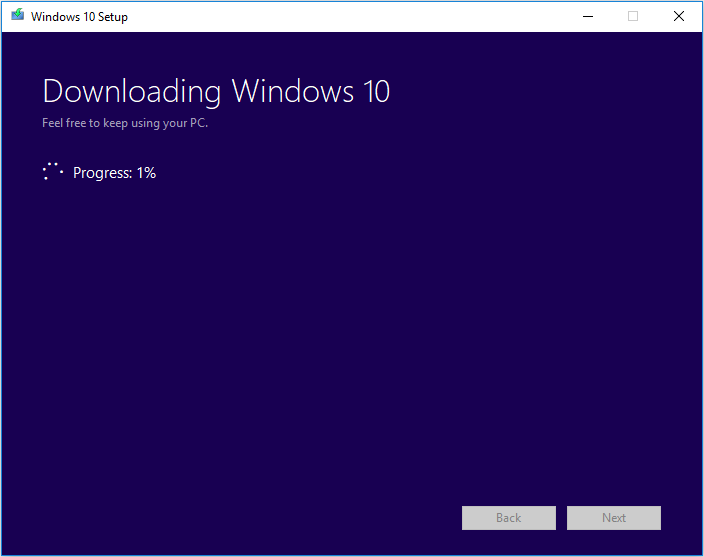
If you choose the “Upgrade the PC Now” option, then the Media Creation tool will start downloading the Windows 11 File and upon downloading successfully, you will be able to install it in your system. After successful installation, complete the setup and you will be now able to run Windows 11 in your system seamlessly.
Create Installation Media
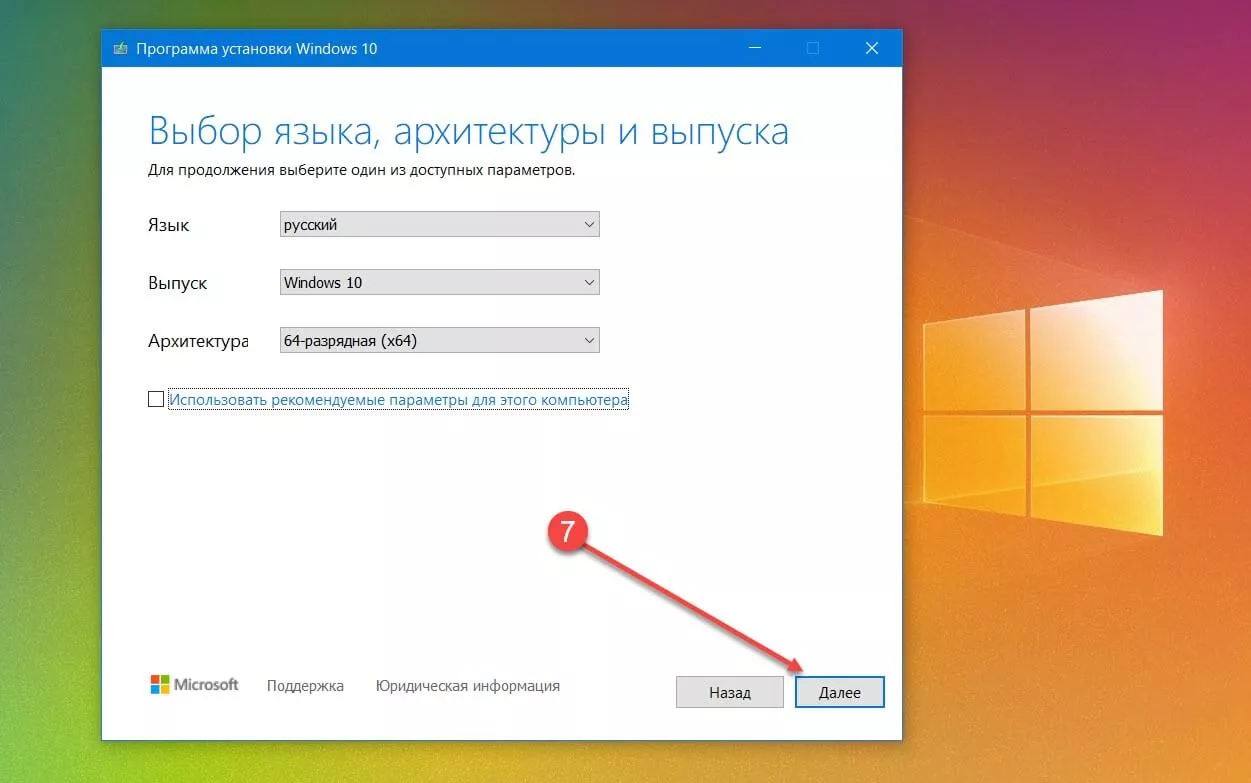
If you choose the option “Create installation media.” then you will now get a prompt asking for language, edition, and architecture details of your system. Make sure to enter the details correctly and also you can choose the option “Use the recommended option for the PC!”. It will automatically select the option compatible with your system.
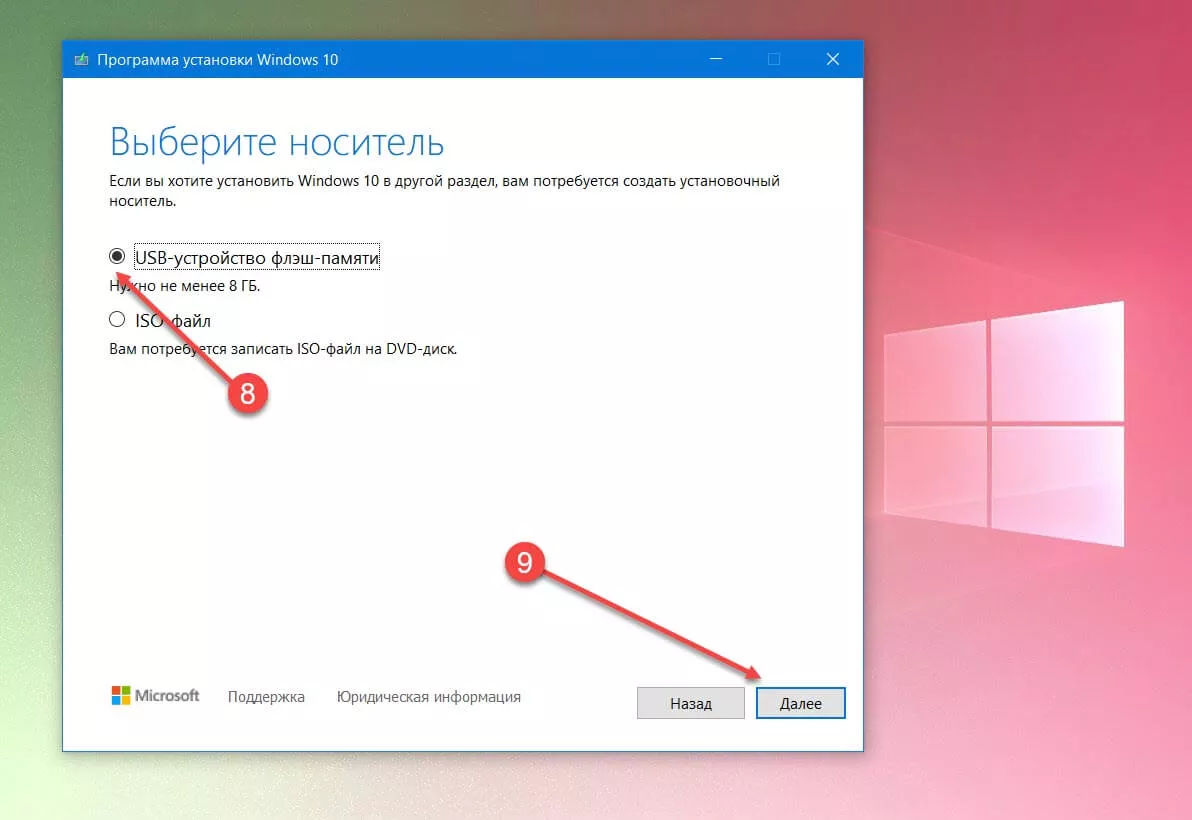
Now click on Next and you’ll get two options namely “Create USB flash drive” and “ISO file”. In create a USB flash drive option, it will create a bootable USB drive for you. And if you choose the second option, you will be able to burn the ISO file later to create a bootable USB drive or a DVD.
- If you select the “Create USB Flash drive” option, then make sure to connect the USB. The tool will automatically download and burn into the US connection. And you can flash it later.
- For the “ISO File” option, it will download the ISO file of Windows 11 and you’ll later have to burn it using any third-party apps to make it bootable.
We recommend you to use the “Create USB Flash Drive” option here, as it is easier to use.
Ready to Install
After creating the bootable Windows 11, plug the USB Drive in which you’ve installed the bootable file. Boot the PC into BIOS and install the system. You can now use Windows 11 seamlessly if you have followed all the steps mentioned above correctly. You can read our “types of Windows 11 product key”, “Password Reset”, and TPM 2.0 Bypass” article here.
How to use the Media Creation Tool to download an ISO file with the latest Windows 10 setup
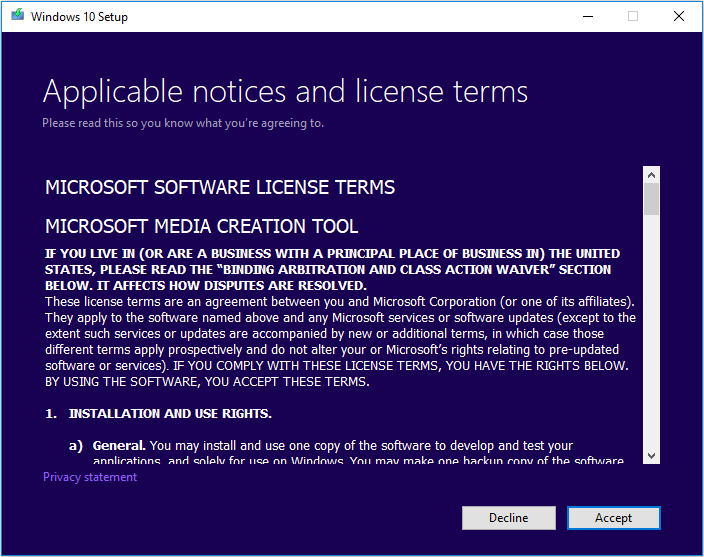
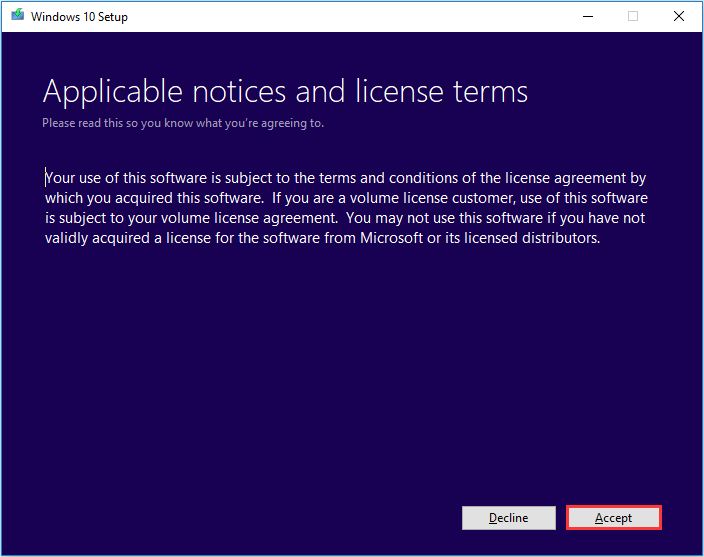
You can also use the Media Creation Tool to create a Windows 10 setup ISO file. When the Windows 10 Media Creation Tool loads its user interface, it asks you to accept its license terms. Read the terms, and click or tap Accept to continue.

Accept the license terms for the Windows 10 Media Creation Tool
You are asked to choose what you want to do. Select «Create installation media (USB flash drive, DVD, or ISO file) for another PC,» and click or tap Next.

Choose to create installation media (USB flash drive, DVD, or ISO file)
By default, the Media Creation Tool chooses for you a recommended language, architecture, and edition of Windows 10. If you want to personalize these settings, uncheck the box for «Use recommended settings for this PC,» and make your selections. When you are done, press Next.

Select the language, architecture, and edition
You are asked to choose which media to use. Select «ISO file» and click or tap Next.

Select ISO file and press Next
The Windows 10 Media Creation Tool asks you to select where you want to save the ISO file and the name you want to give it. Browse your computer or device, choose the location that you want, choose a file name (by default it is named Windows.iso), and then click or tap the Save button.

Choose where to save the Windows 10 ISO file on your PC
Media Creation Tool starts to download the latest Windows 10 installation files to your computer or device. Depending on your internet connection speed and the load on Microsoft’s servers, this might take a while, so give it a couple of minutes.

Downloading the Windows 10 setup files
Once the download is over, it is verified for integrity to make sure that everything is OK. Then, the ISO file is created in the folder you selected, with the file name you chose.

The Windows 10 setup ISO file is created
When the Windows 10 ISO file is created, you are shown where it was saved. Click or tap Finish.

The ISO file was created
You can burn the ISO file with the Windows 10 setup to a DVD or mount the ISO file in a virtual machine.
Как пользоваться
Кликните два раза мышкой по инсталляционному «exe» файлу, согласитесь с лицензией. Программа предложит обновить ОС или создать установочный носитель. Выбираем второй вариант.
Укажите версию ОС для записи. Приложение предлагает установить образ Windows 10 Pro. Выберите разрядность.
У меня программа правильно установила архитектуру — x64 разрядная. При выборе варианта «ISO-файл», образ ОС запишется на HDD. Далее самостоятельно запишите его на диск. Как это сделать подробно рассматривалось в статье «Создайте образ программой UltraISO». Мы выберем вариант «Устройство флэш-памяти».

Запустится установка и последующая запись ее на флешку. Это занимает продолжительное время.
После завершения установки нажимаем кнопку «Готово». Создастся накопитель с оригинальной Windows 10. Используйте его для установки на ПК, или восстановления работоспособности системы.
О создании загрузочной флешки посмотрите в статье «Утилита WINToBootic — как пользоваться».
Windows 10 Installation Media Tool
To download the Windows 10 Installation Media Tool, visit Microsoft.com and scroll down till you see two purple Download Tool Now buttons.
The Windows Media Creation Tool will allow you to download the Windows 10 ISO directly from Microsoft, without having a product key. You can use it to clean install or Upgrade to Windows 10. It can be used to download the following editions of Windows 10 – Windows 10 Home, Windows 10 Home N, Windows 10 Home Single Language, Windows 10 Pro and Windows Pro N.
The tool includes file formats optimized for download speed, built-in media creation options for USB & DVDs, and allows for optional conversion to ISO file format. There are two versions of the tool available – a 32-bit version and a 64-bit version. Download the appropriate version of the tool and run it.
When you run the tool, it creates two directories on your system partition – $WINDOWS.~BT and $Windows.~WS. These folders contain the downloaded setup and installation files, and an option to resume the creation process if it fails.
When you click on it to run the tool, you will see the following screen asking you if you want to Upgrade this PC now or Create installation media for another PC.
If you click on Create installation media for another PC, you will see a screen asking you to choose the media to use. You may use a USB Flash Drive which is at least 3 GB, or you can create an ISO file, which you can burn to a DVD later if you wish. I chose to create an ISO file.
In any case, once you click on Next, the downloading of Windows 10 will start.
The tool will then soon automatically start creating Windows 10 media.
Once the ISO file is ready, you will see two options. One is to open the location where the ISO file has been saved and the other to Open a DVD Burner software to burn the ISO to disc.
I chose to open the ISO folder and run the setup file inside it to perform an in-place upgrade of my Windows 8.1 to Windows 10.
The upgrade process went smoothly, except for one thing…
Something happened when installing Windows 10
I received a Something Happened error screen. I closed the screen and restarted the setup. It worked, and I was able to smoothly upgrade Windows 8.1 to Windows 10.
If on the other hand, you select Upgrade This PC in the first screen, as mentioned above, and click on Next, you will see the following screen.
Select your Language, architecture, and edition and click Next. The upgrade process will begin directly.
TIP: See this post if you receive any Windows 10 Media Creation Tool Errors.
Related reads:
- How to create a Windows 10 bootable USB on Linux
- How to create a Windows 10 Bootable USB on Mac.
Our next post takes you through a screenshot tutorial which shows how you can clean install or Upgrade to Windows 10, using Windows 10 ISO file you created here.
This post will show you how to install any version of Windows from one USB flash drive. You can also download Windows 10 Enterprise ISO with Media Creation Tool.
How to Upgrade or Get Windows 10 without Installation
After reading the above, some users may find, even Windows Media Creation Tool is easy to use, it will still take you much time to upgrade or install Windows 10. Is there any much simpler way on Windows installation?
Actually, there is a method that can make Windows 10 installation as a breeze — migrate Windows 10 from another healthy PC to your PC with a Windows migration tool. If your friends or family are using the latest Windows 10, you can just use the Windows migration tool to migrate their Windows OS to your PC without reinstallation.
In this way, you do not need to create an installation media with Windows 10 Media Creation Tool and then use it to install Windows 10 as the whole process is time-consuming.
Well then, how to migrate Windows 10 with a reliable Windows migration tool? Here it is recommended to use MiniTool Partition Wizard Pro Ultimate Edition to migrate Windows 10.
MiniTool Partition Wizard is a reliable Windows migration tool as well as a professional partition manager trusted by tens of millions of people. It helps users to repartition hard drive, extend partition, convert FAT to NTFS, check files system, convert MBR to GPT without data loss, wipe disk, copy partition and migrate OS to SSD/HD, etc.
With MiniTool Partition Wizard, you can use Windows 10 operating system without installation.
Step 1. Shut down your computer and take out your system disk. Connect the HDD/SSD to another PC of your family or friends who are using the latest Windows 10 via a SATA-to-USB cable.
Note: If there are important files and data on your system disk, please make a backup as the process will delete all the files on your disk. If it is a brand new disk, then you can go ahead directly.
Step 2. Get the system cloning software to computer by clicking the following button. And run it to get the main interface.
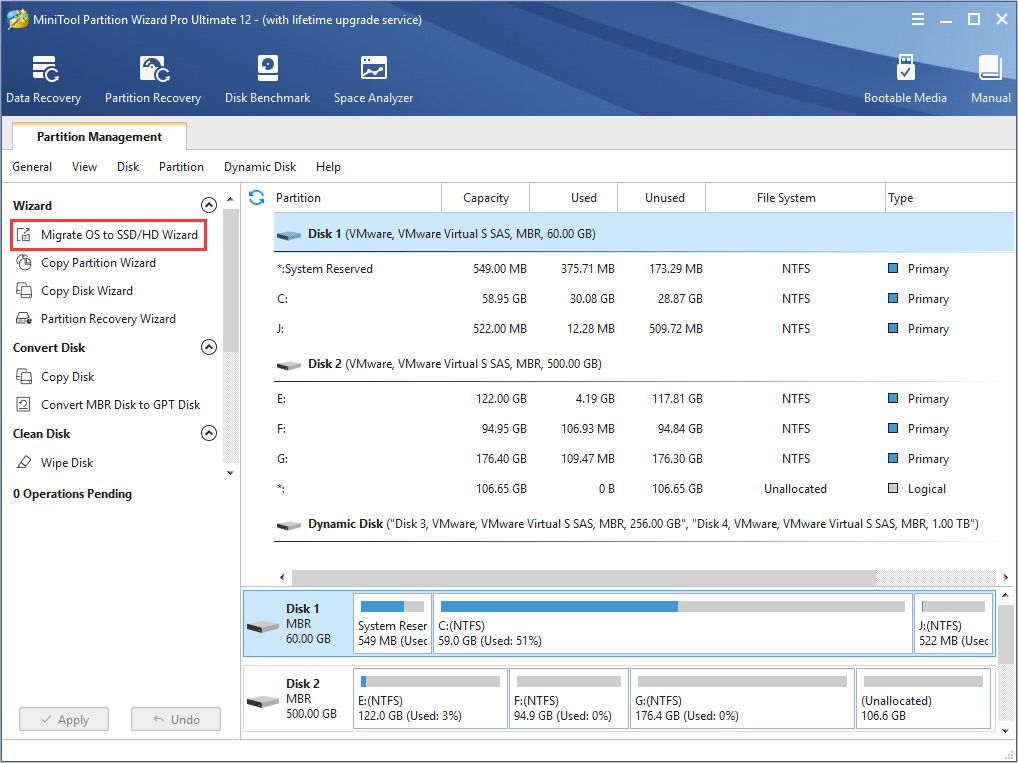
Step 3. Select the function Migrate OS to SSD/HD Wizard on the top toolbar.
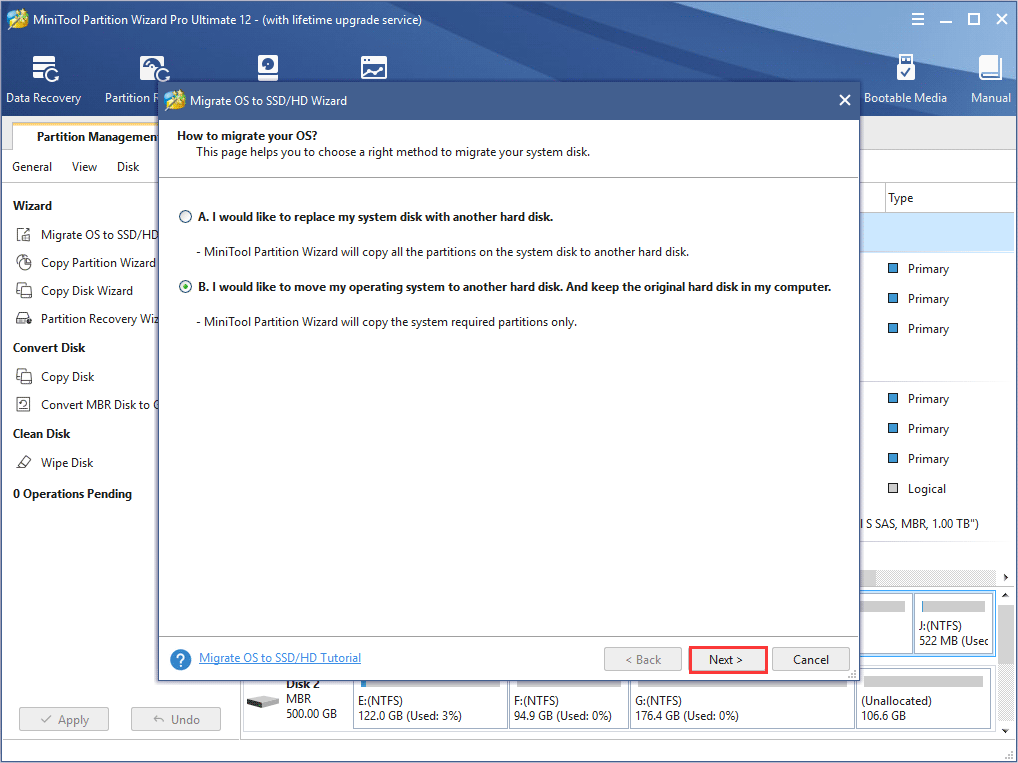
Step 4. Choose option B to move operating system to another hard disk, as the following picture shows.
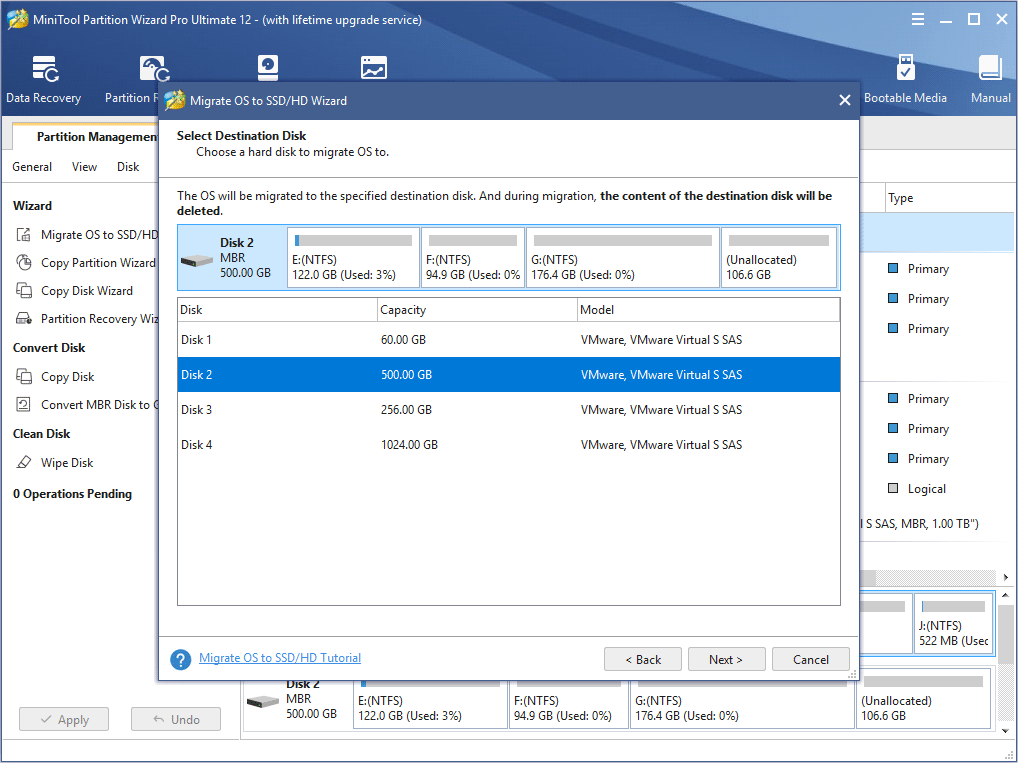
Step 5. Then, choose your HDD/SSD to migrate OS to and click Next.
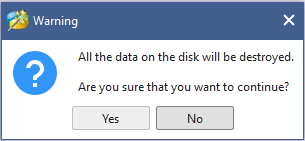
Step 6. All data saved on your HDD/SSD will be destroyed, so please make sure there is no important file and data on the SSD or backup significant ones in advance. Then click Yes on the pop-up Window.
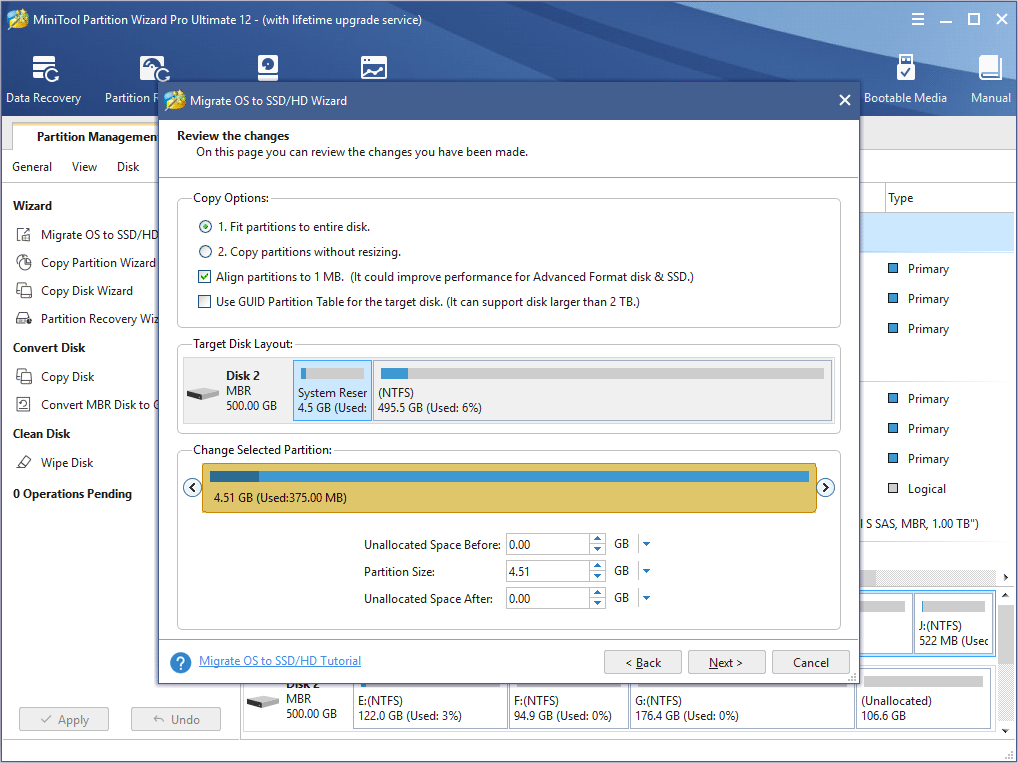
Step 7. Choose a copy method and click Next. If you choose the first one, system partition and boot partition will be enlarged to take up all space of the SSD. If you choose the second one, partitions will be cloned with the same partition size, but you can adjust partition size and location according to actual demands by dragging the handle.
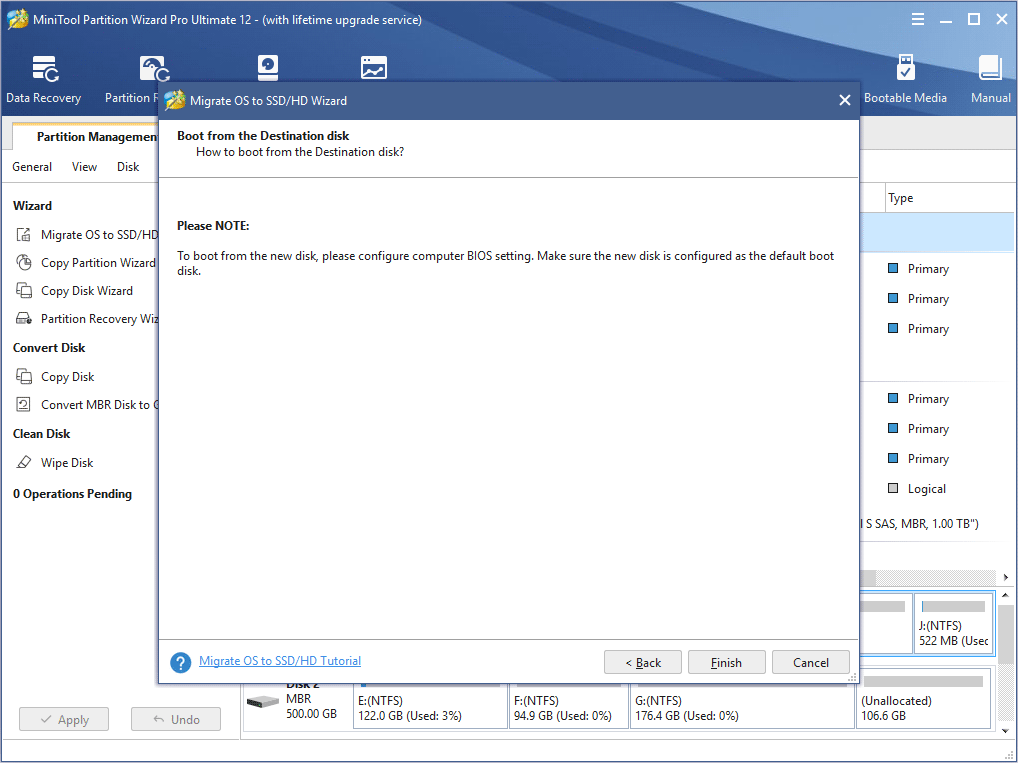
Step 8. This page will remind you to reset BIOS order, giving the new SSD boot priority, so your computer can boot from the new system disk successfully. Then click Finish.
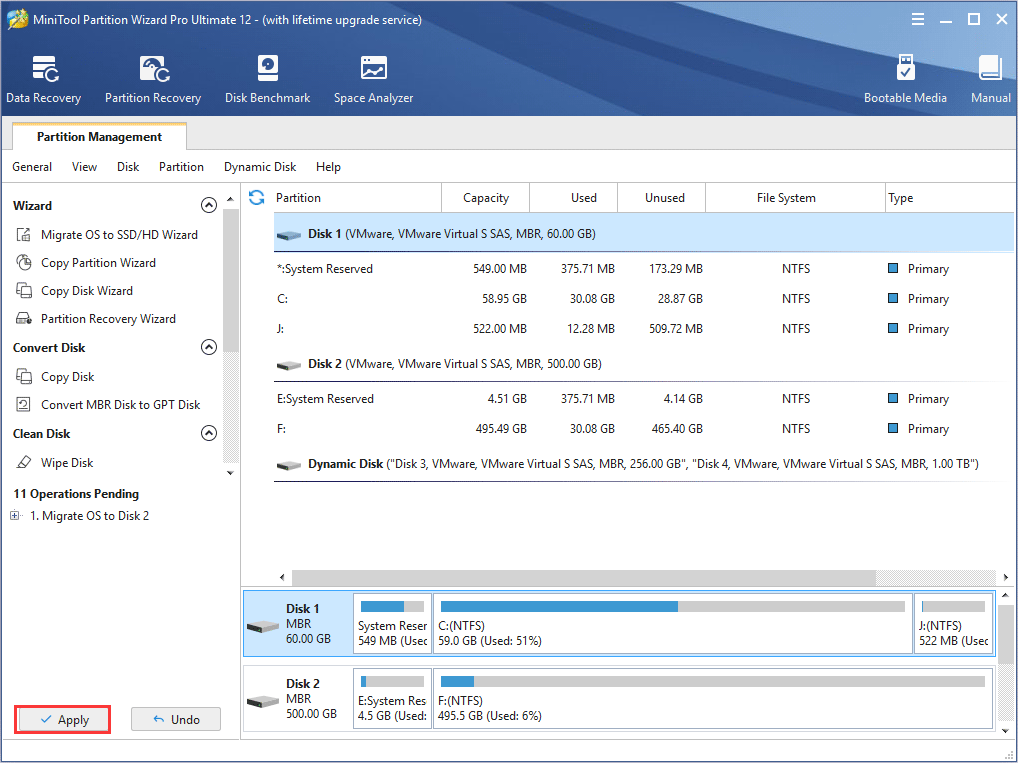
Step 9. At last, please click Apply button on the top to apply all these pending operations.
Since the Windows OS is still running, MiniTool Partition Wizard will ask you to restart the computer for data protection.
You see, it is very convenient to migrate OS to another disk with this Windows migration tool. If you find Windows reinstallation is troublesome and time-consuming, you can try using MiniTool Partition Wizard, which can be a big help.
Что вы должны знать, прежде чем идти вперед
Прежде чем приступить к созданию собственного ISO-файла, карты памяти USB или DVD-диска с установкой Windows 10, необходимо сначала проверить следующие требования и рекомендации:
У вас должно быть работающее интернет-соединение, чтобы вы могли скачать установочные файлы.
На жестком диске или твердотельном диске должно быть достаточно свободного места для загруженных установочных файлов
Безопасной ставкой было бы иметь как минимум 12 ГБ свободного места.
Если вы собираетесь создать карту памяти USB, обратите внимание, что любые данные, хранящиеся на ней, удаляются, поскольку Media Creation Tool форматирует ее перед созданием загрузочной карты памяти с установкой Windows 10.
Если вы хотите создать носитель с установкой Windows 10, вам нужно использовать DVD или карту памяти USB объемом не менее 8 ГБ.
Если вы собираетесь обновить свой текущий компьютер или устройство, убедитесь, что оно соответствует системным требованиям. Вы можете проверить их здесь: Спецификации Windows 10.
Скачиваем оригинальный образ Виндовс 10 через Rufus
 Большинство пользователей используют Rufus для создания загрузочных флешек, но то, что она позволяет скачивать с официального сайта ISO-образы Win 10 и 8.1 знают немногие. Инструкция по загрузке ⇒
- Скачиваем программу Rufus. Подойдет любая версия (портативная, не требующая установки или обычная). Обязательно соглашаемся на автоматическое обновление. Это поможет избежать проблем при запуске загрузки дистрибутива OS. Запускаем ее.
- Справой стороны основного окна программы находим вкладку “Выбрать”, раскрываем ее и жмем ссылку “Скачать”. Бывает что сразу ссылка не срабатывает. В этом случае перезапустите руфус. Если не заработало, то возможно ваш антивирус или файрволл блокируют доступ в интернет программе. Надо дать разрешение. Без этого загрузка будет не возможна. Из-за того, что скрипт загрузки операционки часто не срабатывает, этот способ меня не устраивает.
- Выберете требуемую Виндовс – 10 или 8.1.
- Далее устанавливаете релиз, издание, язык и архитектуру.
- Скачиваем образ ISO. Это можно сделать как при помощи программы, так и с помощью браузера, установив флажок. Если качаете руфусом, то нет возможности нажать на паузу, а браузер это может. Вот и все отличия.
В общем программа хороша. Она позволяет сразу скачать нужную версию операционной системы и сделать установочный накопитель. Дополнительный плюс – можно загружать более старые копии образов Виндовс, которые нужны для восстановления того же релиза на настольных ПК и ноутбуках.
What is Media Creation Tool?
Windows 10 Media Creation tool has two functions:
- Upgrade the PC which has already installed Windows 10
- Create installation media (USB flash drive, DVD) for another PC or simply download the latest Windows 10 ISO file.
Windows Update Assistant is another tool which can be used to upgrade the PC seamlessly but I prefer the media creation tool. If you want to upgrade your PC to the latest version of Windows 10, you should select the first option. And if you want to create a bootable USB/DVD, then you should select the second option.
The only problem with the Media Creation Tool is that it will try to download the Windows 10 setup every time you want to create a bootable USB/DVD. This is the default behavior.
Use Windows Media Creation Tool to Upgrade Your PC
Windows Media Creation Tool is also a Windows upgrade tool as it can upgrade your PC to the latest Windows 10 version. According to many Windows 10 users, using Windows Update to upgrade Windows 10 may encounter some errors like the common Windows 10 update error 0x8007007e, leading to upgrade failure.
In this case, it is highly recommended to utilize Windows 10 Media Creation Tool to upgrade Windows 10. With this Windows upgrade tool, you can quickly upgrade your computer to the latest version of Windows 10. Here are detailed steps and screenshots.
Note: If you intend to upgrade your current computer to Windows 10, make sure it meets the Windows 10 system requirements.
Step 1. Download Windows 10 Media Creation Tool from Microsoft’s official website.
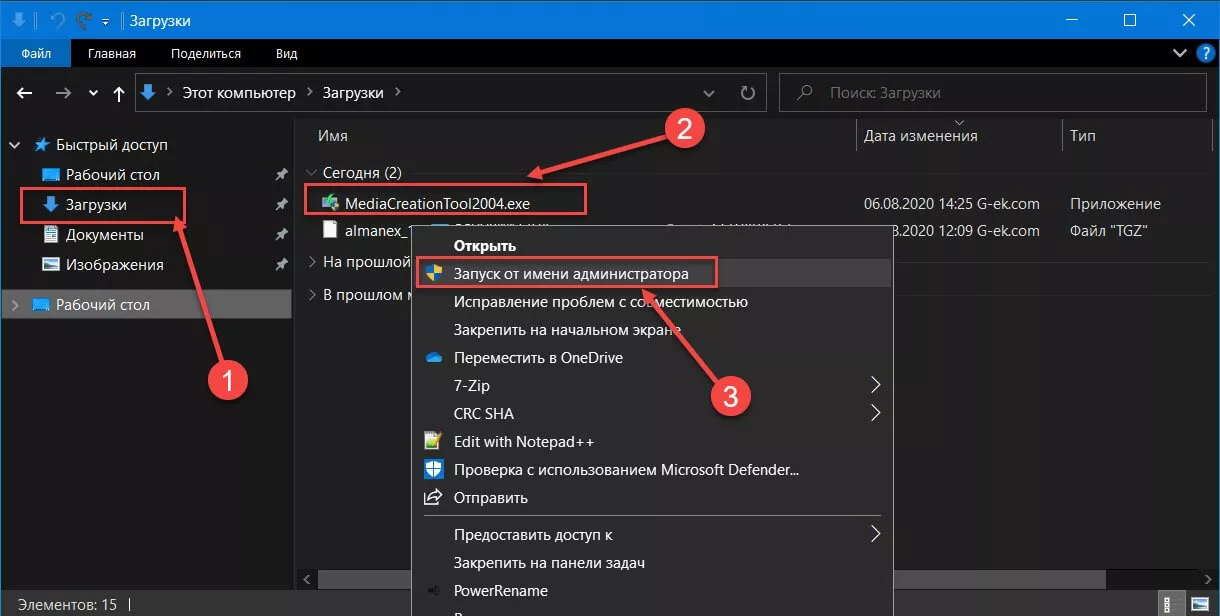
Step 2. Run the Media Creation Tool. To run this tool, you need to be an administrator.
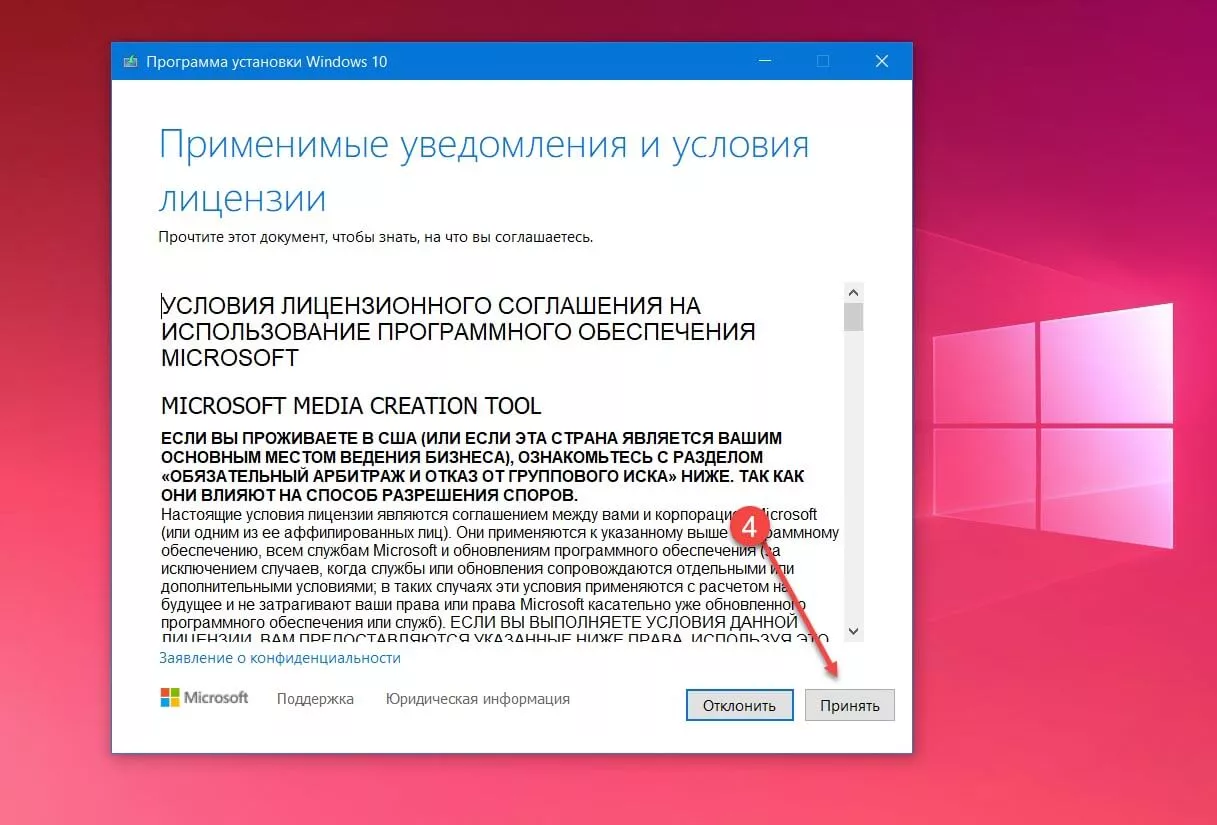
Step 3. On this page, select Accept.
Step 4. Wait patiently for Media Creation Tool to get a few things ready. When it’s done, you can continue.
Step 5. On the What do you want to do page, select Upgrade this PC now, and then click Next.
Step 6. At this time, Media Creation Tool will download some files for updates and then check your PC. This process may take some time. Just wait patiently and it won’t be too long.
Step 7. Read the license terms and click Accept.
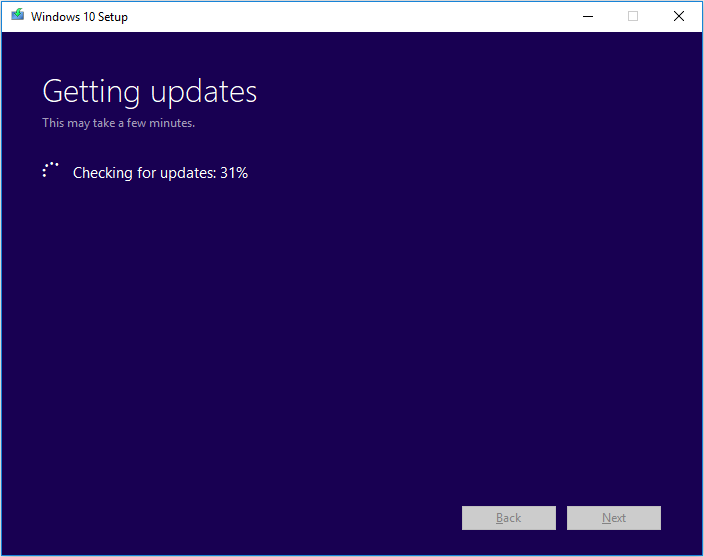
Step 8. Wait for Media Creation Tool to check for updates.
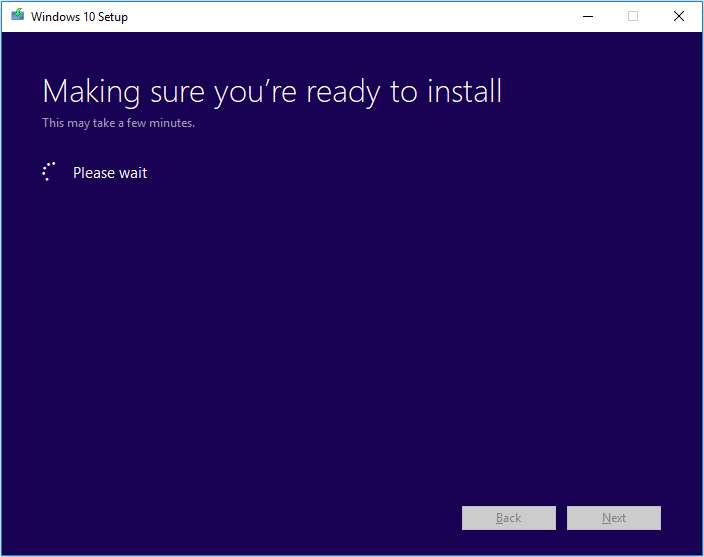
Step 9. Windows 10 Media Creation Tool will check for your PC again and make sure you are ready to install.
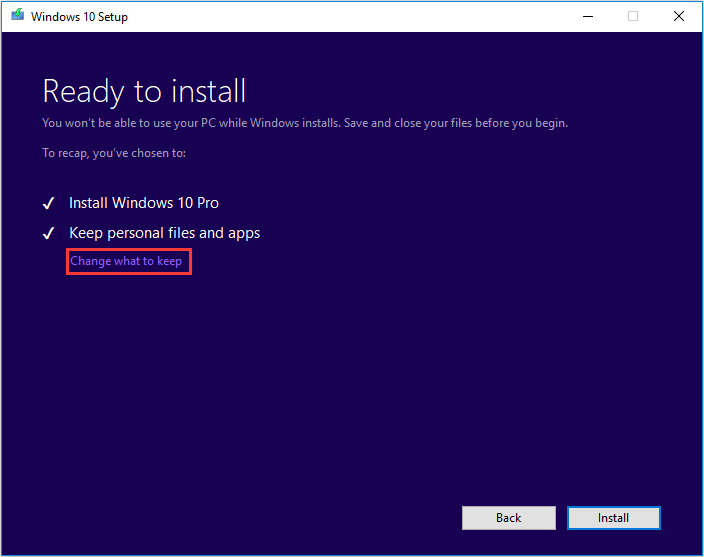
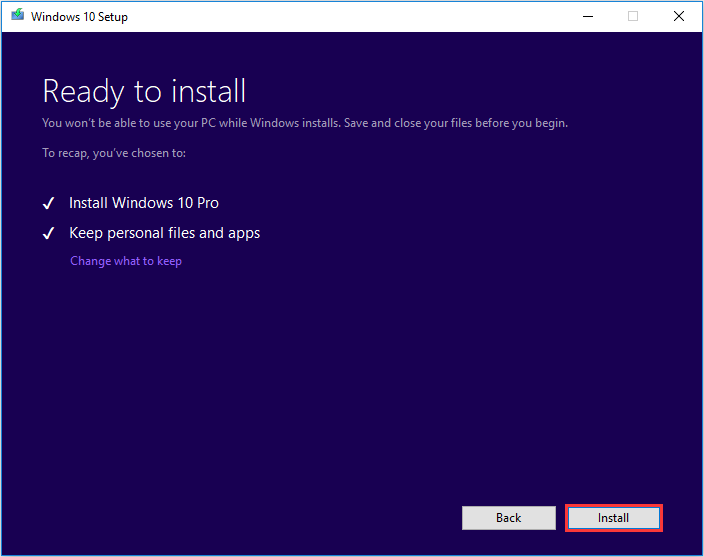
Step 10. When you get this page, you’ll see a recap of what you’ve chosen, and what will be kept through the upgrade. Choose Change what to keep, you can select what to keep by yourself.
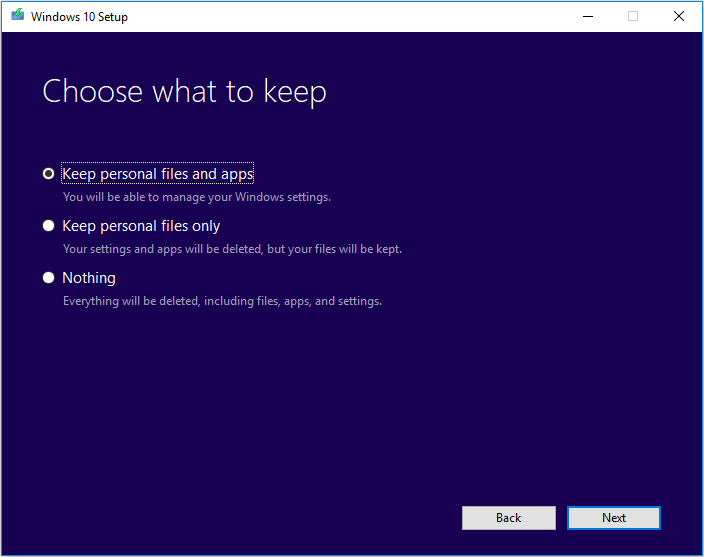
Step 11. Choose whether you would like to Keep personal files and apps, Keep personal files only, or keep Nothing during the upgrade. After selection, then click Next to continue.
Step 12. Close any running applications and when you’re ready, select Install. During the installation, your PC will restart for a few times. Please don’t turn off your PC.
Результат
Результат может быть либо положительный (новая версия успешно установлена), либо отрицательный. Сами результаты могут не устраивать пользователя, например, система обновилась, но что-то не работает или тормозит.
Разберем частые ситуации:
Не удалось завершить обновление windows 10 — отрицательный результат. Для того, чтобы понять, что помешало полноценной установке — нужно смотреть логи и выявлять причину ошибки, но исходя из практики, таких причин не так много:
- Антивирус — нередко он мешает копированию некоторых системных файлов, что приводит к ошибкам. Рекомендуется выключать или даже удалять перед установкой апдейта;
- Драйвера — установите драйвера для неизвестных устройств и обновите для известных. Часто в логах можно найти ошибки инициализации некоторых драйверов, что и вызывает ошибки;
- Системные ошибки — периодическое сканирование системы через SFC и DISM не повредит.
- Была такая ситуация — windows 10 не обновляется до 1809, устройство есть в списке поддерживаемых (ноутбук Acer, новая модель). Не работал тачпад и камера — все драйвера установлены, выполнена переустановка Windows (раза 2 или 3). В итоге помогло обновление BIOS.
- Не работает обновление windows 10 — убедитесь, что ваше устройство или оборудование совместимо с новой версией ОС. Иногда ошибки возникает на неподдерживаемых и действительно старых устройствах;
- Попробуйте выполнить Inplace Upgrade. Если не получится, вы всегда можете переустановить систему с новой версией, если это столь необходимо — если же нет, то скрыть апдейт до лучших времён.
В этой статье мы рассказали, почему не обновляется windows 10 до 1903 и как решить эту проблему. Надеемся, что эта информация была полезна и помогла решить ваш вопрос.
Media Creation Tool Создание загрузочного флеш-накопителя с Windows 10/
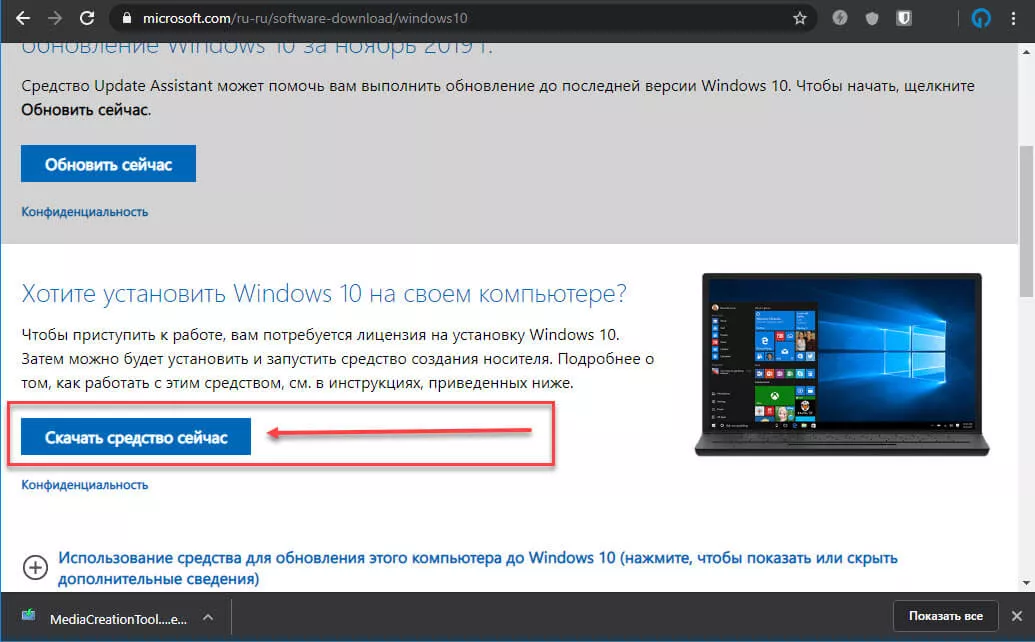
- Посетите страницу Microsoft для загрузки инструмента «Media Creation Tool». На странице нажмите «Скачать средство сейчас».
- Сохраните приложение в любой удобной вам папке, по умолчанию будет использована папка «Загрузки».
- Запустите приложение «Media Creation Tool».
- Примите условия лицензионного соглашения, кнопка «Принять».
- Выберите «Создать установочный носитель (USB-устройство флеш памяти, DVD диск или ISO файл)» и нажмите «Далее».
- Выберите правильные настройки для вашей версии Windows 10
- Язык (страна)
- Windows 10
- 32 или 64-разрядная
- Нажмите «Далее».
- Выберите «USB устройство флеш памяти» и нажмите «Далее».
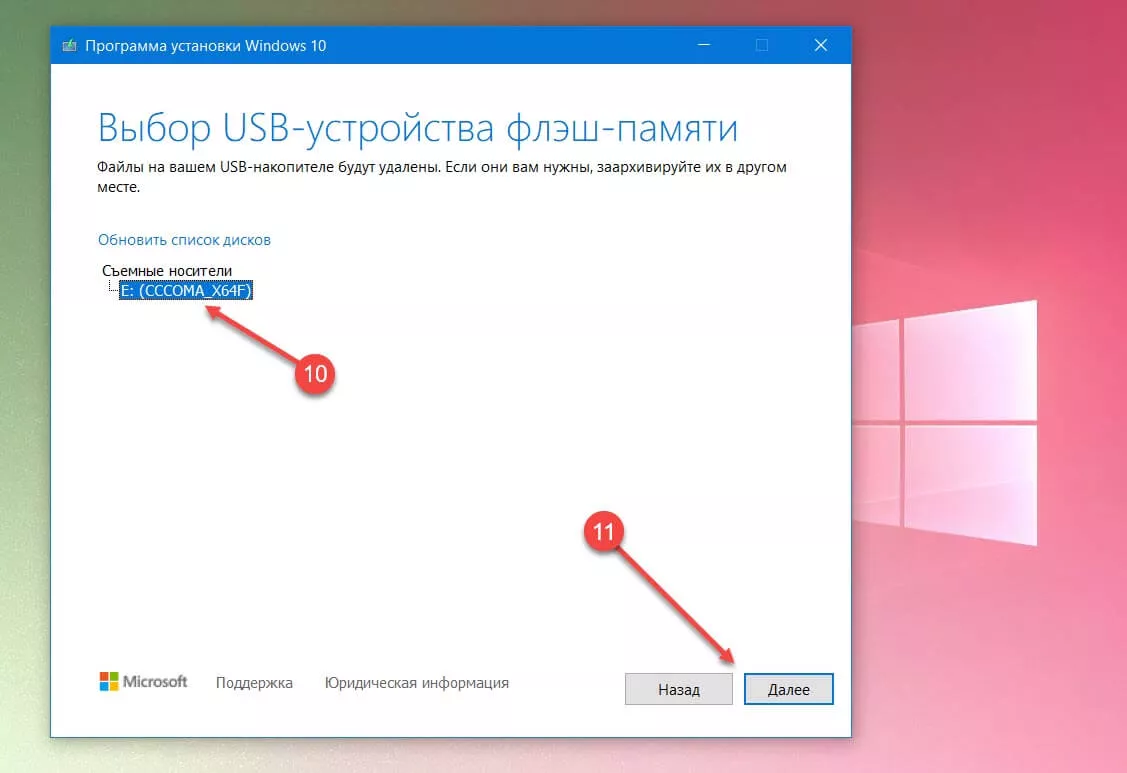
- Выберите свою флешку и снова нажмите кнопку «Далее».
- Дождитесь завершения процесса (Вы можете продолжать пользоваться компьютером).
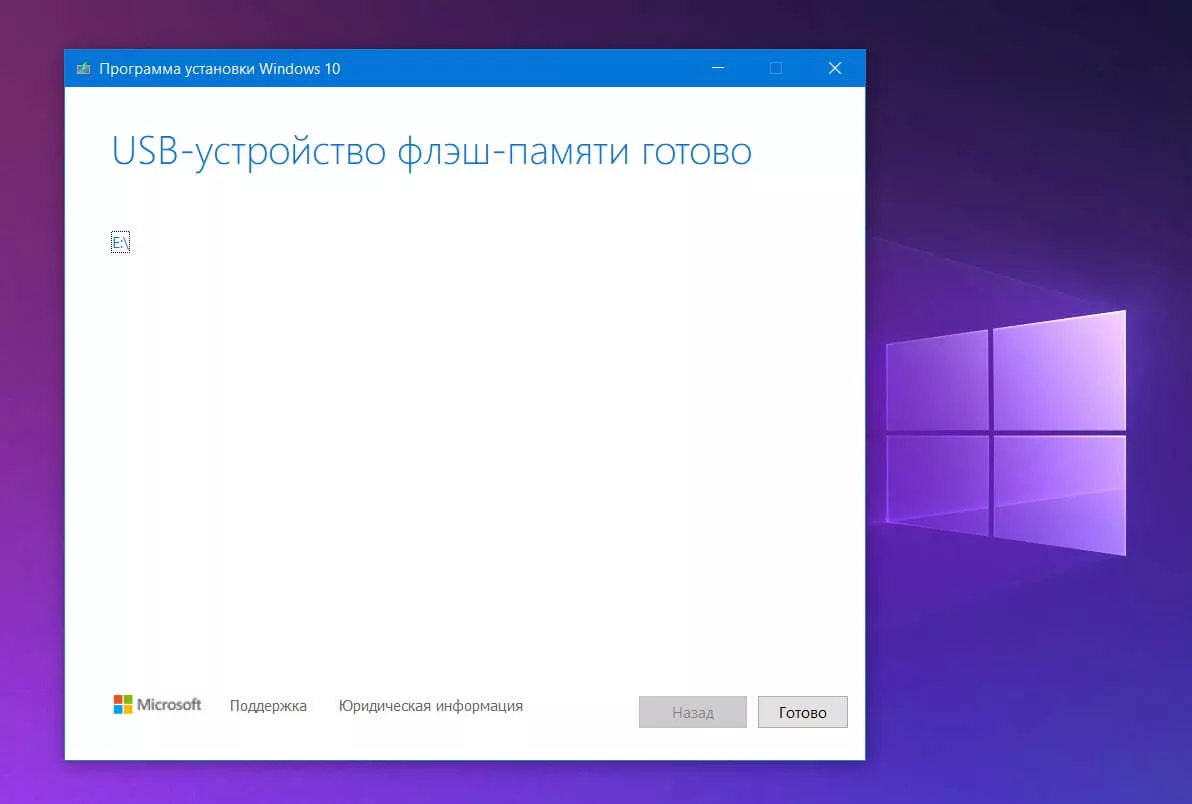
- По окончании загрузки и записи нажмите кнопку «Готово» и извлеките загрузочную флешку с Windows.
Windows 10 Media Creation Tool FAQ
How do I get Windows 10 media creation tool?
You can get Windows 10 media creation tool by visiting the Microsoft Media Creation Tool website. Then click the Download tool now button from the webpage. Then install and run the application on your PC. After that, you can choose to create installation media for another PC or upgrade Windows 10 with Windows 10 media creation tool.
How do I upgrade to Windows 10 using media creation tool?
First, visit the Microsoft support website. Click the Download tool now button on the page. Run the Media Creation Tool and click the Accept button to agree to the terms. On What do you want to do page, select Upgrade this PC now and click Next. Then follow the prompt to complete upgrade to Windows 10.
How do I create a bootable USB using Windows 10 media creation tool?
Prepare a blank USB flash drive with at least 8 GB and connect it to your PC. Download the free Windows 10 media creation tool from the Microsoft’s official website and run the tool. On the What do you want to do page, select Create installation media for another PC. Then select language, Windows Edition, and Architecture for the installation media. On Choose which media to use page, select USB flash drive and follow the prompts to create the bootable USB drive.
What is Windows 10 media creation tool?
Windows 10 Media Creation Tool is a free utility developed by Microsoft, which lets you create a Windows 10 installation USB drive or download its .ISO file that you can burn on to a DVD to install the operating system on a different computer. With Windows 10 creation tool, you can upgrade Windows to its latest version or create a Windows 10 installation USB drive/DVD disc to install Windows 10 or repair a Windows PC.
What You Will Require?
Before we continue with the guide to using Windows 11 Media Creation Tool, let’s discuss a few things that you will need throughout the process. There are certain things that you require to continue with the process of upgrading Windows with the media creation tool.
- Ensure you have a computer to install Windows.
- Take a backup of your data before you continue with the process. In case of data loss, you can easily restore the data if you have a backup of it.
- Ensure you have a stable internet connection. You will need a good speed internet connection to download Windows and then upgrade your Windows or create a bootable USB drive.
- Ensure you have a USB drive with at least 8GB of storage. You will need this if you are not upgrading your Windows but creating a bootable USB drive from the Media Creation tool.
What is Windows 11 Media Creation Tool?
Just in case if you have no idea about the handy media creation tool for Windows 11, we have included a brief explainer as well.
So basically, Windows 11 media creation tool is an official utility from Microsoft to install/ update Windows OS to the latest available build. It is not limited to Windows 11 users, but Windows 10, 8.1 and 7 users can utilize the tool as well if they have a license.
For example, if a new Windows update is rolled out by Microsoft for only some users, you cannot update it via Windows settings first. it may take time to get updated for all users across the globe. So, in such contexts, if you really want to install the latest update due to some reasons, this media creation utility comes to the rescue. It allows you to upgrade your system to the latest build if you have an ISO file of the latest build.
And the best part?
The tool won’t touch any of your files and seamlessly upgrade your PC or laptop to the latest version.
Furthermore, it can help you create Windows 11 installation media without having you to download an ISO file separately. Based on your system architecture and the edition of Windows, this tool will make your Windows 11 media creation much easier by extracting the required files from the current installation and putting it together to create an ISO for you! You can also use a new ISO file if you want.
How To Use Windows 11 Media Creation Tool
Once you have all the things you require, you can get ahead with upgrading your Windows through the Media Creation Tool. This part of the article will be discussing how you can use Windows 11 media creation tool to upgrade to Windows 11.
First, click on the link that leads you to the official Microsoft website. Choose “Windows 11“.

Now, There you will get all the information related to Windows 11. Click on “Download Now”
After you have downloaded the media creation tool for Windows 11, run it on your PC. You will be asked to accept the license terms. Once you do that, you will see a screen stating ‘Getting a few things ready.’
Next, you will see two options on the screen – ‘Upgrade this PC now,’ and ‘Create Installation Media (USB flash drive, DVD, or ISO file) for another PC.’

-
- Upgrade this PC- Choose this Option if you want to upgrade the PC on which you are running the Media Creation Tool.
- Create Installation Media for another PC- Select this option, if you want to create a bootable USB drive for another PC.
ALSO READ: How To Make Windows 11 USB Bootable
Выводы статьи
В бесплатной программе Media Creation Tool можно выполнить обновление Windows 10 до новой версии системы. Программа выполнит все необходимые операции, в итоге, на компьютере будет установлена самая последняя версия Windows 10. При настройках по умолчанию, в обновленной версии системы будут сохранены все данные пользователя и установленные программы.
Обновление Windows 10 в Media Creation Tool (видео)
Похожие публикации:
- Сравнение версий Windows 10: таблица
- Как отключить или удалить OneDrive в Windows 10
- Диск восстановления Windows 10
- Как установить русский язык в Windows 10 — 2 способа
- Индекс производительности Windows 10 — 5 способов