Лучший конвертер изображений в excel с помощью технологии ocr
Содержание:
- Конвертация в программе Excel
- 6.Convert Image to Excel on iPhone
- Best JPG to Excel OCR Converter for Windows PC
- Convert Excel to JPG by using Print Screen feature
- 8. Convert Image to Excel on Android Device
- Export Excel to JPG with Camera tool
- office Convert Document To Image Free
- Копируем диаграмму в графический редактор и сохраняем как картинку
- 5. Convert Image to Excel on Mac with Nice Formatting Using Cisdem PDF Converter OCR Mac
- Conclusion
- 4. Convert Image to Excel on Mac using Adobe Acrobat Reader Pro/ Reader DC
- 2. Convert Image to Excel Online
- 3. Convert Image to excel on Windows using Adobe Acrobat DC
- Convert .xls to .jpg (.xlsx to .jpg) with Snipping Tool
- Сохраняем диаграмму как картинку при помощи макроса VBA
- LibreOffice Calc
- 1. Extract Data from Image to Excel with Microsoft Office
- Best JPG to Excel OCR Converter for Mac
Конвертация в программе Excel
Если раньше для того, чтобы конвертировать Excel в PDF, нужно было повозиться, используя для этого сторонние программы, сервисы и дополнения, то с версии 2010 года процесс конвертации можно выполнить прямо в программе Microsoft Excel.
Прежде всего, выделяем область ячеек на листе, которую собираемся конвертировать. Затем, переходим во вкладку «Файл».
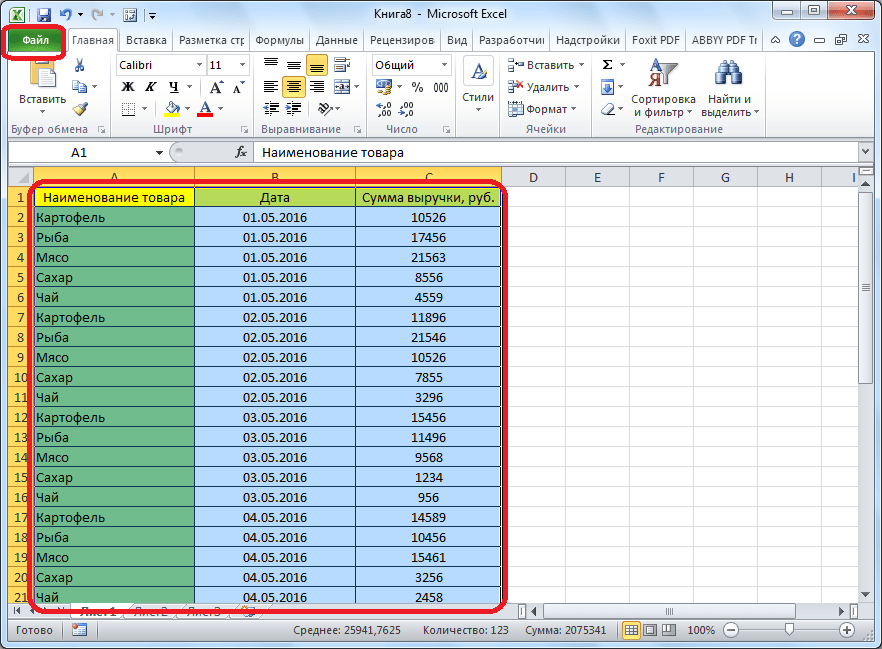
Кликаем по пункту «Сохранить как».
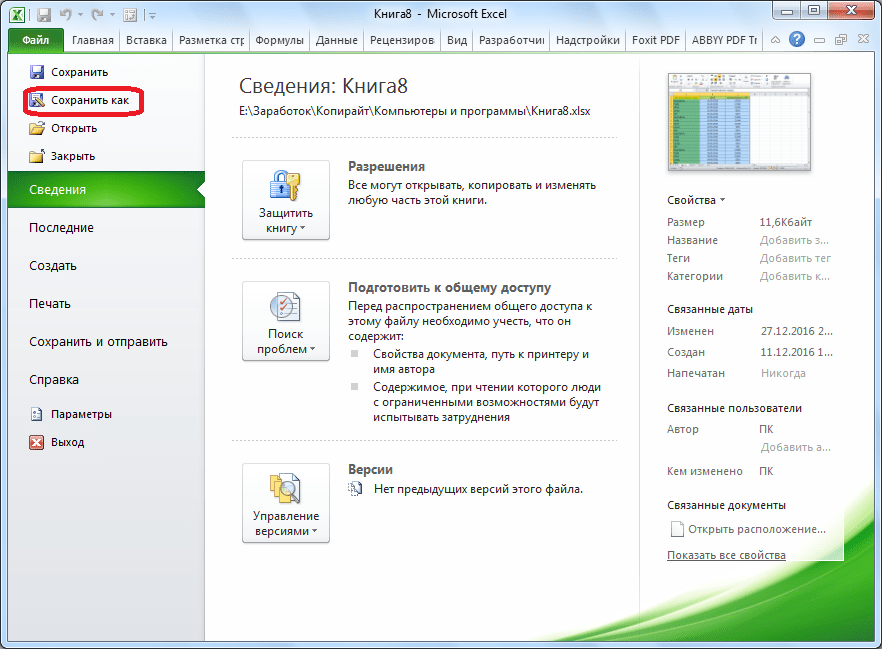
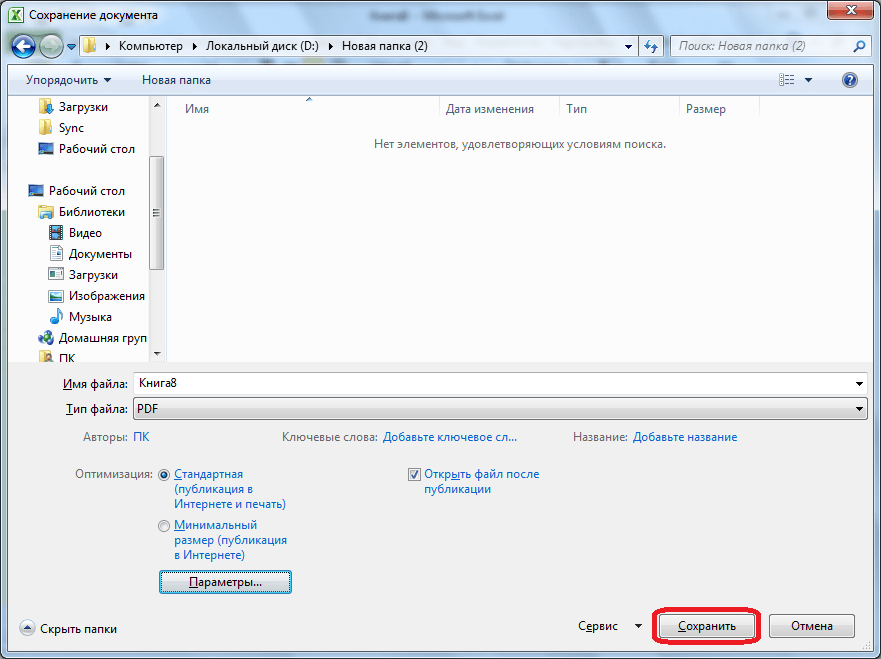
Открывается окно сохранения файла. В нём следует указать папку на жестком диске или съемном носителе, куда файл будет сохранен. При желании, можно переименовать файл. Затем, раскрываем параметр «Тип файла», и из огромного списка форматов выбираем PDF.

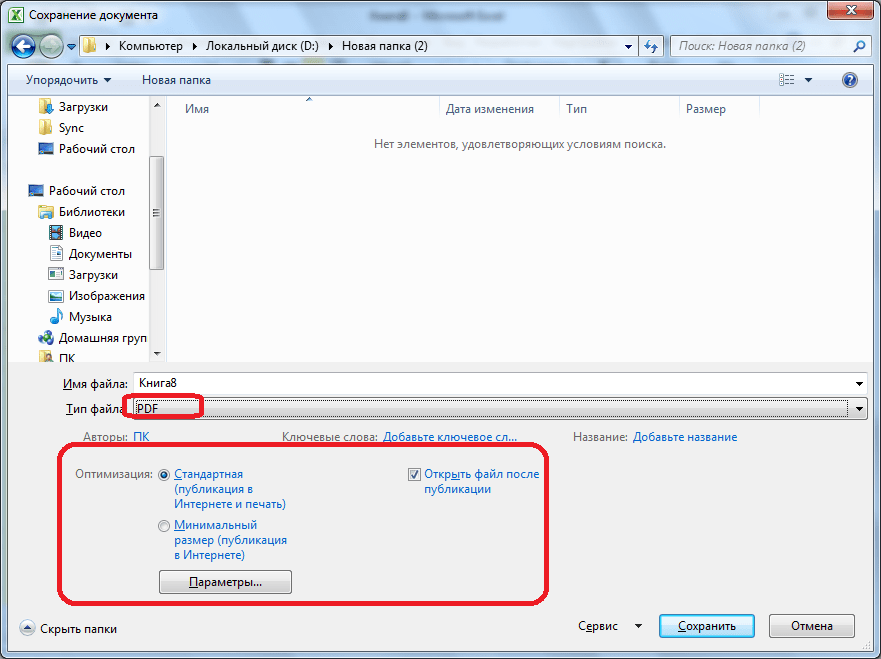
После этого, открываются дополнительные параметры оптимизации. Путем установки переключателя в нужную позицию, можно выбрать один из двух вариантов: «Стандартный размер» или «Минимальный». Кроме того, установив галочку напротив надписи «Открыть файл после публикации», вы сделаете так, что сразу после процесса конвертации, файл запустится автоматически.
Для установки некоторых других настроек, нужно нажать на кнопку «Параметры».
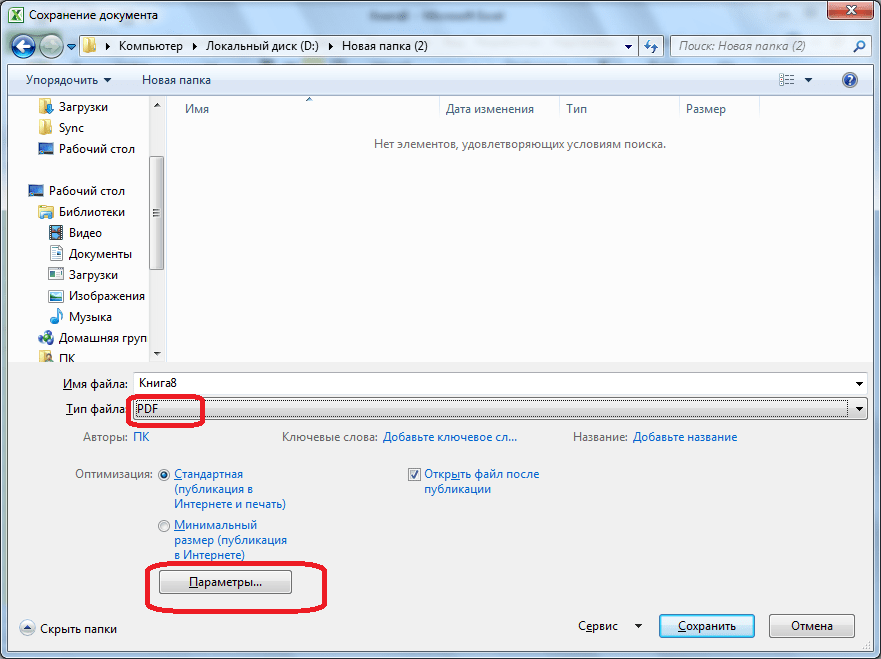
После этого, открывается окно параметров. В нём можно установить конкретно, какую часть файла вы собираетесь конвертировать, подключить свойства документов и тэги. Но, в большинстве случаев, изменять данные настройки не нужно.
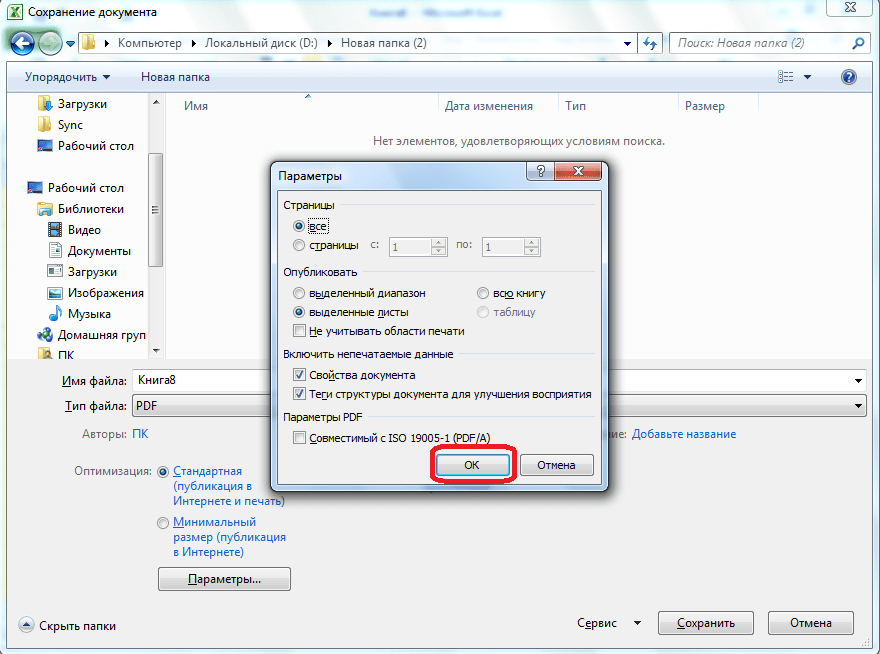
Когда все настройки сохранения выполнены, жмем на кнопку «Сохранить».
Происходит конвертация файла в формат PDF. На профессиональном языке процесс конвертации в этот формат называется публикацией.
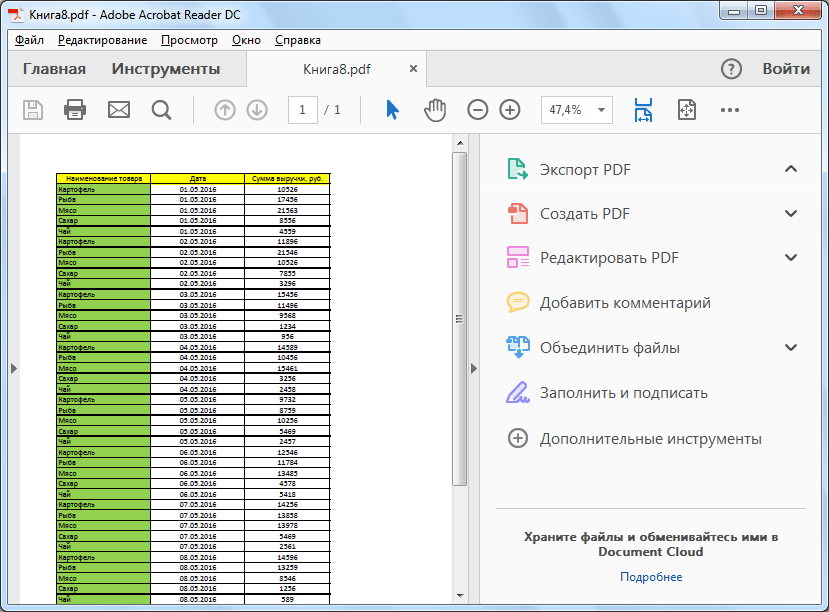
По завершению конвертации, вы можете делать с готовым файлом все то же самое, что и с любым другим документом PDF. Если в настройках сохранения вы указали необходимость открыть файл после публикации, то он запустится в автоматическом режиме в программе для просмотра файлов PDF, которая установлена по умолчанию.
6.Convert Image to Excel on iPhone

You’ll just need an Image to Excel converter app and you’ll be able to easily make the most of your photos.
6.1. Why use Image to Excel Converter?
First of all, it will save you precious time. There won’t be a need for tedious rewriting of whole tables, invoices, reports, lists, and other documents by hand. This way is even quicker than using a scanner because afterward, you need to convert your scans into editable documents. What else does this useful app have to offer?
– Great conversion quality and recognition of rows and columns
- Complicated tables and screenshots can be converted too
- No limitations on the file size and number of converted files
- Won’t affect your battery or resources
- Absolutely free to use
Apart from these characteristics, Image to Excel has a very clean design and instinctive interface. This makes the app pretty manageable and easy to operate. Let’s see those straightforward moves and how to convert images of tables into MS Excel documents.
6.2. How to Convert Image to Excel on iPhone
Follow these simple steps and get Excel spreadsheet of your photos:
For the start download Image to Excel Converter app and open it

Choose from where you want to convert your image. There are two options: to select an already existing photo from your iPhone or to take a new one
Click on the image which will then show up among converted documents
The last step is to open the converted document in some app that makes editing Excel files possible and start polishing your document. Piece of cake!
Best JPG to Excel OCR Converter for Windows PC
ABBYY FineReader 14 for Windows is a powerful program allowing users to edit, convert, scan even compare PDFs on Windows PC. It brings highly accurate conversion results and recognize hundreds of languages. For being so, couple with the extended features it offers, ABBYY FineReader comes with a high price tag.
Main Features:
- Edit PDFs within the program: search, review, comment, protect, fill forms;
- Convert PDF, scanned files and images into Excel, Word, and other editable formats;
- Compare PDF smartly;
- Customize settings;
- Automate conversion;
Steps to Convert JPG to Excel on Windows with ABBYY FineReader 15
- Free download ABBYY FineReader JPG to Excel software onto your Windows PC, install and launch the program;
- Click “Open”, choose “Convert to Microsoft Excel”, then upload JPG file;
- Then in the “Keep formatting” menu, choose “Editable copy”;
- Then the Excel file will be opened with your defaulted reader, save it.
Convert Excel to JPG by using Print Screen feature
It is the most popular technique to convert the currently visible on-screen part of your Excel sheet to JPG or any other image format. Here’s how:
- Zoom in or out the worksheet so that all data of interest is visible on the screen.
- Press the PrtSc key on your keyboard while holding the Alt key.
- Open a graphics editor of your choosing, Microsoft Paint works just fine for this purpose.
- Paste the copied screen by clicking the Paste button or pressing the Ctrl + V shortcut.
- Click the blue drop down arrow in the upper left corner of the Paint window, and then click Save As to save the pasted image. Or, simply press Ctrl + S (a shortcut to save a file that works in most programs).
- In the Save as window, type the desired file name, and choose one of the following image formats:
- JPEG (.jpg) — right choice for complex pictures and photos.
- GIF — great for creating low-resolution images, which is best suited for simple drawings.
- PNG — allows creating low-resolution files that load quickly but look crisp and beautiful, it’s suitable for almost anything.
- Click Save and you are done!
Here’s what my sample Excel table exported to Paint looks like: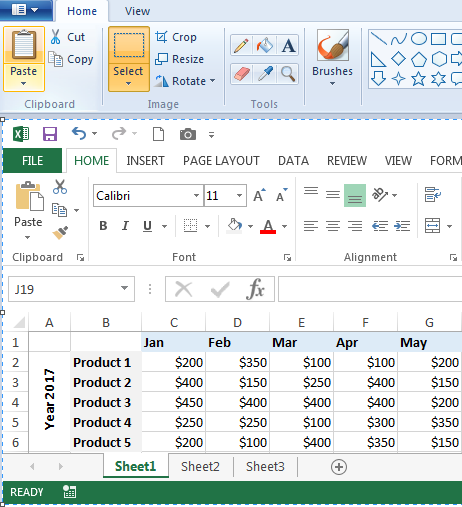
Tip. The Print Screen feature captures everything on the screen, including the ribbon, top menu, scrollbar and sheet tabs. If you want to export only the data, use the Crop function to cut off extra parts before saving an image.
8. Convert Image to Excel on Android Device
There are a lot of simple methods to convert an Image into Excel using an Android Device. From them, I will show you to convert Image to Excel using Microsoft Excel, a product from Microsoft Office.
1. Firstly, download the Microsoft Excel application from playstore on your Android device.

2. Open the application, If you are opening this application, it asks you to sign-in using a Microsoft account (optional) and allow all the permissions.
3. Click on + icon, from the top right corner. And, select Blank Workbook to open.

4. Click on the Sheets option, which is on the left bottom to open the menu bar. There you will find a grid icon with a camera icon. Click on it.

5. Then, the camera will open. Capture the Image which you want to turn into excel. or else, click on the image icon to select the image from your gallery. Choose the image that you want to convert into Excel. Then, it takes time to capture the data in the image and shows you a preview of the data.
6. Click on open and there you will find two options as Open anyway, or Review all. If you want to modify the data from the preview, click on the “Review all” option. or else, choose the other to continue.

7. Then, the data will be automatically arranged in the Excel sheet.

8. Click on the 3 dots, from the top right corner and select the options to save the Excel file. Microsoft Excel allows you to save the file on your device, OneDrive, Google Drive, and more.
Export Excel to JPG with Camera tool
One more way to quickly take a snapshot of your Excel data is using the Camera tool. A really cool feature of Excel Camera is that it creates a dynamic image that syncs with the original dataset and gets updated whenever the original data changes.
In order to use the Camera tool, you must add it to the ribbon or Quick Access Toolbar manually because it does not show up by default. To have it done, perform these steps:
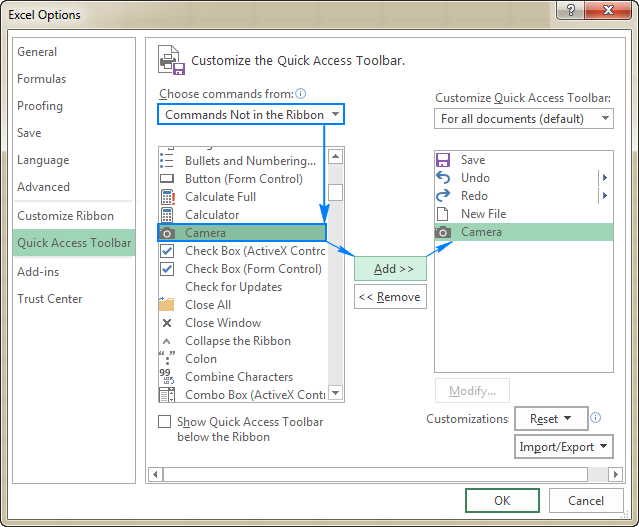
- Click the small drop-down button in the upper-left corner of your Excel and select More Commands…. This will open the Options dialog box.
- On the right pane, under Choose commands from, select Commands Not in the Ribbon.
- Scroll down the list until you find the Camera command, select it and click the Add button to move it to the right-hand section.
- Click OK.
Now, you have the Camera button on the Quick Access Toolbar:
To save an Excel table as image using Camera, just do the following:
- Select a range of cells you want to capture. To make a photo of a chart, select the cells surrounding it.
- Click on the Camera
- Click anywhere in the worksheet where you want to place a snapshot. Bingo!
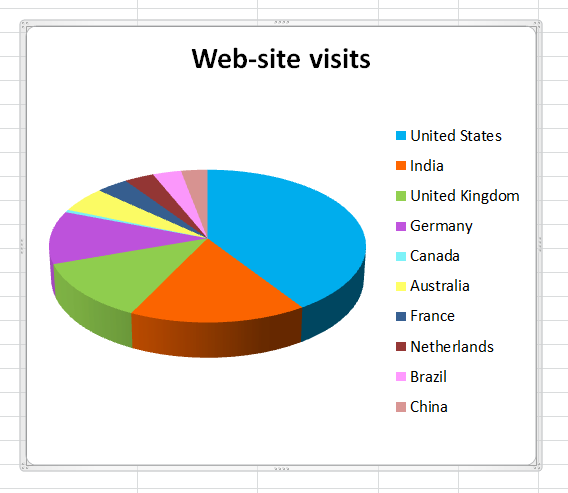
Now, you can make the image bigger or smaller by dragging the sizing handles. Or, you can apply different Picture Styles by using the Picture Tools tab that appears as soon as you select the image. For example: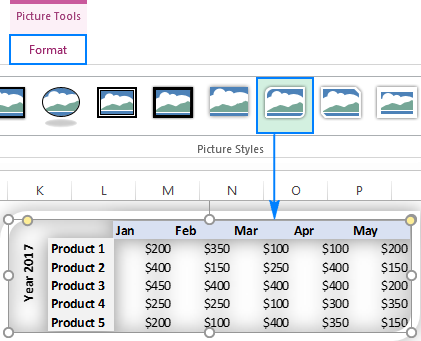
Tip. By default, Microsoft Excel adds a border to the image, if you don’t want it, click Picture border > No outline on the Format tab, in the Picture styles group.
When you are happy with the image design, you can export the Excel camera output to anywhere. For this, simply select the picture and press Ctrl + C to copy it (or right-click and then click Copy). After that, open another application, say Paint, Word or PowerPoint, and press Ctrl + V to paste the copied image. Or, you can assemble bits from several worksheets onto one page, and then save it as image by using any of the methods described above. Just remember that only a linked picture on the sheet is «live». When copied outside of Excel, it becomes a regular image and it won’t update when the original data in the worksheet changes.
office Convert Document To Image Free

office Convert Document To Image Free is another free Excel to JPG converter software for Windows. It is a simple and straightforward software through which you can convert Excel files (XLSX, XLS, etc.) to JPG, BMP, GIF, RLE, PNG, etc. images. The good thing about this software is that you can convert any Excel file (CSV, XLS, XLSX, etc.) to JPG format.
To convert Excel to JPG, first, load Excel files to this software using Add files or Add Folder option. After that, go to its Save Folder section and set the output file location. Now, move to Image Section and select JPG as the output format. At last, press the Convert Button to start the Excel to JPG conversion process. The output file that you get can directly be opened in an image viewer software.
Note: In this free version of this software, you get a small watermark at the bottom of the images. Also, you face limitations like disabled Batch File Conversion feature, Image Resolution Changer, File Merger, etc.
Копируем диаграмму в графический редактор и сохраняем как картинку
Одна моя подруга однажды поделилась со мной секретом: она обычно копирует свои диаграммы из Excel в Paint. Она создаёт диаграмму и просто нажимает клавишу PrintScreen, затем открывает Paint и вставляет снимок экрана. После этого обрезает ненужные области снимка и сохраняет оставшуюся картинку в файл. Если Вы до сих пор поступали так же, то скорее забудьте его и больше никогда не используйте этот детский способ! Мы будем действовать быстрее и разумнее!
- Кликните правой кнопкой мыши по области диаграммы и нажмите Копировать (Copy). Не нужно кликать мышью по самому графику, поскольку так будут выбраны отдельные элементы, а не вся диаграмма целиком, и команда Копировать (Copy) не появится.
- Откройте Paint и вставьте диаграмму при помощи иконки Вставить (Paste) на вкладке Главная (Home) и нажав Ctrl+V.
- Теперь осталось только сохранить диаграмму как графический файл. Нажмите Сохранить как (Save as) и выберите один из предложенных форматов (.png, .jpg, .bmp или .gif). Если хотите выбрать другой формат, нажмите Другие форматы (Other formats) в конце списка.
Проще не бывает! Чтобы сохранить диаграмму Excel таким способом, подойдёт любой графический редактор.
5. Convert Image to Excel on Mac with Nice Formatting Using Cisdem PDF Converter OCR Mac
Suppose if you want to extract data from the image to excel with exactly the same formatting as the original file, a dedicated image to excel converter is necessary for you to achieve it.
Cisdem PDF Converter OCR Mac, is an expert converter to convert any PDFs and images into 16 formats, including PDF to Microsoft Word, Excel, Powerpoint, iWork formats, ePub, HTML, Text, RTFD, and Image, etc.Its powerful OCR engine can accurately recognize images and export to editable formats with original file formatting retained.The image OCR feature works on all screenshots, pictures in JPG, BMP, PNG, TIGG, and GIF format.You don’t need to retype the file again at any cost.That’s to say for you for sure, you can also convert your images into high-security PDFs or Excel.
5.1.Cisdem PDF Converter OCR Mac key features:
- This will perform the OCR program on all images and pictures, JPG to Excel, PNG to Excel, BMP/GIF/TIFF to Excel.
- Make scanned PDFs searchable and editable.
- Convert PDFs into 16 formats.
- Batch conversion and OCR.
- Create PDFs from other documents (output customizing is also allowed here).
5.2. How to Convert Image to Excel on Mac Using Cisdem PDF Converter OCR Mac
First, go to the “Converter” interface.

- Here you have 2 ways to add files (images in this case) to the program.
- Either drag & drop the files to the program or click on the ‘+’ button to add files to the interface.
- Once the JPG image is imported to the interface, then it will be under OCR mode by default.
- You can click on the image icon to preview files.

- Then choose the file language and select output as “Excel”.
- Click on the “Advanced Settings” option, a new interface with OCR area marked shows up will open.

- Make sure all the parts are marked correctly for your image, for example here you can say, the tables should be marked in the blue box.
- Also, you can manually modify, if you want to output a table as text, remove the marked box in this zone, click on “Mark Text” in the OCR applied zone, then drag a mark box to include those contents you want to mark as Text.
- You can resize the marked box by dragging its corners from all sides.
- You have complete customization here to play.
- Click on the ‘Convert’ button to start the JPG image to excel conversion process.
- You can find the Excel file in the output folder which is converted with OCR feature.
Conclusion
So from the above topic, you got the solution like, there is no need to retype the image file in a spreadsheet, just utilize an OCR program to perform the image-to-excel conversion.
Solutions for the process of converting an image to excel may definitely vary for different users depending on your requirements.
But for sure, it can be said the best one to boost your productivity is using a dedicated OCR converter to do the work automatically.
- You May Like: Free way to convert PDF to Word on iPhone
- How to take screenshot on iPhone or iPod or iOS
- How to close running apps on iphone
I hope you like this tutorial about the ways to Convert Image to Excel. Please share this article with your friends. Want more iOS tips, follow WhatVwant on , , and YouTube.
4. Convert Image to Excel on Mac using Adobe Acrobat Reader Pro/ Reader DC
If you have subscribed and installed Adobe Acrobat DC, then you can also utilize this Adobe Acrobat converter to perform Image-to-Excel conversion easily, since Acrobat is also equipped with an OCR feature to work on scanned PDF or images.
Here we take Adobe Acrobat DC as an example to demonstrate how to convert images to excel in Adobe.
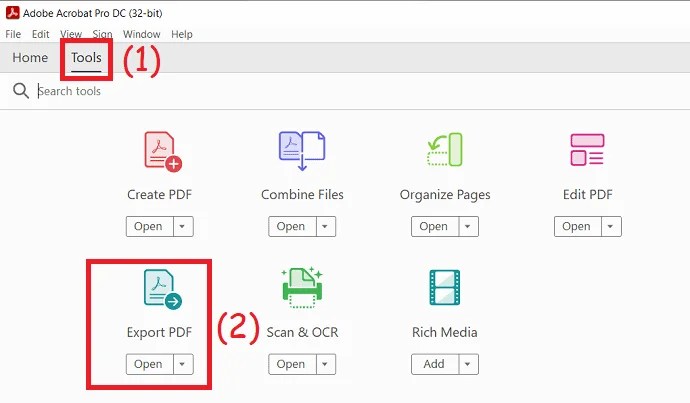
- Open the Acrobat Reader DC.
- Click on the ‘Tools’ tab from the top main menu.
- Find and select the ‘Create PDF’ option from the list of PDF features available.

- Sometimes, if it is not visible, then click on the ‘Show More’ option and that feature will be listed.
- You can select a JPG image to upload and click on the ‘Create’ button to make the image in PDF format.
- Then again Click on the ‘Tools’ tab from the top main menu.

- Select ‘Export PDF’ and choose the output as Spreadsheet.
- Click on the ‘Export’ button.
- This process will perform Adobe OCR on the JPG image and you will get the Excel file within seconds.
- Also Read: The disk you inserted was not readable by this computer fix in mac
- 4 useful tips to keep your mac clean and healthy
2. Convert Image to Excel Online
2.1. Using online2pdf:
It is completely an online document converter offering free services to transfer PDF and image files into searchable PDF, Word, Excel, PowerPoint, RTFD, Text, and ODT in batch.There are 6 languages supported by this online free tool, including English, French, German, Spanish, etc.Also, users can adjust the setting or customize accurately to change decimal separator and data formatting in the excel file.
2.1.1. How to Convert Image to Excel online using an online2pdf tool?
Video Tutorial:
Watch a video tutorial to understand the process or just continue with the steps mentioned after a video.
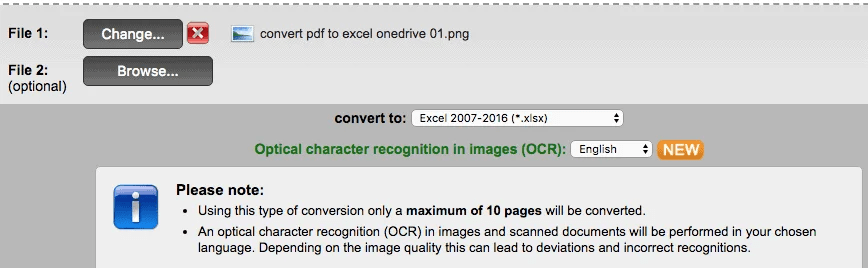
- Go to the online2pdf
- Click on the ‘Select files’ to upload JPG image(s) into the program or interface.

- The Maximum file size should not exceed 100 MB.
- All files together should not exceed 150 MB.
- Since it supports batch conversion, you can select up to 20 files.
- Choose the language and select the output as xlsx as you are converting an image to excel.
- Also, you can adjust the setting to customize the image-to-excel conversion.

- Click on the ‘Convert’ button to change the image to excel for free.
- Once ready, follow the prompt to save an Excel file on your Mac PC.
2.1.2.Advantages:
- Batch convert.
- Support PDF, JPG, PNG, BMP, TIF, MDI.
- Allow limited customization on the Excel output.
- Export as 9 editable formats.
2.1.3. Disadvantages:
- Can recognize only 6 languages.
- Need to manually check due to OCR errors sometimes.
2.2. Using onlinceocr
Another online free document converter converts PDF and image to Microsoft Word, Excel, and Text. It supports recognizing files in more than 40 languages.
2.2.1. How to Convert JPG Image to Excel online with onlineocr?
1. Visit Online OCR Image to Excel converter

2. Click ‘Select file’ to add JPG file that you want to convert.
3. Next, choose the file language and also set the file format (Excel) you want to change.
4. At the end, click ‘Convert’ to change JPG file to Excel file.

6. As soon as the conversion is done, you can download the Excel file.
2.2.2. Advantages:
- Relatively higher OCR accuracy
- Support PDF, JPG, BMP, TIFF, and GIF
- Super easy to use
- Recognize 40+ languages
- Maximum 20 image or pictures can be converted
2.2.3.Disadvantages:
- Do not support batch convert
- Support exporting only 3 formats
- Max file size 15MB
Things You Need to know or must know When Converting Image to Excel for Free:
- Please don’t upload very highly-private images for conversion.
- You must make sure the Internet connection is stable with more speed and fast.
- As there are some file size limits, please don’t upload large images for conversion.
- Re-check the spreadsheet output and manually adjust, if possible, only convert simple image files to excel online free.
2.3. Using PDF Converter:

We face a lot of difficulties while changing file formats from one to another. One among them is converting an image file to an excel file. ‘PDF Converter’ helps you and guides you to convert one file format to another.
Total Time: 5 minutes
Go to the online file converter and upload image file

Visit the online file converter site and choose a JPG file to save it to PDF first.
Download PDF and click Start Over

Download the PDF and click the ‘Start Over’ button on the top-right corner.
Upload PDF file to convert to Excel

Now, upload the converted file (PDF) and click on ‘to Excel’. Let the tool perform its magic and convert the file.
Save the converted Excel file
The converted file will be shown on the screen. Save the Excel file.
Related: Top 5 methods to Remove Watermark from PDF
3. Convert Image to excel on Windows using Adobe Acrobat DC
Below are the steps to know how to convert images to Excel on windows using Adobe Acrobat DC. First, you need to convert the image to PDF then PDF to Excel.
Step 1: Launch the Adobe Acrobat DC application. Select “Tools” and click on “Create PDF” under Create & edit.

Step 2: Upload the image that you want to convert to Excel and click on the “Create” option. Once the file creates, press ctrl+s on your keyboard to save the file.
Step 3: Now go back to tools and click on the “Export PDF” option.
Upload the created PDF file and choose the output format as Excel Workbook under Spreadsheets. Finally, click on the “Export” option. That’s it… press ctrl+S on your keyboard to save the file on your desired location.

Convert .xls to .jpg (.xlsx to .jpg) with Snipping Tool
It is another amazingly simple way to get an image of your Excel sheet that very few people know about. Snipping Tool is specially designed to take a snapshot of the screen and is included with all modern versions of Windows, from Windows 7 to Windows 10.
Unlike the Print Screen feature, Snipping Tool gives you the following choices as to what to capture:
- Free-form snip — you can draw any shape on the screen and only that part of your Excel sheet will be included in an image.
- Rectangular snip — the default option that captures rectangular snips.
- Window snip — allows capturing a dialog box or a resized Excel window.
- Full-screen snip — captures the entire screen, the same as Print Screen.
To locate Snipping Tool on your computer, click the Start button, type «snipping tool» in the search box, and then click on Snipping Tool in the list of results. If you don’t want to capture a snip immediately, click the Minimize button to send it to the task bar, switch to Excel and open the spreadsheet of interest.
To convert an Excel sheet to JPG (or another image format), perform the 3 quick steps outlined below:
- Choose what kind of snip you want to capture. For this, click the little arrow next to the Mode button (in older versions, click the arrow next to New), and select one of the options described above.
- Select the area of your sheet that you want to capture. This will immediately copy the selected area to the Snipping Tool window.
- Click the Save button, type the file name, choose your preferred image format (.jpg, .png and .gif are supported) and click OK. That’s all there is to it!
Tip. To make some edits to the captured image, use the Pen, Highlighter and Eraser tools shown in the screenshot below.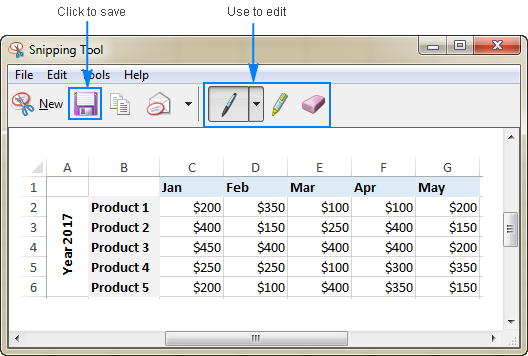
Сохраняем диаграмму как картинку при помощи макроса VBA
Если необходимость экспортировать диаграммы Excel как картинки возникает часто, то можно автоматизировать эту задачу при помощи макроса VBA. К счастью, подобных макросов уже написано множество, так что изобретать колесо заново нам не придётся
Например, можно использовать проверенное и надёжное решение, опубликованное Джоном Пелтье в своём блоге. Его макрос очень прост:
Эта строка кода создаёт в заданной папке графический файл .png и экспортирует в него диаграмму. Вы сможете создать свой первый макрос прямо сейчас за 4 простых шага, даже если не делали этого никогда в жизни.
Перед тем как приступить к написанию макроса, подготовьте папку для экспорта диаграммы. В нашем случае это будет папка My Charts на диске D. Итак, все приготовления завершены, давайте займёмся макросом.
- В своей рабочей книге Excel откройте вкладку Разработчик (Developer) и в разделе Код (Code) нажмите иконку Макросы (Macros).
Замечание: Если Вы будете создавать макрос впервые, то, скорее всего, вкладка Разработчик (Developer) будет скрыта. В таком случае перейдите на вкладку Файл (File), кликните Параметры (Options) и откройте раздел Настроить ленту (Customize Ribbon). В правой части окна, в списке Основные вкладки (Main Tabs) поставьте галочку рядом с Разработчик (Developer) и нажмите ОК.
- Дайте название новому макросу, например, SaveSelectedChartAsImage, и сделайте его доступным только для данной рабочей книги.
-
Нажмите кнопку Создать (Create), при этом откроется окно редактора Visual Basic, в котором уже будут обозначены начало и конец нового макроса. Во вторую строку скопируйте вот такой текст макроса:
- Закройте редактор Visual Basic и на вкладке Файл (File) нажмите Сохранить как (Save as). Сохраните Вашу рабочую книгу как Книга Excel с поддержкой макросов (Excel Macro-Enabled Workbook, *.xlsm). Вот и всё, Вы сделали это!
Теперь давайте запустим только что созданный макрос, чтобы увидеть, как он работает. Постойте минутку… Мы должны сделать ещё кое-что. Нужно выбрать диаграмму Excel, которую будем экспортировать, поскольку наш макрос работает только с выделенной диаграммой. Кликните по краю диаграммы в любом месте. Светло-серая рамка, появившаяся вокруг диаграммы, будет сигнализировать о том, что она выделена полностью.
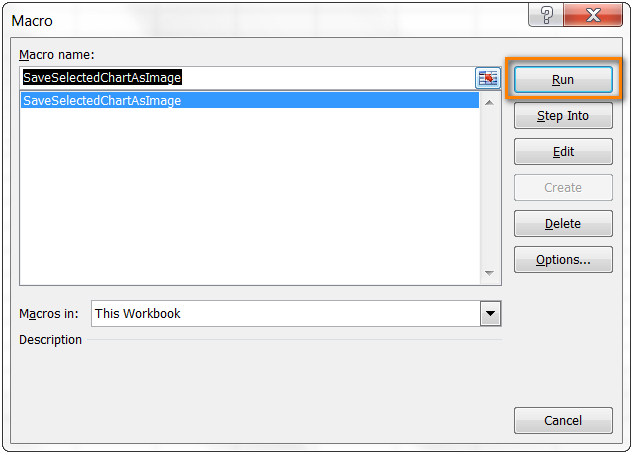
Снова откройте вкладку Разработчик (Developer) и кликните иконку Макросы (Macros). Откроется список макросов, доступных в Вашей рабочей книге. Выделите SaveSelectedChartAsImage и нажмите кнопку Выполнить (Run).
Теперь откройте папку, которую указали для сохранения файла – там должна быть картинка .png с экспортированной диаграммой. Таким же образом можно сохранять диаграммы в другом формате. Для этого достаточно в макросе изменить .png на .jpg или .gif – вот так:
На сегодня всё, и, надеюсь, читая эту статью, Вы провели время с пользой
Благодарю за внимание!
LibreOffice Calc

LibreOffice Calc is an application of free and open source LibreOffice suite. Using it, you can easily convert Excel (CSV, XLS, TSV, etc.) to JPG image format. However, it only converts one page of the file or about first 50 rows of Excel to JPG image. The process of Excel to JPG conversion is pretty simple. First, load an Excel file and use its Export Option to save it in JPG file format. Apart from JPG, you can export an Excel file to XHTML, PDF, XML, PNG, etc. formats. This software also provides various tools sections through which you can edit an Excel document before the conversion.
Let’s take a brief look at various available editing sections:
- Edit: Using this section, you can enable Edit and Cell Edit modes to perform quick editing. Plus, common tools like Cut, Paste, and Find and Replace can also be found here.
- Insert: This section lets you insert various elements into the Excel file like Images, Tables, Charts, Objects, etc.
- Format: It helps you adjust the formatting of your Excel document like Spacing, Number Format, Spreadsheet Themes, Row & Column Height, etc.
- Sheet: Through this section, you can insert a new Cell, Row, Column, etc. Plus, a completely new sheet can also be entered in the existing sheet through it.
- Tools: Many handy tools like Spelling, Automatic Spell Checking, AutoCorrect, Password Protect Sheet, etc. are available in it.
In the LibreOffice Suite, you will also get many other LibreOffice products other than Calc such as Writer, Impress, Draw, Writer/Web, and more.
Windows
Write a Comment
1. Extract Data from Image to Excel with Microsoft Office
Even though Microsoft Office Excel does not have the option to offer OCR feature to extract data from the image to excel file, OneNote from Microsoft Office can help to convert picture to excel table.
Microsoft Office OneNote is a free program facilitating team collaboration, it can help you to create notes, drawings, clips, even audio, then gather all the information for multiple user’s usages. To copy the text from screenshot or other image files, Microsoft Office OneNote builds in the OCR feature to OCR pictures to text.
So, here is how we utilize Microsoft Office to convert image to text in Excel with clear steps. Use OneNote OCR to extract the data first, then save the text to the Excel table.
- First, you have to install and launch Microsoft OneNote in Mac AppStore.
- Click on the ‘Insert’ tab on the top main menu.

- Select the ‘Picture’ option and upload a JPG image to OneNote.
- Right-click on the picture and choose the “Copy Text from Picture” option from the list to start the OCR processing.

Now you launch Microsoft Office Excel, paste the picture text to excel, and save the file.
Best JPG to Excel OCR Converter for Mac
Though there are good online free tools available to export JPG as Excel, many users still pay for an offline JPG to Excel converter in the end. One reason is that online free tools are borne with potential risk of information leakage and unstable conversion quality, while the other reason is that offline ones bring high-quality and professional conversion results.
Here for Mac users, you are recommneded with Enolsoft PDF Converter with OCR for mac, it is a professional OCR converter to export scanned files and images into multiple editable formats, including Excel, Word, PowerPoint, Pages, Keynote, Text, ePub, etc.
Main Features of Enolsoft PDF Converter with OCR
- Perform OCR on scanned files and images, export as editable formats (Searchable PDF, Excel, Word, Powerpoint, Keynote, Pages, Text, ePub, etc.);
- Recognize 200+ languages;
- Convert native PDF to 16 formats;
- Batch convert files;
- Preserve original file layout and formatting;
- Convert full file or specified page range;
- Support password-protected PDFs;
- Allow to add password to the PDF output;
- Free download Enolsoft JPG to Excel converter onto your mac, install and launch the program;Download
- Drag and drop JPG files into the program, it supports batch convert JPG to Excel on mac;
- Choose the JPG file language and select the output as Excel;
- Click “Convert” to change JPG to Excel on mac.