Использование групповых политик для управления расширениями microsoft edge
Содержание:
- Скачать расширения Microsoft Edge
- Обзор полезных плагинов для Microsoft Edge
- Before you begin
- Best Microsoft Edge extensions for remote work
- Setting up your project to show live changes in the extension
- The main tools on the toolbar
- Скачать расширения Microsoft Edge
- Prevent extensions from altering web pages
- Step 6: Complete your submission
- Configure using a JSON string in Windows Group Policy Editor
- Как установить расширения Microsoft Edge
- Ghostery
- Extension architecture
- AdBlock
- Best Microsoft Edge extensions for collaboration
- Bottom Line: Microsoft Edge Extensions
- Выбор разрешаемых расширений
- Публикация расширения
- Import Chrome Extensions to Microsoft Edge
- TreeClicks
- Тревожная кнопка
- Social & Entertainment
Скачать расширения Microsoft Edge
Миссия, на самом деле, выполнима. Организация магазина предельно проста и примитивна. Быстро становится понятно, почему.

Вас ничего не смущает? А вот вам еще один скриншот, со вторым экраном:

Это я промотал страничку магазина немного вниз, чтобы вывести полный список расширений Edge. Да-да, их всего 13 штук. Со временем, надеюсь, их будет больше и их распределят по категориям, но пока это выглядит именно так.
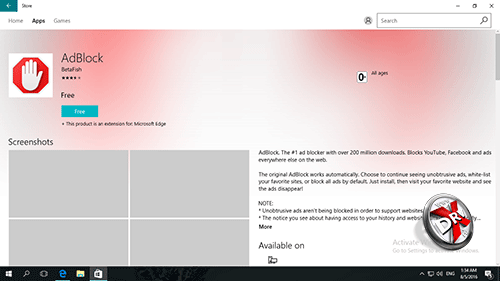
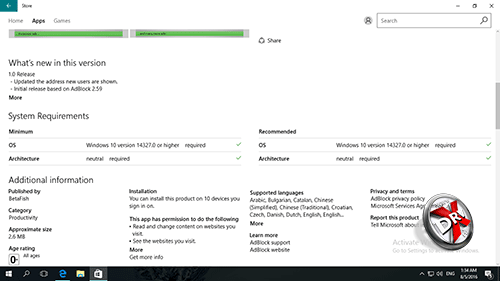
Описание расширения выглядит вполне информативно, отсюда же его можно скачать. Немного ниже находится информация о нем, а далее комментарии и оценки пользователей.
И вот теперь давайте разберемся, что уже есть и как с этим быть.
Обзор полезных плагинов для Microsoft Edge
С основными расширениями разобрались. Блокировщик рекламы, переводчик, VPN нужны большинству пользователей. Остальные – на усмотрение, в зависимости от специфики использования браузера. Рассмотрим некоторые из них.
- Avast Online Security.
Пользователи Edge могут повысить безопасность работы с сайтами. Разработчики антивируса Avast предлагают расширение для браузера. Установив плагин, можно зайти в основной интерфейс, кликнув на иконку верхней панели.

Помимо защиты от вирусов, расширение предлагает блокировку рекламы. В принципе, его смело можно было рассматривать под заголовком о рекламных блокировщиках. Если с сайтом все в порядке, в интерфейсе пользователь видит зеленое окошко с галочкой. А вот как выглядят дополнительные настройки.

Расширение очень достойное, похоже на AdGuard. Тем, кто хочет повысить уровень безопасности в интернете, рекомендуем установить.
- OneNote Web Clipper.
Плагин для создания скриншотов и записей веб-страниц с последующим сохранением в сервисе OneNote. После установки кликаем правой кнопкой мышки на страницу и выбираем расширение.

Чтобы работать с ним, нам нужно войти в учетную запись Майкрософт, в рабочую или учебную запись. Информация будет сохраняться в сервисе OneNote. В всплывающем окне выбираем вход.

Сохранять можно полностью страницу, отдельный скриншот выбранной области, конкретную статью или делать закладку. Кликаем «Вырезать», чтобы информация сохранилась на сервисе.

Сохраненные снимки, страницы, статьи и закладки можем сразу же просмотреть в нашем аккаунте OneNote.

Создается отдельная запись с ссылкой и скриншотом.

Расширение OneNote Web Clipper удобно для пользователей, которым нужно работать с большим массивом страниц. Чтобы не забыть нужное, их можно сохранять и просматривать после.
- Night Eye.
Интересный плагин для изменения интерфейса веб-страниц. Некоторым пользователям удобно работать с темным фоном. Расширение дает возможность подогнать фон по цвету, яркости, контрастности и другим характеристикам.

- LastPass.
Еще одно полезное расширение – менеджер паролей. Плагин сохраняет все используемые пароли и дает им более надежную защиту. Для входа нужно будет зарегистрироваться на официальном сайте. Вот так выглядит главный интерфейс.

Преимущество программы – надежное сохранение всех используемых паролей. Возможна синхронизация с другими устройствами и сервисами. Разработчики не могут получить доступ к вашей учетной записи благодаря специальным механизмам шифрования.
Расширение подойдет для тех, кто постоянно забывает пароли. Хотя у многих пользователей он один – для всех ресурсов, служб, почты, социальных сетей. Но делать этого не рекомендуется – пароли должны отличаться. LastPass также имеет возможность генерации сложных паролей.
Before you begin
Ensure that you publish your extension in the Microsoft Edge Add-ons website, or package a file and ensure that it installs successfully on your computer. If you install the file using the , ensure you can navigate to your extension at that URL.
Also, ensure that you have the following information.
- The file path of the file, or the of your extension.
- The version of your extension. The version information is available in your manifest file, or in Microsoft Edge at after you load the packed extension.
- The ID of your extension. The ID information is available in Microsoft Edge at after you load the packed extension.
Note
The following examples use as the version, and for the ID.
Best Microsoft Edge extensions for remote work

Workona
Workona is an easy way to share documents, links, bookmarks, and any other saved resource in the browser. Use it to collaborate on projects with your remote team members and contractors.
Remote work features
- Share and access cloud resources regardless of browser preference.
- Collaborate on projects, meetings, and recurring workflows with a team.

Fireshot
If you need to show a colleague your screen to work through a problem, Fireshot has you covered. It lets you take high-quality screenshots, including full-screen shots so you don’t have to piece them together manually.
Additional features
- Save screenshots to PDF, JPEG and PNG, or copy to clipboard.
- Screenshots are instant, stored locally, and produce no traffic.
- Works offline and online.
Setting up your project to show live changes in the extension
By default, the Microsoft Edge DevTools extension doesn’t track live changes to the code as you write. If you want the browser to automatically refresh when you change a file, set up a live reload environment, as follows.
This example shows a folder of production files on your hard drive called . In the following steps, change to your folder name, if it is different.
-
Install Node.js and the npm package, as follows:
- Download and install Node.js.
- To install the reload npm package, open a command prompt and run to install the package globally.
-
Attach the extension to your live reloading project, as follows:
- Navigate to the folder in your terminal window and run to start the local server.
- In Visual Studio Code, open the folder.
- Go to the extension and launch a Microsoft Edge browser instance.
- In Microsoft Edge, navigate the extension to .
All changes that are saved in this folder now trigger a browser refresh.
The main tools on the toolbar
DevTools give you an amazing amount of power to inspect, debug, and change the web product currently displayed in the browser. Most of the tools display the changes live. Live updates make the tools incredibly useful to refine the appearance and navigation or functionality of a web project without the need to refresh or build it. The DevTools also allow you to change web-based third-party products on your computer.
Main tools (tabs) on the toolbar
There are two toolbars: the main toolbar at the top of DevTools, and the Drawer at the bottom if you select . The main toolbar normally has the following tabs (or tools, or panels):
Welcome. Includes information about the new features of DevTools, how to contact the team, and provides information about certain features. This tool is placed first.
Next, the following tools are always present on the toolbar and cannot be closed:
- Elements. Allows you to edit or inspect HTML and CSS. You can edit in the tool while displaying the changes live in the browser.
- Console. Allows you to display and filter log messages. Log messages are automated logs of the browser like network requests and developer-generated logs. You can also run JavaScript directly in the Console in the context of the current window or frame.
- Sources. A code editor and JavaScript debugger. You can edit projects, maintain snippets, and debug your current project.
- Network. Allows you to monitor and inspect requests or responses from the network and browser cache. You can filter requests and responses to fit your needs and simulate different network conditions.
Finally, these more specialized tools (tabs) are on the toolbar by default:
- Performance
- Memory
- Application
- Security
- Lighthouse
Tool, tab, or panel
Often the words «tool», «tab», or «panel» can be used interchangeably. In the command menu, the tools are called panels; for example, the Elements tool is called the Elements panel. To switch to the the Elements tool, you select the Elements tab. There’s a More Tools button and list, and there’s a More tabs button on the toolbar, both of which are used to select tools, which are also called panels.
Sections of the toolbar
The main toolbar in DevTools has the following sections:
-
When you select the Inspect tool, you can select an element on the current webpage. While the Inspect tool is active, you can move your mouse over different parts of the webpage to get detailed information about page elements, and a multi-color overlay that shows the layout dimensions, padding, and margin of the page element.
-
The Device Emulation tool displays the current web product in an emulated device mode. The Device Emulation tool allows you to run and test how your product reacts when you resize the browser. It also gives you an estimation of the layout and behavior on a mobile device.
-
The main toolbar contains tabs for tools that are used in various scenarios. You can customize each of the tools, and the content of a tool can change based on the context. To show a tool that is on a tab that’s hidden, select the More tabs () button. To add a tool to the main toolbar or to the drawer’s toolbar, select the More tools () button. Each tool is introduced below.
-
Next to the Tools tab group are optional error and issues shortcuts. The shortcuts display when JavaScript errors or issues occur on the current webpage. The Open Console to view # errors, # warnings (JavaScript Errors) button displays a red circle with an , followed by the number of JavaScript errors. To open the Console and learn about the error, select the JavaScript Errors button. The Open Issues to view # issues (Issues) button is a blue message icon followed by the number of issues. To open the Issues tool, select the Issues button.
-
The Settings button displays a gear icon. To open DevTools Settings webpage, select the Settings button. The Settings webpage displays a menu to change Preferences, turn on Experiments, and much more.
-
The Send Feedback button displays a torso with a chat bubble next to it. To open the Send Feedback dialog, select the Send Feedback button. The Send Feedback dialog allows you to enter information to describe what happened and automatically includes a screenshot. Use it to connect with the DevTools team to report problems, issues, or suggest ideas.
-
The Customize and control DevTools () button opens a dropdown menu. It allows you to define where to dock the DevTools, search, open different tools, and much more.
Скачать расширения Microsoft Edge
Миссия, на самом деле, выполнима. Организация магазина предельно проста и примитивна. Быстро становится понятно, почему.
Вас ничего не смущает? А вот вам еще один скриншот, со вторым экраном:
Это я промотал страничку магазина немного вниз, чтобы вывести полный список расширений Edge. Да-да, их всего 13 штук. Со временем, надеюсь, их будет больше и их распределят по категориям, но пока это выглядит именно так.
Описание расширения выглядит вполне информативно, отсюда же его можно скачать. Немного ниже находится информация о нем, а далее комментарии и оценки пользователей.
И вот теперь давайте разберемся, что уже есть и как с этим быть.
Prevent extensions from altering web pages
This setting prevents extensions from reading and changing data from sensitive websites and domains. Blocking unwanted actions is done by blocking actions such as script injection into your websites, reading the cookies, or making web-request modifications. This setting doesn’t prevent your users from installing or removing extensions, it only prevents extensions from altering the specified websites.
Note
The Runtime allowed/blocked hosts setting can only be set within the extension settings policy.
You can configure the following settings in the ExtensionSettings policy to prevent (or allow) alterations of websites or domains:
-
Runtime_blocked_hosts. This setting blocks extensions from making changes or reading data from the websites you specify.
-
Runtime_allowed_hosts. This setting allows extensions to make changes or read data from the websites you specify. The following format is used for specifying your site(s) in the JSON string in the policy:
Note
sections are required, but section is optional.
The following table shows examples of valid host patterns and matching patterns.
| Valid host patterns | Matches | Doesn’t match |
|---|---|---|
| All URLs |
Use the following steps as a guide to block or allow extensions to access a website or domain.
- Open the group policy management editor and go to Administrative Templates > Microsoft Edge > Extensions, and then select Configure extension management settings.
- Enable the policy, then enter the permissions that you want allowed or blocked, compressing the permissions to a single JSON string.
The following examples show how to block extensions on a hostname and how to block extensions on the same domain.
JSON example to block hostname
This example shows the JSON and compressed JSON string to block any extension from accessing the hostname.
Note
To block all extensions from accessing a webpage, use an asterisk for the extension ID, as shown in the previous example. If you specify one extension ID instead of an asterisk, the policy will only apply to that extension. You can block more than one extension, but they need to be separate entries.
JSON example to block extensions on same domain
This example shows the JSON and compressed JSON string to block specific extensions from running on the same domain, «importantwebsite».
Step 6: Complete your submission
On the Submit your extension webpage, add notes for certification to help test your extension.
Notes for certification (optional)
When you submit your extension, use the Notes for certification webpage to provide additional information to the certification testers. The additional information helps ensure that your extension is tested correctly. If your extension isn’t fully tested, it might fail certification.
Make sure you include the following information, as necessary.
- User names and passwords for test accounts.
- Steps to access hidden or locked features.
- Expected differences in functionality based on region or other user settings.
- If your submission is an update to an existing extension, include information about the changes made to the extension.
- Any additional information that testers must understand about your submission.
After you provide the information, select Publish to submit your extension to the Microsoft Edge Add-ons website. Your submission proceeds to the certification step. The certification process can take up to seven business days after your submission.
After your submission passes certification, your extension is published in the Microsoft Edge Add-ons website. The status of your extension in the Partner Center dashboard changes to .
Configure using a JSON string in Windows Group Policy Editor
The steps to use the extension settings policy using GPO assume that you’ve already imported the ADM/ADMX for Microsoft Edge Policies.
- Open the group policy editor and go to go to Microsoft Edge > Extensions > Configure extension management setting policy.
- Enable the policy and enter its compact JavaScript Object Notation (JSON) data in the text box as a single line with no line breaks.
- To validate the policy and compact it into a single line, use a JSON compression tool.
Properly format JSON for the extension settings policy
You need to understand the two parts to this policy — the default scope and the individual scope. The default scope is a catch-all for extensions without their own scope. The individual scope is applied to that extension only.
The default scope is identified by the asterisk (*). The next example defines a default scope and an individual extension scope.
{
   “*”: {},
   “nckgahadagoaajjgafhacjanaoiihapd”: {}
}
An extension will only get its settings from one scope. If there’s an individual extension scope for that extension, those will be the settings that apply to that extension. If no individual extension scope exists, then the extension will use the default scope.
The next JSON example blocks any extension from running on and blocks any extension that requires the permission «USB».
{
  "*": {
    "runtime_blocked_hosts": ["*://*.example.com"],
    "blocked_permissions":
  }
}
Compact JSON
{"*":{"runtime_blocked_hosts":["*://*.example.com"],"blocked_permissions":}}
Using installation_mode property to allow and block extensions
-
User can install all extensions — this is the default setting
-
User can’t install any extensions.
-
Specify a custom message to display when installation is blocked.
Using installation_mode property to force install extensions
When using installation_mode as «force_installed», the extension is automatically installed without user interaction. A user can’t disable or remove the extension. If an extension is «normal» or «force» installed, the update_url field must also be defined. This field points to the location where the extension can be installed from. Use the following locations for the update_url field:
-
If you’re hosting the extension on your own server, use the URL where Microsoft Edge can download the packed extension (.crx file). JSON example:
In the above example Instead of «force_installed», if you use «normal_installed», then the extension is automatically installed without user interaction, but they can disable the extension.
Как установить расширения Microsoft Edge
На самом деле очень просто. Ну, или почти. Здесь Microsoft поступила не совсем так, как остальные разработчики браузеров, где для расширений есть отдельная вкладка. В Edge никаких специальных вкладок нет, а есть выделенный раздел в Windows Store, то есть магазине приложений. В принципе, вполне логично, но несколько непривычно.
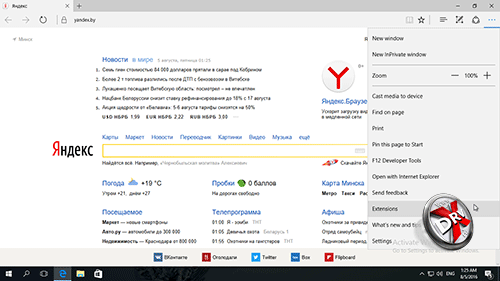
В главном меню браузера есть пункт Расширения (Extensions), который неприметно затесался в десятке других.
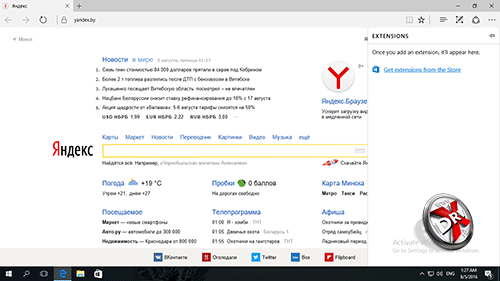
Его открытие приводит к появлению совершенно пустой панели, если не считать ссылки на магазин приложений Windows Store. Впрочем, эта панель пустует только по началу – со временем здесь должны будут появиться установленные расширения.
Ну а дальше остается только перейти к непосредственно самим расширениям.
Ghostery
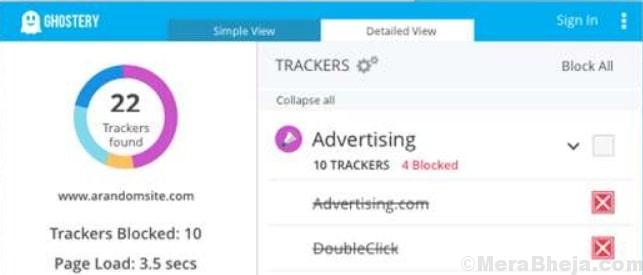
Ghostery is an extension for those looking for privacy guards for their systems. The app looks for any kind of hacking malware on the websites you visit and blocks all of them for seamless reading/viewing. From blocking unwanted ads to preventing trackers or speeding up the websites, it offers many such benefits.
The integrated ad-blocker in the app deletes any unwanted ads from a website that you visit. This helps remove any clutter helping you to focus on the content that you want to view. in addition, it also blocks any scripts that may slow down the page performance.
Best of all, the extension also discovers and block any harmful trackers on the website you visit that helps protect your data. The boosted anti-tracking technology also cleans your data to keep you protected. What’s more? It even speeds up the page loading capability of the web pages visited by you and enhances the page speed by blocking and unblocking the trackers automatically. This process helps suffice the guidelines for page quality.
You can also customize your display using the app highlighting only the details that are important for you.
Price: free
Extension architecture
The following list outlines helpful information as it relates to the architecture of an extension.
-
The Extension web server bundle. An extension is a bundle of web resources. The web resources are similar to other resources that you (the web developer) publish to web servers. You bundle the web resources into a zip file when building an extension.
The zip file includes HTML, CSS, JavaScript, and image files. One more file is required in the root of the zip file. The other file is the manifest file that is named . The manifest file is the blueprint of your extension and includes the version of your extension, the title, permissions needed for the extension to run, and so on.
-
Launching the extension server. Web servers contain your web bundle. A browser navigates to URLs on the server, and downloads the file to render in the browser. A browser navigates using certificates, configuration files, and so on. If an file is specified, the file is stored at a special location on the web server.
When you use an extension, the tab page of your browser gets to the web bundle of your extension using the extension runtime. The extension runtime serves the files from the URL , where is a unique identifier assigned to the extension when during installation. Each extension uses a different unique identifier. Each identifier points to the web bundle that is installed in your browser.
-
An extension may communicate with tabs and the browser toolbar. An extension may interact with the toolbar of your browser. Each extension manages running tab pages in separate threads, and DOM manipulation on each tab page is isolated. An extension uses the extensions API to communicate between the extension and tab pages. The extensions API provides extra capabilities that include notification management, storage management, and so on.
Just like web servers, an extension waits for notifications when the browser is open. An extension and tab pages run in threads that are isolated from each other. To allow an extension to work with any tab page, use the extensions API and set the permissions in the manifest file.
-
An extension provides opt-in permissions at install time. You specify the extension permissions in the file. When a user installs an extension, information about the permissions that the extension requires is displayed. Based on the type of permission required, the extension may extract and use information from the browser.
AdBlock
Если вас довольно часто раздражают всплывающие окна с рекламой и другими раздражающими уведомлениями, то AdBlock поможет вам больше всего. Это помогает блокировать всплывающую рекламу на всех веб-сайтах.
Если вы хотите просматривать или читать в Microsoft Edge, не отвлекаясь, AdBlock сделает эту работу за вас.
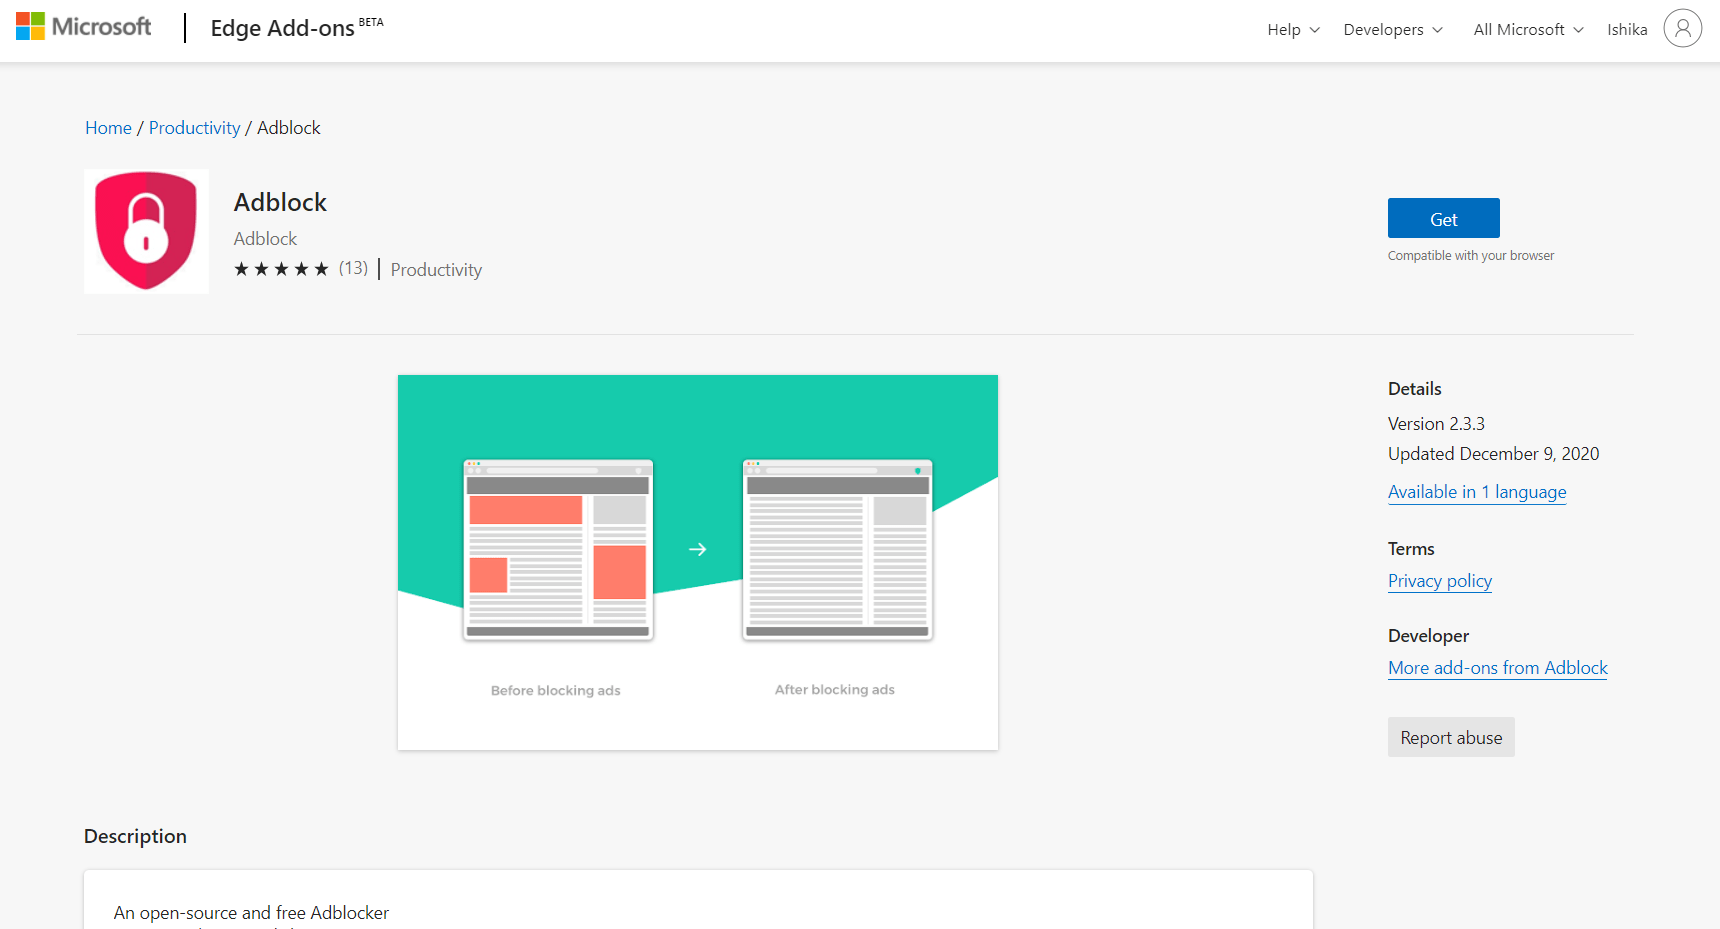
Давайте посмотрим на некоторые важные особенности AdBlock:
- Он блокирует все виды рекламы, включая всплывающие окна, баннеры и видеорекламу.
- Вы можете транслировать видео и читать на веб-сайтах, не отвлекаясь.
- Он блокирует сторонние трекеры, что повышает вашу конфиденциальность.
- Он также блокирует все вредоносные программы и спам, которые могут нанести вред вашему устройству.
Несмотря на то, что он обладает такими удивительными функциями, он может не удалось заблокировать некоторые объявления иногда. Также служба поддержки поддержка недоступна в бесплатной версии.
Best Microsoft Edge extensions for collaboration

Microsoft Office
Microsoft Office has several collaborative apps, including OneDrive and Excel. The extension adds an icon to the Microsoft Edge toolbar that gives you direct access to your Office files, whether they’re stored online or on your computer.
Additional features
- Open files stored in OneDrive and OneDrive for Business.
- Access the features of Word, Excel, PowerPoint, OneNote, and Sway right in your browser without having to install Office.

Additional features
- Save content from websites into your Evernote account.
- Clip full pages, save parts of a page as an article, or simply bookmark the page.
Bottom Line: Microsoft Edge Extensions
Edge extensions can be very helpful since they tend to offer features that are generally not available on the browser. In recent times, the popularity of extensions has increased. Now, more and more people are looking for extensions that will enhance their user experience and boost their productivity. Edge extensions are a great way to manage your time well and do more in less time.
I am sure that the extensions mentioned above will help you somehow in making your work life more efficient than before. It has surely helped me a lot in making my tasks easier than before. The Grammarly browser extension is a lifesaver for me at all times. As I write this article, I still make sure to use it to rectify my grammatical errors.
I suggested the same to my friend who was looking for a way to proofread and edit her research paper in a short period. Now, instead of doing it manually, Grammarly did it for her. She was extremely happy!
Related: How to Install Chrome Extensions on Edge Browser?
What is your opinion about the browser extension feature? Which extension is your favorite Microsoft Edge extension?
Lastly, here are the recommended web browsers for your computer and mobile phone that you should give a try.
| Windows | MacOS | iOS | Android | Linux |
|---|---|---|---|---|
| Chrome Windows | Chrome Mac | Chrome iOS | Chrome Android | Firefox Linux |
| Firefox Windows | Safari Mac | Safari iOS | Edge Android | Chrome Linux |
| Edge Windows | Firefox Mac | Edge iOS | Samsung Internet | Edge Linux |
If you’ve any thoughts on 10+ Best Microsoft Edge Extensions You Must Have in 2021!, then feel free to drop in below . If you find this article helpful, please consider sharing it with your network.
Also, please subscribe to our BrowserHow YouTube channel for helpful videos tutorials.
Выбор разрешаемых расширений
Большинство организаций должны управлять расширениями с помощью разрешений и путем предоставления доступа к определенным веб-сайтам. Этот метод более безопасный, простой в управлении и масштабируемый для крупных организаций.
- Заблокированные и допустимые разрешения — позволяет управлять расширениями с помощью необходимых разрешений.
- Узлы блокировки среды выполнения — позволяет выбирать, к каким веб-сайтам есть доступ у этих расширений.
Использование этого подхода экономит время, так как эти параметры нужно установить только один раз. А благодаря политике узлов среды выполнения ваши наиболее важные сайты будут защищены. Существуют и другие параметры, например:
- Принудительная установка расширений — позволяет устанавливать расширения автоматически.
- Список разрешенных или заблокированных элементов (если требуется) — определите, какие расширения можно устанавливать.
Чтобы определить, какие расширения доступны в организации, используйте следующие действия.
Благодаря применению базовых или разрешенных разрешений и защите конфиденциальных корпоративных сайтов вы можете обеспечить для предприятия дополнительную защиту и улучшенное взаимодействие с пользователями. Сотрудники могут устанавливать расширения, которые ранее были им недоступны, но не могут запускать их на конфиденциальных бизнес-сайтах.
Публикация расширения
Перед публикацией расширения его необходимо упаковать в файл CRX (расширение Chrome). В качестве руководства по упаковке расширения в качестве файла CRX используйте следующие действия.
В адресной строке Microsoft Edge перейдите в edge://extensions и включите режим разработчика, если он еще не включен.
В разделе Установленные расширения щелкните Расширение пакета, чтобы создать файл CRX.
Используйте диалоговое окно Расширение пакета, чтобы найти каталог с источником расширения. Выберите каталог и нажмите кнопку Расширение пакета. Это создаст файл CRX вместе с файлом PEM
Сохраните файл PEM, так как он необходим для обновления версии расширения
На следующем снимке экрана показано диалоговое окно Расширение пакета для размещения корневого каталога расширения.
Важно!
Сохраните файл PEM в безопасном месте, потому что это ключ для расширения и он понадобится для будущих обновлений.
Перетащите файл CRX в окно расширений и убедитесь, что он загружается.
Проверьте расширение и обратите внимание на поле идентификатора (это ИД CRX) и номер версии. Эти сведения потребуются позже
На следующем снимке экрана показано тестовое расширение с его ИД CRX.
Отправьте CRX-файл на узел и обратите внимание на URL-адрес расположения, из которого он будет скачан
Эти сведения необходимы для XML-файла манифеста.
Чтобы создать XML-файл манифеста с ИД приложения или расширения, URL-адресом загрузки и версией, определите следующие поля:
appid — ИД расширения из шага 5
codebase — расположение скачанного файла CRX из шага 6
версия — версия приложения или расширения, которая должна соответствовать версии, указанной в манифесте расширения.
В следующем фрагменте кода показан пример XML-файла манифеста.
Дополнительные сведения см. в статье Автоматическое обновление расширений в Microsoft Edge — Разработка Microsoft Edge.
Добавьте готовый XML-файл в папку, из которой его можно скачать, с помощью URL-адреса. Этот URL-адрес потребуется при установке расширения с помощью групповой политики. См. статью .
Важно!
Расположение размещения расширения не требует проверки подлинности. Оно должно быть доступно на устройствах пользователей, где бы они ни использовались.
Import Chrome Extensions to Microsoft Edge
If you can’t find an extension on the Chrome Web Store or if you want to install a particular version of an extension that you’ve got on Chrome, you’ll need to follow these steps to install the extensions from your computer:
Step 1: In the Microsoft Edge Extensions settings, turn on Developer mode by clicking on the toggle.


Step 2: Now, to locate the directory where your extensions are installed, open up a new tab in Chrome, enter chrome://version in the address bar and press enter.


Step 3: The Profile Path listed in the version page is where all your Chrome extensions are installed. Navigate to that directory, and in case you don’t find the App Data folder, make sure you turn on the Show hidden files setting.


Step 4: Head back to Edge and in the Extension settings click on the Load unpacked button.


Step 5: Enter the Profile Path in the dialog box and select the Extension you wish to install from the folder. The extensions in the folder can be identified using their extension ID.


Step 6: To find the ID of a particular extension, open up the Extensions setting on Chrome and turn on the developer options. Now click on the Details button of the extension you wish to install.


Step 7: The Extension ID is listed in the following page under the ID section.


Step 8: Now that you know the ID of the extension you wish to install head back to Edge, open up the extension folder and select the first folder inside. Then click on Select Folder.


That’s it. If you follow all the steps carefully, the extension should install in an instant. Since this is such a lengthy process, I’d recommend you to use it only if you aren’t able to find a particular extension on the Chrome Web Store.


Now that you’ve got all your Chrome extension on Edge, I’m sure it’ll be easier for you to switch to the new browser. Microsoft is expected to roll out a more stable beta build of the browser sometime soon, and I’m definitely looking forward to it. I just hope the company adds an easier way to import extensions from Chrome for those of us who have too many extensions installed.
TreeClicks
TreeClicks – это бесплатное расширение для Microsoft Edge, которое сажает дерево всякий раз, когда вы покупаете его у их продавцов. Их торговцев более 50 000.
Используя это расширение, вы не только сможете совершать ценные покупки, но и внести свой вклад в доброе дело. Беспроигрышный вариант, правда?
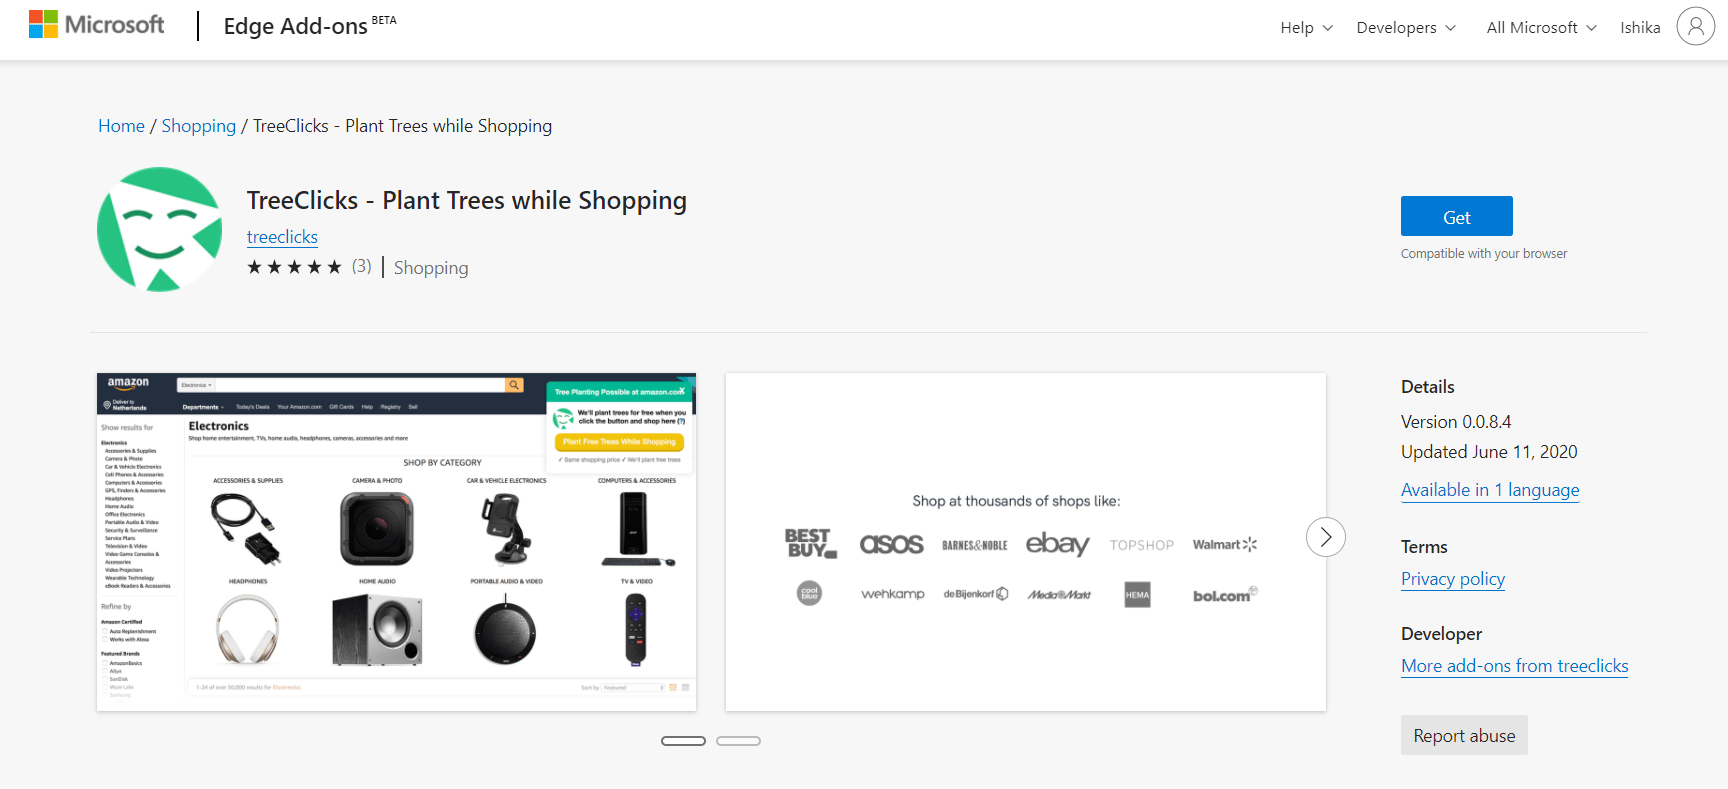
Некоторые из важных функций TreeClicks:
- Цена на все товары остается прежней. Никаких скрытых затрат.
- Посадка деревьев предлагается бесплатно.
- Также есть тележка для покупок и другие функции, которые упростят процесс покупок.
- Он также предоставляет другие услуги SEO.
У него есть множество преимуществ, но он может часто отставать а также показать старые цены. Обновление расширения все еще продолжается. Тем не менее, используя это расширение, вы всегда вносите свой вклад в развитие чего-то хорошего.
Тревожная кнопка
Играете в игры или смотрите видео, притворяясь, что работаете / учеба? Ты не одинок. Всем нам время от времени нужен перерыв, но это непростой аргумент перед родителями / начальством. Введите расширение Panic Button. Он сразу скроет все ваши открытые вкладки одним щелчком мыши, и никто никогда не узнает, что вы были в Twitter.


Он работает как менеджер вкладок, помещая в закладки все открытые вкладки во временной папке, которую вы можете восстановить или удалить. Прост в использовании и очень эффективен. Справедливое предупреждение. Каждый раз, когда вы страдаете панической атакой, нажимайте большую красную кнопку. Затем он перенаправит вас на страницу HideMyAss VPN.
Social & Entertainment
Chrome Equivalent: Reddit Enhancement Suite
Reddit is a popular destination for news, humor, and communities built around specific topics. It’s a great site on its own, but it becomes so much better with the Reddit Enhancement Suite (RES). With inline image viewing, never-ending pages, and color-coded usernames, this is an absolute must-have for anyone who uses Reddit.
Winner: Tie.
Moderator toolbox for reddit
Chrome Equivalent: Moderator toolbox for reddit
We mentioned earlier that the Reddit Enhancement Suite is a must-have for all Reddit regulars. This extension is for those who serve as moderators for one of the site’s many subreddits. Moderators are in charge of removing posts that violate the rules and monitoring the sub’s health. If you’re a mod, this suite of tools helps you perform your job more easily. Those who just browse Reddit won’t need this, though.
Winner: Tie.
Pinterest Save Button
Chrome Equivalent: Pinterest Save Button
A basic extension for Pinterest users that allows you to save a website, recipe, or other content into your Pinterest account. It’s not a vital tool by any means, as you use Pinterest’s bookmarklet for the same function, and it’s lighter on resources. Many websites also have a Pinterest social button you can use too. But if you’re a Pinterest fanatic, this is worth keeping around.
Winner: Tie.
Enhancer for YouTube for Microsoft Edge
Chrome Equivalent: Enhancer for YouTube
YouTube is great, but with some tweaks it gets even better. This extension lets you customize the service to your liking. Disabling autoplay, loading videos at a certain quality, and pinning the video to your screen while scrolling are all supported. Anyone who uses YouTube often should play around with this to remove some of its annoyances.
Winner: Tie.
CR-Unblocker
Chrome Equivalent: CR-Unblocker
Crunchyroll is an anime streaming website where you can watch hundreds of shows, either free with ads or via a paid subscription. Some of its content is only available in the USA. If you’re outside America, this extension fools the site into thinking that you’re in the US so you can access more shows.
Winner: Tie.