Google sketchup pro 2020 20.1.229
Содержание:
- Creating your first 3D model in SketchUp
- Что такое SketchUp Layout
- Аналоги Google SketchUp
- Файл «core.rb»
- Версия Pro
- ИСКЛЮЧЕНИЯ И ОГРАНИЧЕНИЯ
- Limitation of Liability
- ОГРАНИЧЕНИЕ ОТВЕТСТВЕННОСТИ
- Установка SketchUp в первый раз или установка новой основной версии
- Models
- Просмотр Quick Reference Card SketchUp
- Selecting a template
- Confidential Information
- EXPORT RESTRICTIONS
- Saving files
- Term and Termination
- Institution Obligations
- SketchUp 2017 Скачайте Русскую версию для Windows
- SketchUp 2017
- ВОЗМЕЩЕНИЕ УЩЕРБА
Creating your first 3D model in SketchUp
If you’ve never created a 3D model in SketchUp (or any other modeling program), the following steps offer a quick overview the basics:
- Select the person, context-click the selection, and select Erase in the context menu that appears.
- In the Getting Started toolbar, select the Rectangle tool ().
- On the ground plane, in the space between the red and green axis, click the Rectangle tool cursor (). Then move your cursor to the right and click again. A rectangle appears on the ground, as shown here.
- On the Getting Started toolbar, select the Push/Pull tool (), and place the Push/Pull cursor over the rectangle you just created, as shown in the following figure.
- Click and drag your rectangle up into a 3D shape. Keep an eye on the Measurements box and release the cursor when your shape is about 5 feet tall.
- Without clicking or selecting anything, simply type 6’ and press Enter. Notice how the height of your shape changed to exactly 6 feet tall, and the value you entered appears in the Measurements box.
- In the Getting Started toolbar, select the Orbit tool (). Place the Orbit cursor above your shape. Then click and hold while you move the mouse down. Notice how the view of your shape changes, as shown in the following figure. Practice clicking and dragging with the Orbit tool as much as you like. It’s a pretty fun tool!
- In the Getting Started toolbar, click the Zoom Extents button (). If you orbit around until you lose track of where you are in your model, the Zoom Extents button is a handy way to reorient yourself.
- If you have a scroll-wheel mouse, scroll down to zoom out a bit. Working in SketchUp is much easier with a scroll-wheel mouse. However, if your mouse lacks a scroll wheel, click the Zoom tool () and you can zoom in and out that way, too.
Tip: No matter what tool is selected, holding down the scroll wheel activates the Orbit tool until you release the scroll wheel.
- In the Getting Started toolbar, click the Paint Bucket tool ().
- In the Materials panel that appears, select Colors from the drop-down menu, as shown here. Then select a color from the options that appear on the Select tab.
- Click one side of your model with the Paint Bucket cursor to apply your selected color. Experiment a bit with the different options in the drop-down menu if you like. For example, select Landscaping, Fencing, and Vegetation from the drop-down menu and apply pebbles to your model. Select Tile from the drop-down menu and apply a tile pattern that you like. Orbit around and apply different materials to each side of your model, as shown here.
- Close the Materials panel and select Window > Styles.
- Close the Materials panel and select Window > Styles, which appear in the Default Tray.
- From the drop-down menu, select Sketchy Edges and then select a style option. In the following figure, Marker Wide is selected. Notice that the style completely overrides all the materials and colors applied. To see them again, select In Model from the drop-down menu and then select the Simple Style option.
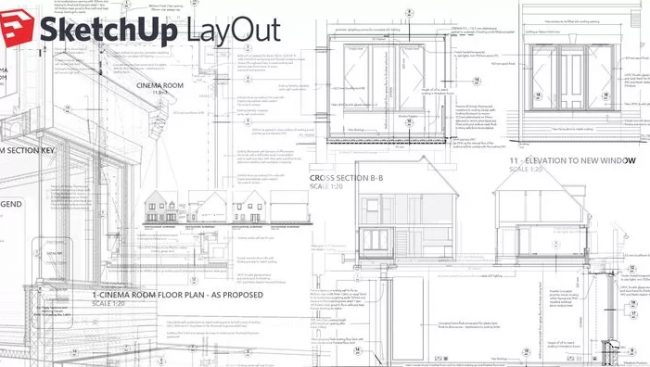
Что такое SketchUp Layout
Модификация Layout позволяет составлять конструкторскую (ЕСКД) и проектную (СПДС) документацию. Здесь можно оформить краткое резюме проекта, отразив тем самым намерения и подробности: используемые материалы, размеры модулей, назначения и другие ключевые для подрядчика сведения.
SketchUp Layout позволяет объяснить какие-то сложные элементы, а также представить работу в реальном масштабе. При этом визуализация происходит на одной странице. Под каждым чертежом можно поставить свою оригинальную подпись, выбрав её из многочисленных шаблонов профессиональных штампов.
Если требуется изменить размеры, нанесённые метки или геометрию, то с помощью SketchUp Layout это можно сделать в два клика. Одним словом, это дополнение для профессиональных конструкторов и проектировщиков.
Аналоги Google SketchUp
SketchUp считается простым редактором для работы с 3D и 2D моделями. Его функционала вполне достаточно для выполнения самых необходимых действий. Поэтому он подходит не только для любительского, но и профессионального редактирования.
Как и у любой другой программу, у SketchUp есть свои аналоги, к которым относятся такие приложения, как:
- Blender
- AutoCAD
- ArchiCAD
- K-3D
- Art of Illusion
- Zmodeler
Каждый из них имеет свои особенности и недостатки, поэтому подходит для создания предметов интерьера, моделирования игровых персонажей и их последующего внедрения или других целей. Все они имеют схожий между собой функционал и могут частично или полноценно заменить друг друга.
В отличие от них, SketchUp Pro поставляется сразу с дополнительными компонентами Style Builder и LayOut, которые позволяют осуществлять более реалистичную визуализацию созданных моделей, проектов, а также позволяют работать с документацией (чертежи).
Плагины для Google SketchUp Программа проектирования имеет много встроенных компонентов, к примеру, в ней есть библиотека, в которой имеется мебель, текстура материалов и многое другое. Но имеются и независимо компилируемые программные модули, которые динамическим образом подключаются к главной программе и предназначены для того, чтобы расширить ее возможности либо плагины.
Эти уроки очень полезны для тех, кто хочет создать у себя на дачном участке красивый дизайн или можно спроектировать интерьер дома. Рассмотрим основные плагины для программы Google SketchUp pro: V-Ray дает возможность демонстрировать 3d элементы модели; Make Faces может облегчить работу с чертежом и схемой, которые можно импортировать из AutoCAD; Pen Tool+ осуществляет работу в качестве дополнения к инструментам Перо и так далее.
Имеются также плагины, помогающие демонстрировать 3d модели, увеличивают некоторые инструменты, ими можно усовершенствовать анимации, экспортировать в определенный формат некоторые проекты. Плагины можно скачивать и free – свободно. Как применять какой-то из плагинов, можно взглянуть в онлайн-уроки.
Файл «core.rb»
Каждая функция возвращает объект Shasoft::Object3D::Object3D который содержит методы для перемещения объекта и его поворота
-
Функция name() — установка имени объекта. Не стоит им пренебрегать. При сборке может сильно помочь 🙂
-
Функции объекта moveX, moveY, moveZ позволяют перемещать объект по соответствующим осям.
-
Функция move(x,y,z) позволяет переместить объект сразу по трем осям
-
Функции объекта rotateX, rotateY, rotateZ позволяют вращать объект вокруг соответствующих осей.
-
Есть функции псевдонимы moveRed, moveGreen, moveBlue, rotateRed, rotateGreen, rotateBlue где оси X(red), Y(green), Z(blue) названы по их цвету в SketchUp. Может кому-то так будет удобнее.
Каждая функция возвращает указатель на сам обхект. Это позволяет делать цепочку вызовов -
Функция объекта set(dict,key,value) позволяет установить значение атрибута. dict — имя словаря, key — имя атрибута, value — значение
-
Функция объекта get(dict,key,value=nil) позволяет получить значение атрибута. dict — имя словаря, key — имя атрибута, value — значение
-
Метод copy позволяет получить копию объекта (хотя работает не очень стабильно :))
-
Метод group позволяет получить стандартный объект SketchUp::Group
Определен метод для создания объекта. В качестве параметров можно передавать список объектов Shasoft::Object3D::Object3D или SketchUp::Group. Если список параметров пустой, то будет создана новая группа
Также есть функция которая позволяет получить список объектов (Skechup::Group). Можно задать имя словаря и будут возвращены только объекты, у которых такой словарь присутствует. В частности именно так я отделяю объекты лист ЛДСП от других. При создании я устанавливаю словарь LDSP по которому потом и фильтрую все объекты сцены.
Версия Pro
Это профессиональное решения для выполнения более сложных задач. Годовая подписка на SketchUp Pro обойдётся примерно в 22 000 рублей. Здесь мы имеем полноценный клиент для персонального компьютера. То есть необходимо скачать дистрибутив и установить его в операционную систему.
Помимо неограниченного доступа к готовым 3Д-моделям и облачному хранилищу пользователь получает многочисленные плагины, значительно расширяющие возможности редактора, средства просмотра гарнитуры смешанной реальности, климатический анализ, а также доступ к инструментам для составления проектной документации.
Техподдержка работает оперативнее, чем у Free-модификации, решая вопросы за считанные минуты. Работать с программой можно в любом месте, главное активировать аккаунт на новом оборудовании. Все сохранённые проекты и изменения сохраняются в облачном хранилище.
Проектируем интерьер сами. Sweet Home 3D, FloorPlan 3D, Google SketchUp и IKEA Home Planner
С помощью этой книги вы создадите виртуальный образ своего жилища! Вы можете расклеивать виртуальные обои, менять окна и двери, увидеть, как будет выглядеть ваш дом в том или ином освещении. Экспериментируйте с разными комбинациями мебели, перемещайте предметы по своему усмотрению, пробуйте разные стили.
ИСКЛЮЧЕНИЯ И ОГРАНИЧЕНИЯ
НИКАКАЯ ЧАСТЬ ЭТОГО СОГЛАШЕНИЯ НЕ ПРЕДНАЗНАЧЕНА ДЛЯ ИСКЛЮЧЕНИЯ ИЛИ ОГРАНИЧЕНИЯ КАКИХ-ЛИБО УСЛОВИЙ, ГАРАНТИЙ, ПРАВ ИЛИ ОТВЕТСТВЕННОСТИ, КОТОРЫЕ НЕ МОГУТ БЫТЬ ИСКЛЮЧЕНЫ ИЛИ ОГРАНИЧЕНЫ В СООТВЕТСТВИИ С ЗАКОНОМ. НЕКОТОРЫЕ ЮРИСДИКЦИИ НЕ ДОПУСКАЮТ ИСКЛЮЧЕНИЯ ОПРЕДЕЛЕННЫХ ГАРАНТИЙ ИЛИ УСЛОВИЙ, А ТАКЖЕ ОГРАНИЧЕНИЯ ИЛИ ИСКЛЮЧЕНИЯ ОТВЕТСТВЕННОСТИ ЗА УБЫТКИ ИЛИ УЩЕРБ, ВЫЗВАННЫЕ ХАЛАТНОСТЬЮ, НАРУШЕНИЕМ УСЛОВИЙ КОНТРАКТА ИЛИ ПОДРАЗУМЕВАЕМЫХ УСЛОВИЙ, А ТАКЖЕ ЗА ПОБОЧНЫЙ ИЛИ КОСВЕННЫЙ УЩЕРБ. СООТВЕТСТВЕННО, В ТАКИХ СЛУЧАЯХ К ВАМ БУДУТ ПРИМЕНЯТЬСЯ ТОЛЬКО ТАКИЕ ОГРАНИЧЕНИЯ, ПРИВЕДЕННЫЕ ВЫШЕ В СТАТЬЯХ 11 И 12, КОТОРЫЕ РАЗРЕШЕНЫ ЗАКОНОМ В ВАШЕЙ ЮРИСДИКЦИИ. ОТВЕТСТВЕННОСТЬ КОМПАНИИ GOOGLE БУДЕТ ОГРАНИЧЕНА В ПОЛНОЙ МЕРЕ, РАЗРЕШЕННОЙ ЗАКОНОДАТЕЛЬСТВОМ.
Limitation of Liability
IN NO EVENT SHALL TRIMBLE BE LIABLE FOR ANY LOSS OF USE, LOST OR INACCURATE DATA, FAILURE OF SECURITY MECHANISMS, INTERRUPTION OF BUSINESS, OR ANY INDIRECT, SPECIAL, INCIDENTAL, OR CONSEQUENTIAL DAMAGES OF ANY KIND (INCLUDING LOST PROFITS), REGARDLESS OF THE FORM OF ACTION, WHETHER IN CONTRACT, TORT (INCLUDING NEGLIGENCE), STRICT LIABILITY OR OTHERWISE, EVEN IF INFORMED OF THE POSSIBILITY OF SUCH DAMAGES IN ADVANCE. NOTWITHSTANDING ANY OTHER PROVISION OF THIS AGREEMENT, TRIMBLE’S ENTIRE LIABILITY TO INSTITUTION UNDER THIS AGREEMENT SHALL NOT EXCEED FIVE HUNDRED DOLLARS (USD $500).
ОГРАНИЧЕНИЕ ОТВЕТСТВЕННОСТИ
ВЫ ЯВНО ВЫРАЖАЕТЕ СВОЕ ПОНИМАНИЕ И СОГЛАСИЕ С ТЕМ, ЧТО КОМПАНИЯ GOOGLE НЕ НЕСЕТ ПЕРЕД ВАМИ ОТВЕТСТВЕННОСТИ ЗА КАКОЙ-ЛИБО ПРЯМОЙ, КОСВЕННЫЙ, ПОБОЧНЫЙ И СПЕЦИАЛЬНЫЙ УЩЕРБ, А ТАКЖЕ ШТРАФНЫЕ УБЫТКИ, ВКЛЮЧАЯ, ПОМИМО ПРОЧЕГО, ПОТЕРЮ ПРИБЫЛИ, РЕПУТАЦИИ, ВОЗМОЖНОСТИ ИСПОЛЬЗОВАНИЯ ДАННЫХ И ДРУГИЕ НЕМАТЕРИАЛЬНЫЕ УБЫТКИ (ДАЖЕ ЕСЛИ КОМПАНИЯ GOOGLE БЫЛА ПРЕДУПРЕЖДЕНА О ВОЗМОЖНОСТИ ТАКОГО УЩЕРБА), НАНЕСЕННЫЕ В РЕЗУЛЬТАТЕ (I) ИСПОЛЬЗОВАНИЯ ИЛИ НЕВОЗМОЖНОСТИ ИСПОЛЬЗОВАНИЯ ПРОГРАММНОГО ОБЕСПЕЧЕНИЯ; (II) НЕВОЗМОЖНОСТИ ИСПОЛЬЗОВАНИЯ ПРОГРАММНОГО ОБЕСПЕЧЕНИЯ ДЛЯ ДОСТУПА К СОДЕРЖАНИЮ ИЛИ ДАННЫМ; (III) СТОИМОСТИ ПРИОБРЕТЕНИЯ ЗАМЕНЯЮЩИХ ТОВАРОВ ИЛИ УСЛУГ; (IV) НЕСАНКЦИОНИРОВАННОГО ДОСТУПА, ИЗМЕНЕНИЯ ВАШИХ СООБЩЕНИЙ ИЛИ ДАННЫХ; (V) ДРУГИХ ПРОБЛЕМ, СВЯЗАННЫХ С ПРОГРАММНЫМ ОБЕСПЕЧЕНИЕМ. ПРИВЕДЕННОЕ ВЫШЕ ОГРАНИЧЕНИЕ ПРИМЕНЯЕТСЯ НЕЗАВИСИМО ОТ СООТВЕТСТВИЯ ОГРАНИЧЕННОГО СРЕДСТВА ЗАЩИТЫ ПРАВ СВОЕМУ ОСНОВНОМУ НАЗНАЧЕНИЮ И В ПОЛНОЙ МЕРЕ, РАЗРЕШЕННОЙ ЗАКОНОДАТЕЛЬСТВОМ.
Установка SketchUp в первый раз или установка новой основной версии
После загрузки файла выполните следующие действия для установки SketchUp:
- Войдите в систему с помощью учетная записи с правами администратора.
- Дважды щелкните на установочный файл EXE. Можно также вызвать контекстное меню и выбрать Запустить от имени администратора.
- Щелкните Далее в диалоговом окне приветствия.
- Если вы согласны с условиями, щелкните кнопку Я принимаю условия лицензионного соглашения в лицензионном соглашении.
- Щелкните кнопку Далее, чтобы установить SketchUp в папке по умолчанию.
- Щелкните кнопку Установить, если настройки вас устраивают.
- Щелкните кнопку Готово в окне соответствующего запроса.
Windows 7 и Windows 8: Перед авторизацией не забудьте закрыть SketchUp Pro после его установки. - Запустите SketchUp один раз перед выходом из учетной записи администратора. Если у вас есть лицензия SketchUp Pro, вам необходимо авторизовать ее под учетной записью администратора. См. ссылки ниже для справки по авторизации.
После загрузки файла выполните следующие действия для установки SketchUp.
- Дважды щелкните установочный файл DMG. Будет смонтирован диск установки и откроется окно Finder.
- Щелкните и перетащите приложение в папку «Приложения». Вам будет предложено ввести пароль учетной записи пользователя.
Примечание.
- Лицензию на одного пользователя может использовать только зарегистрированный пользователь.
- Зарегистрированные пользователи могут авторизовать до 2 персональных компьютеров.
Поддержка драйвера видеокарты
Для обеспечения бесперебойной установки и работы SketchUp мы рекомендуем убедиться, что у вас установлен самый свежий драйвер видеокарты. Подробнее об обновлении драйвера видеокарты можно узнать в Справочном центре.
Для обеспечения бесперебойной установки и работы SketchUp мы рекомендуем установить самый свежий драйвер видеокарты. Для этого убедитесь, что у вас установлена самая последняя версия OS X или macOS. Если в настоящий момент вы используете не самую последнюю версию macOS, то мы рекомендуем обновить ее.
Примечание к разрешениям
Для успешной установки и авторизации SketchUp Pro сначала необходимо войти в Windows с правами администратора или опытного пользователя.
Для успешной установки SketchUp Pro на Mac сначала необходимо войти в Mac с правами администратора
Обратите внимание, что во время установки вам также будет предложено ввести имя пользователя и пароль
Подсказка. SketchUp 2019 не устанавливается поверх более ранних версий SketchUp. На одном и том же компьютере можно установить несколько версий SketchUp. Но если вам не нужны более ранние версии, их можно удалить, чтобы не засорять компьютер.
Models
As between the parties, Institution shall retain all right, title and interest (including any and all intellectual property rights) in and to the Models created by Institution using the Service. Subject to the terms of this Agreement, Institution hereby grants to Trimble a non-exclusive, worldwide, royalty-free right to use, copy, transmit, modify, create derivative works of and publicly perform and display the Models solely to the extent necessary to provide the Service to Institution. Institution acknowledges that any Models saved by Users will be stored on the Google Services and will not be stored on the Service.
Просмотр Quick Reference Card SketchUp
Quick Reference Card — это удобное для печати руководство по всем инструментам SketchUp и их клавишам-модификаторам. Держите его под рукой, когда начнете использовать SketchUp, и вы научитесь моделировать быстро и эффективно. Вот как выглядит Quick Reference Card:
Чтобы загрузить Quick Reference Card в формате PDF, щелкните ссылку, соответствующую вашей операционной системе:
- Microsoft Windows
- macOS
- Microsoft Windows
- macOS
- Microsoft Windows
- macOS
- Microsoft Windows
- macOS
- Microsoft Windows
- macOS
- Microsoft Windows
- macOS
Примечание. Ищете Quick Reference Card для LayOut? Щелкните .
Selecting a template
Every model in SketchUp is based on a template, which has predefined settings for your model’s background and units of measurement. When you begin a new model, selecting a template with the correct unit of measurement makes modeling easier.
Here’s how to select a template in the Welcome to SketchUp dialog box:
- On the Files panel, which is selected by default in the left-hand sidebar, select one of the templates shown (such as Architectural Inches or Woodworking Inches).
- (Optional) If you don’t see the template you want, select More Templates in the upper right. You see additional options, as shown in the following figure. The bold text describes the type of work for which the preset was created. The units appear below the style name. After you select a template, the modeling window appears with your selected template applied.
Tip: While you’re working in SketchUp, you can access the Welcome to SketchUp window anytime. On the menu bar, simply select Help > Welcome to SketchUp. After you become comfortable creating 3D models in SketchUp, you can create a custom template that reflects your preferences.
Confidential Information
The parties may disclose to each other information identified at the time of disclosure as confidential or which should be reasonably known by the receiving party to be confidential («Confidential Information»), which may include information concerning their respective businesses and technology. The Service (including the performance characteristics of the Service) and all related documentation are Confidential Information of Trimble. Except as authorized herein, the receiving party will (i) hold in confidence and not disclose any Confidential Information to third parties and (ii) not use Confidential Information for any purpose other than fulfilling its obligations and exercising its rights under this Agreement. The receiving party may disclose Confidential Information to its employees, agents, contractors and other representatives having a need to know (including, for Trimble, the subcontractors referenced in Section 16), provided that such representatives are bound to confidentiality obligations no less protective of the disclosing party than this Section and that the receiving party remains responsible for compliance by any such representative with the terms of this Section. These restrictions on disclosure will not apply to any information that: (a) is or becomes generally known or publicly available through no act or omission of the receiving party; (b) is known by the receiving party without confidentiality restriction at the time of receiving such information, as shown by written records; or (c) is furnished to the receiving party by a third party without confidentiality restriction. The receiving party may make disclosures to the extent required by law or court order, provided the receiving party notifies the disclosing party in advance and cooperates in any effort to obtain confidential treatment. The receiving party acknowledges that disclosure of Confidential Information would cause substantial harm for which damages alone would not be a sufficient remedy, and therefore that upon any such disclosure by the receiving party the disclosing party will be entitled to seek appropriate equitable relief in addition to whatever other remedies it might have at law.
EXPORT RESTRICTIONS
The Software may be subject to export controls or restrictions by the United States or other countries or territories. You agree to (i) comply with the requirements of the U.S. Department of Commerce (DOC) Export Administration Regulations (EAR) (see http://www.bis.doc.gov) and all applicable international, national, state, regional and local laws, and regulations, including without limitation any applicable import and use restrictions, (ii) not export, or re-export, directly or indirectly, the Software to any country outlined in the EAR, nor to any person or entity on the DOC Denied Persons, Entities and Unverified Lists, the U.S. Department of State’s Debarred List, or on the U.S. Department of Treasury’s lists of Specially Designated Nationals, Specially Designated Narcotics Traffickers, or Specially Designated Terrorists, (iii) not export, or re-export the Software to any military entity not approved under the EAR, or to any other entity for any military purpose, and (iv) not license, sell, provide or distribute the Software for use in connection with chemical, biological, or nuclear weapons or missiles capable of delivering such weapons.
Saving files
After you’ve created a new model, one of the first things you may want to do is save it to Trimble Connect. Follow these steps:
- After creating a new model, click either the ‘Untitled’ file name or the ‘Save’ command in the upper left of your screen. In either case, a Trimble Connect dialog will open.
- In the Trimble Connect dialog, first, choose a Project to save your model in. With a Free subscription, you have access to one project, simply called ‘SketchUp.’ With paid subscriptions, you can create more projects at web.connect.trimble.com. Within a project, you can click the “Add folder” button to organize your work within a project.
- When you’ve picked a location in Trimble Connect, click the Save Here button.
Now, as you continue modeling, SketchUp for Web will auto-save your model every few minutes. You can also trigger a manual save by clicking the Save command in the top left of your screen. It’s always a good idea to do a manual save before closing SketchUp.
A Free subscription includes access to both SketchUp for Web and Trimble Connect Personal, a free service that provides you with one project folder, 10 GB of file storage to put in that project, and the ability to invite up to 5 people to collaborate in your project. Paid SketchUp subscribers are upgraded to Trimble Connect Business which offers unlimited storage, projects, and collaborators.
Term and Termination
This Agreement is effective as of the Effective Date and expires on the date of termination. Either party may terminate this agreement, for any reason or no reason, immediately upon written notice to the other party. Upon any expiration or termination of this Agreement, Institution shall immediately cease any and all use of and access to the Service (including any and all related Trimble Technology) and delete (or, at Trimble’s request, return) any and all copies of the Service documentation and any other Trimble Confidential Information in its possession. Except where an exclusive remedy is specified, the exercise of either party of any remedy under this Agreement, including termination, will be without prejudice to any other remedies it may have under this Agreement, by law or otherwise. This Section 10 and Sections 2 (General Restrictions), 3.3 (Google Services Disclaimer), 6 (Institution Obligations), 8 (Confidential Information), 9 (Intellectual Property Rights), 11 (Disclaimers), 12 (Limitation of Liability), 13 (Institution Indemnity), 14 (Export Control), 15 (Governing Law; Dispute Resolution) and 16 (General) will survive any expiration or termination of this Agreement.
Institution Obligations
Institution shall ensure that Institution’s use of the Service and all Models are at all times compliant with Institution’s privacy policies, and all applicable local, state, federal and international laws, regulations and conventions, including, without limitation, those related to data privacy, data transfer, international communications and the exportation of technical or personal data. Institution is solely responsible for the accuracy, content and legality of all Models. Institution represents and warrants to Trimble that Institution has sufficient rights in the Models to grant the rights granted to Trimble in Section 4 (Models) above and the Models do not infringe or violate the intellectual property, publicity, privacy or other rights of any third party.
In addition, Institution specifically agrees not to submit to the Service any data or information other than Models, including without limitation any patient, medical or other protected health information regulated by HIPAA or any similar federal or state laws, rules or regulations («Health Information») or any other personally-identifiable information. Institution acknowledges that Trimble is not a Business Associate or subcontractor (as those terms are defined in HIPAA) and that the Service are not HIPAA compliant. «HIPAA» means the Health Insurance Portability and Accountability Act, as amended and supplemented. Trimble shall have no liability under this Agreement for Health Information or any other personally-identifiable information, notwithstanding anything to the contrary herein.
SketchUp 2017 Скачайте Русскую версию для Windows
| Версия SketchUp | ОС | Язык | Размер | Тип файла | Загрузка |
|---|---|---|---|---|---|
|
SketchUp 2017 |
Windows | Русский |
147.57mb |
exe |
Скачать |
|
SketchUp 2019 |
Windows | Русский |
199mb |
exe |
Скачать |
|
SketchUp 2019 Pro |
Windows | Русский |
222mb |
zip |
Скачать |
|
Crack для SketchUp pro 2017 |
Windows | Русский |
15.55mb |
zip |
Скачать |
|
SketchUp 2018 Pro |
Windows | English |
312mb |
zip |
Скачать |
|
SketchUp pro 2017 |
Windows | Русский |
147.57mb |
exe |
Скачать |
|
SketchUp 8 |
Windows | Русский |
69.55mb |
zip |
Скачать |
SketchUp 2017
SketchUp — программное обеспечение, предназначенное для создания несложных 3D моделей.
Отличается простотой использования, так как почти все действия можно выполнять с помощью простого перетаскивания плоскостей мышью. Чаще всего используется в построении интерьера и дизайна помещений, ландшафтного дизайна и для моделирования застройки в условиях города.
Общая информация о программе
Приложение позволяет создавать несложные, с небольшим количеством мелких деталей, трехмерные модели. В SketchUp присутствует подробная документация и описание возможностей, что значительно упрощает первоначальные шаги в работе. Созданные модели можно экспортировать в различные форматы — очень удобно при работе над совместными проектами.
Программа не требует специфических знаний и нацелена на рядового пользователя. Это выражается в том, что ней не нужна предварительная настройка, а все характеристики задаются прямо во время работы в режиме реального времени.
Функциональные возможности SketchUp
Программа позволяет создавать 3D-композиции, состоящие из несложных моделей. Большинство из них можно создать с помощью мыши, даже не заходя в настройки программы — все необходимые параметры задаются непосредственно в окне проекта, а для разметки размеров можно использовать обычную метрическую систему.
Функционала SketchUp достаточно для большинства бытовых решений. Кроме этого, в программе есть возможность подключать и использовать сторонние плагины, а также работать с библиотекой, в которую можно загружать уже готовые элементы моделей — как свои, так и скачанные из сети. Также в программе доступны:
- работа с макросами и автоматизация действий;
- компонентная разработка моделей — позволяет сохранять и использовать их в других проектах;
- большое количество сторонних плагинов, значительно расширяющих функционал;
- обзор готовой модели в разрезе и от третьего лица.
Поддерживается создание активных элементов конструкции — окна, двери, выдвижные ящики и так далее — они активируются по щелчку мыши. Ко всем деталям есть возможность прикреплять сноски с информацией.
ВОЗМЕЩЕНИЕ УЩЕРБА
Вы соглашаетесь не причинять ущерба компании Google и возместить ей и ее дочерним предприятиям, филиалам, руководству, агентам и сотрудникам любой ущерб, вызванный иском, судебным процессом или разбирательством в результате вашего использования Программного обеспечения или в связи с ним или с нарушением вами этих Положений и условий, включая любую ответственность или расходы, понесенные в результате исков, убытков, ущерба, судебных процессов и решений, а также судебные издержки и расходы на все виды услуг юриста. В этом случае компания Google предоставит вам письменное уведомление о таком иске, судебном процессе или разбирательстве.