Что за программа keepass password safe, как ее скачать на компьютер и начать пользоваться?
Содержание:
- In conclusion
- Where can I find more application icons for Windows shortcuts?
- Отключение автозагрузки базы
- User Opinions
- Управление паролями и их использование
- KeePass / Password Management / Security
- Генератор паролей
- Plugin Installation and Uninstallation
- Starting KeePass using a Batch File
- Как русифицировать KeePass
- Plugin Cache
- Changes from 2.46 to 2.47:
- FAQ
- Internet Explorer и Microsoft Edge
- Где хранить пароли?
- Подключаем базу паролей к смартфону
- Database Encryption
- Создание, редактирование, удаление записи
- Printing creates a temporary file. Will it be erased securely?
- Преимущества
- Installer program (KeePass-2.xx-Setup.exe file)
- Key Hashing and Key Derivation
In conclusion
Whether you use KeePass to simplify your everyday life, no longer needing to scribble down passwords on random scraps of paper, or you utilise it to increase the security of your access codes, these two areas are major advantages you can enjoy with this software.
The ever-increasing community behind the KeePass open source project are deserving of praise, with their commitment and passion the reason why it’s the most popular encrypted password manager solution out there today.
This popularity has only been made possible by the efforts of this dedicated community who have helped evolve this innovative software over the years.
You can find KeePass in both its Portable and Classic versions for Windows, MacOS X, Linux, BSD and many more operating systems. For porting to other platforms, forks and KeePass plugins, consult the guide for the way to go.
Where can I find more application icons for Windows shortcuts?
|
Application icons are icons in Windows ICO format. They can be used in Windows shortcuts and/or as file association icons. The KeePass executable contains various application icons which can be used for these purposes. Additional application icons are available from the «» directories of the KeePass source code package. Most of them, shown at right, are slight variations of the main KeePass icon. Even more, contributed icons (by users) can be found on the . If you have multiple KeePass databases, you can use differently colored KeePass application icons in order to distinguish them. These icons are not included in the binary distribution because this would make the application file too large. |
Отключение автозагрузки базы
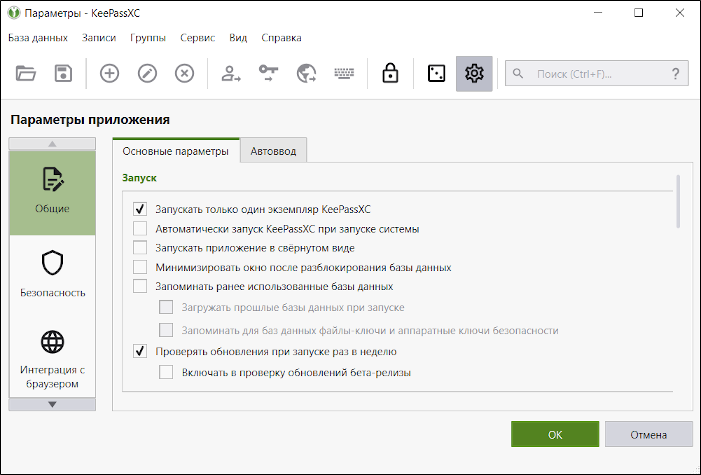
Нажмите на панели инструментов 11-ю кнопку (со значком шестерёнки) для перехода в настройки программы KeePassXC.
Обратите внимание на пункты:
- Запоминать ранее использованные базы данных
- Загружать прошлые базы данных при запуске
- Запоминать для баз данных файлы-ключи и аппаратные ключи безопасности
Весьма удобно, если программа при запуске находит базу и предлагает ввести пароль. Но это не всегда хорошо с точки зрения безопасности. Возможно, вы не захотите, чтобы злоумышленник запустил KeePassXC и немедленно обнаружил, в каком файле вы храните свои пароли. Тогда снимите галочку из пункта «Запоминать ранее использованные базы данных» (в двух других пунктах галочки исчезнут автоматически).
User Opinions
Jeb54321 in the KeePass forums:KeePass gives me a sense of security I haven’t found in any other product
(2 page long comment).
Erez Zukerman in his article
‘Review: KeePass makes strong passwords and keeps them safe’:If you adopt just one security tool this year, make it KeePass.
This free and open-source password manager is available for Windows, with unofficial
ports for iOS, Android, Linux, and Mac OS X. A secure, lengthy, completely random
password goes a long way towards improving your security — and having a separate password
for each and every website and service you use is the single most important thing
you can do to keep secure.
KeePass has been recommended in an article by
security.itworld.com:One password vault that is receiving quite a bit of attention
and has been getting good reviews is «KeePass». KeePass is an open
source password vault for Windows. It appears to be developed
with attention to security and features some very useful functions,
such as cut and pasting of passwords with a clipboard wipe after
a few moments, strong encryption and the ability to access password
databases stored on network servers instead of local hard disks.
If this technology interests you, KeePass might be a good place
to start looking.
Nicholas at SnapFiles.com in his review
‘Private fort knox’:Yes! This is the one! After trying a few other (awkward) password
keepers I discovered KeePass and found out quickly that this program
is useful, reliable, user friendly and very safe. It reveals passwords
and other secrets only for a very short time on the clipboard, just
long enough to paste it into a waiting password field. From now on I
never have to click buttons with texts like: Forget Password? Very
valuable and free!
NothinsEasy at SnapFiles.com in his review
‘Excellent security tool’:KeePass ranks with the best freeware software and surpasses many commercial
products. I’ve evaluated software and security for many years, and one truth is,
that any effective security effort reduces convenience. Passwords are so
inconvenient that we are all tempted to use and reuse passwords that are «weak»,
duplicate and virtually useless. Today’s hacking and identity theft events
should be enough to encourage most to try a product like KeePass. The only
sensible way to start is to read over the comprehensive KeePass documentation
and try to learn enough so that the methods that you choose to create, organize
and use numerous passwords are consistent with, and exploit KeePass features.
This chore should be less unpleasant since KeePass is a well documented,
well designed, apparently reliable product.
Chameleon Web Services:KeePass is our number 1 choice of password safe software as the features
that it offers, coupled with the fact that it is a free open source application,
give us complete satisfaction and peace of mind.
Note: most of the images above are copyrighted by the linked sites.
The author of the KeePass website (including this page) is not responsible for the
contents of the linked pages; visit on your own risk.
Управление паролями и их использование
Управление паролями
После того, как вы создали или открыли базу данных, вы можете вводить новые пароли и легко переносить их в поля входа на веб-сайты или в другие приложения.
Для лучшего структурирования все данные доступа организованы в группы. Чтобы создать новую новую запись пароля, сначала переключитесь на одну из предопределенных групп. Или создайте новую группу. Нажмите значок «плюс» в нижнем правом углу, а затем на папку. Введите имя и подтвердите ввод с помощью «Ok».
Переключитесь на соответствующую группу, нажав имя группы. Затем выберите последовательно знак плюса и ключ, чтобы ввести новый пароль. В зависимости от типа ввода доступны различные шаблоны. Например, существуют настраиваемые формы для адресов электронной почты, кредитных карт или сетей Wi-Fi. Для обычной записи с именем пользователя и паролем используйте «запись по умолчанию».
Введите как минимум имя пользователя и пароль. Для веб-сайтов рекомендуется также указать URL-адрес. Сохраните запись, нажав на значок дискеты в верхней части окна.
Если вы теперь хотите использовать сохраненный пароль, то имя пользователя и пароль должны вставляться один за другим через буфер обмена в соответствующую форму входа. Откройте требуемую запись в Keepass2Android. Затем коснитесь трех точек после имени пользователя и выберите «Копировать в буфер обмена». Перейдите в приложение, где вам нужно ввести данные и вставить имя пользователя из буфера обмена в правильное поле
Затем вернитесь к управлению паролями и повторите процедуру для пароля.
Важно. Буфер обмена через определенные промежутки времени очищается Keepass2Android по соображениям безопасности
Это предотвращает использование кешированных данных другими процессами. Кроме того, приложение блокируется, если оно не использовалось в течение определенного времени. Вы можете самостоятельно отрегулировать периоды времени. Для этого перейдите в меню настроек «Keepass2Android» и перейдите в раздел «Безопасность». Здесь вы можете установить значения для блокировки буфера обмена и время отключенияприложения.
 Для того, чтобы управлять своими паролями на ПК, вам понадобится версия KeePass под Windows.
- Как не потерять пароли, фотки и прочие данные при продаже iPhone или iPad
- Выбираем лучший менеджер паролей
Фото: компании-производители
KeePass / Password Management / Security
KeePass and Password Management:
-
BSI Cyber Security Recommendations BSI-CS 003 2.0
Recommendations by the German Federal Office for Information Security
(Bundesamt für Sicherheit in der Informationstechnik),
in which KeePass is the recommended password manager. -
KeePass: So speichern Sie Ihre Passwörter sicher auf Ihrem PC
KeePass is recommended by the Swiss Federal Office of Information
Technology, Systems and Telecommunication (FOITT/BIT) and the
Federal IT Steering Unit (FITSU/ISB).
It is installed by default on all PCs of the federal administration of Switzerland. -
Certification de Sécurité de Premier Niveau (CSPN)
KeePass has received the CSPN
by the French Network and Information Security Agency
(Agence Nationale de la Sécurité des Systèmes d’Information, ANSSI). - Recommended free software for the public sector (French)List of the French Etalab (public administration), which includes KeePass.
- HP: The Do’s and Don’ts of Password ManagementAn article by HP about password management, recommending KeePass.
-
BBC: Heartbleed bug — What you need to knowKeePass is mentioned in the section ‘How do I make sure my password is robust?’
of a BBC article about the Heartbleed bug.
Генератор паролей
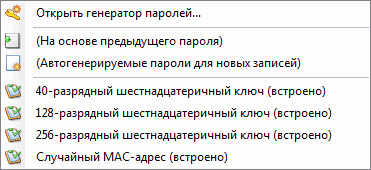
Под «звездочками» находится кнопка «Генерация пароля». После нажатия на левую кнопку мыши, будет открыто контекстное меню для входа в генератор паролей, или для создания ключа соответствующего типа.
В окне «Генератор паролей» вы можете настроить пароль необходимой сложности и надежности.
Во вкладке «Настройки» необходимо будет выбрать профиль для создания пароля:
- «Пользовательский» — вы сами выбираете настройки для пароля.
- «На основе предыдущего пароля» — новый пароль будет сгенерирован по настройкам для предыдущего пароля.
- «Автогенерируемые пароли для новых записей» — программа сама будет генерировать пароли по заданным параметрам.
- «40-разрядный шестнадцатеричный ключ (встроено)» — программа будет генерировать ключ данного типа.
- «128-разрядный шестнадцатеричный ключ (встроено)» — будет сгенерирован ключ данного параметра.
- «256-разрядный шестнадцатеричный ключ (встроено)» — будет создан ключ, отвечающий таким требованиям.
- «Случайный MAC-адрес (встроено)» — созданный ключ будет иметь соответствующий вид.
Вы можете выбрать длину генерируемого пароля. Для большей безопасности пароля можно будет выбрать дополнительные наборы символов. После завершения настройки нажмите на кнопку «ОК».
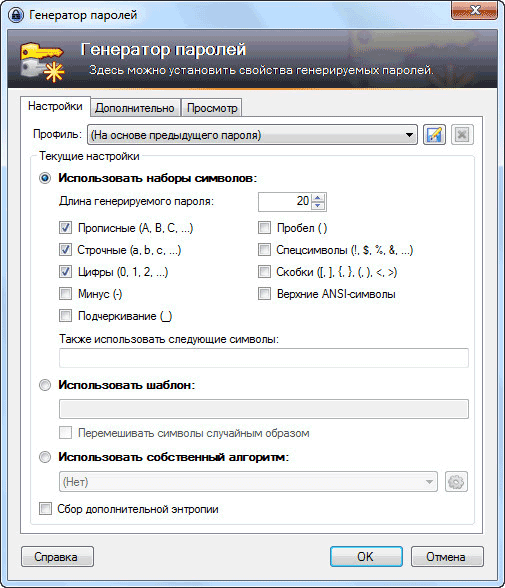
По стандартам шифрования в США, при параметре ключа в 128 бит, обычно ставится гриф «секретно», а при использовании 256 битного ключа — «совершенно секретно».
Во вкладке «Дополнительно» можно будет ввести дополнительные настройки. Во вкладке «Просмотр» вы можете увидеть примеры паролей, созданных по правилам двух первых вкладок. Из этой вкладки вы можете скопировать пароли для замены уже существующих ваших паролей. Естественно, сначала необходимо будет поменять пароли на соответствующих сервисах, а потом уже сохранить изменения в программе KeePass.
Созданная запись будет находиться в соответствующей группе. При необходимости, вы можете добавлять в эту группу другие записи, или перемещать записи в другие группы.
После закрытия окна программы будет открыто окно, в котором вам предложат сохранить все изменения в базе паролей. Для сохранения изменений нажмите на кнопку «Сохранить», а перед этим активируйте пункт «Автоматически сохранять при закрытии/ блокировке базы паролей». После активации этого пункта данное окно больше не будет появляться, а все изменения в базе паролей будут сохраняться автоматически.

Это сделано для того, чтобы не потерять изменения, которые вы по каким-либо причинам забыли сохранить. После закрытия программы все изменения в базе данных будут сохранены.
Plugin Installation and Uninstallation
If there are no explicit instructions how to install the plugin,
follow these steps:
- Download the plugin from the page above and unpack the ZIP file to a
new folder. - In KeePass, click ‘Tools’ → ‘Plugins’ → button
‘Open Folder’; KeePass now opens a folder called ‘Plugins’.
Move the new folder (containing the plugin files) into the ‘Plugins’ folder. - Restart KeePass in order to load the new plugin.
To uninstall a plugin, delete the plugin files.
Linux:
On some Linux systems, the package may be
required for plugins to work properly.
Portability:
PLGX plugins are compiled by KeePass and the generated files are stored
in a , which by default is located in the
user’s application data directory (so, running a PLGX plugin by default
creates files outside the KeePass application directory).
These plugin cache files do not need to be copied to other systems though,
because they are generated on each system and do not contain any user data.
Starting KeePass using a Batch File
Batch files can be used to start KeePass. Mostly you want to
specify some of the parameters listed above. You can theoretically
simply put the command line (i.e. application path and parameters)
into the batch file, but this is not recommended as the command
window will stay open until KeePass is closed. The following
method is recommended instead:
START "" KeePass.exe ..\MyDb.kdbx -pw:MySecretPw
This command will run KeePass (which opens the
file using
as password). KeePass is assumed to be in the same
directory (working directory) as the batch file, otherwise you need to
specify a different path.
executes the given command line and immediately exits,
i.e. it doesn’t wait until the application is terminated. Consequently,
the command window will disappear after KeePass has been started.
Please note the two quotes () after the
command. These quotes
are required if the application path contains quotes (in the example
above, the quotes could also be removed).
If you want to learn more about the command syntax, type
into the command window.
Как русифицировать KeePass
Перейдите на страницу переводов https://keepass.info/translations.html и скачайте файл с русским языком.
Распакуйте оба архива. Языковой файл поместите в папку Languages.
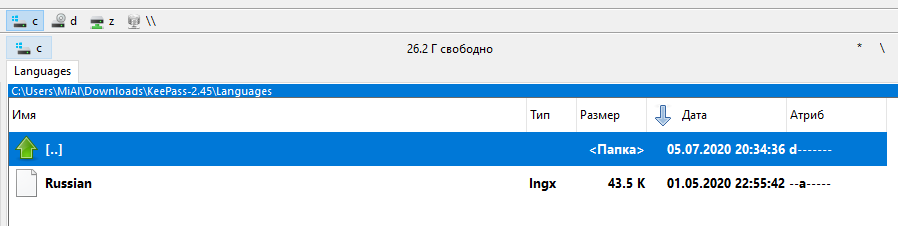
Запустите файл KeePass.exe.
При первом запуске программа спросит, хотим ли мы включить функцию автоматической проверки новых версий. Если вы её включите (Enabled (recommended)), то программа будет проверять выход новых версий. Это удобно, но не всем нравится, когда программа для хранения паролей автоматически выходит в Интернет — поэтому выберите на своё усмотрение.
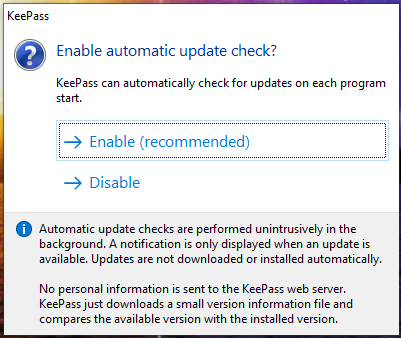
В любом случае, вы можете в дальнейшем изменить эту настройку.
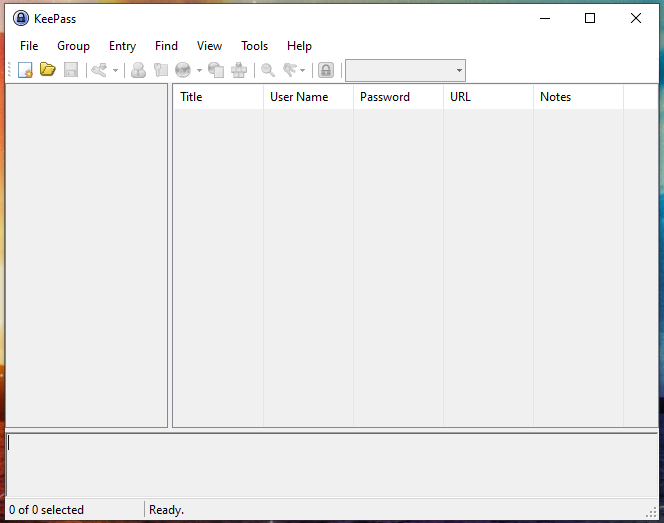
Чтобы русифицировать KeePass перейдите в меню «View» → «Change Language…»:

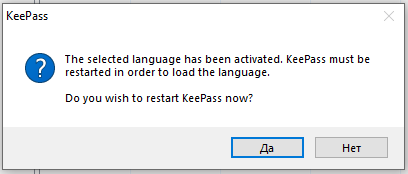
Выберите русский язык:

Программа предложит перезапуститься, чтобы изменился язык интерфейса на русский:
Plugin Cache
PLGX plugins are compiled and stored in a plugin cache directory on the
user’s system. This cache highly improves the startup performance of KeePass.
Old files are normally deleted from the cache
automatically (this can be disabled in the plugins dialog).
The cache does not contain any user data.
By default, the plugin cache is located in the user’s application data
directory. However, this can be overridden using the
setting in the configuration file
(this setting supports placeholders and environment variables).
So, if you’re for example using KeePass on a portable device and don’t want
the cache to be on the system, you could set the path to .
Do not relocate the plugin cache into the ‘Plugins’ folder of the
KeePass application directory, because this can result in a severe
performance degradation.
Changes from 2.46 to 2.47:
New Features:
- In the ‘Find’ dialog, search
parameters can now be saved as
;
the profiles can be accessed quickly via the main
menu (‘Find’ → ‘Search Profiles’) and the group context menu. - Added search mode »
in the ‘Find’ dialog, which creates a KeePass 2.x XML DOM of the current database
in memory and finds entries using the specified XPath
expression. - Added option ‘History’ in the ‘Find’ dialog, which includes
entries in searches. - Added ‘Help’ button in the ‘Find’ dialog.
- Added auto-type
matching option ‘Consider similar dashes as
identical’ (in ‘Tools’ → ‘Options’ → tab ‘Advanced’, turned
on by default). - Added commands ‘Copy Group (Encrypted)’, ‘Copy Group
(Unencrypted)’ and ‘Paste Group’ (in the menu ‘Group’ →
‘Data Exchange’). - When loading/saving a configuration
file fails, an error message is displayed now, and in certain cases a backup of
the configuration file is created (the path is mentioned in
the error message). - Added configuration option for saving the configuration
(turned on by default). - On the ‘Security’ tab page of the options dialog, two links
have been added, which open help pages for
and
. - Added
placeholder, which generates a time-based
one-time password (as specified in RFC 6238). - Enhanced XML
format (added hash that allows to
verify the integrity of the key; values are now encoded using
hexadecimal characters in order to improve the readability). - Added command ‘Print Key File Backup’ (in ‘File’ → ‘Print’).
- In the dialog that asks whether to print an
,
there is now an option ‘Also print a key file backup’ (on
Windows), if the master key contains a key file. - Added command ‘Create Key File’ (in ‘Tools’ → ‘Advanced
Tools’), which shows a dialog for creating a new key file
(random key) or for recreating a key file from a printed
backup. - Added Argon2id
function. - Added support for importing
Dashlane 6.2039.0 JSON files. - Dashlane and RoboForm import: domains are now mapped to HTTPS
URLs (instead of HTTP URLs). - Added option ‘Use a different master key’ in the
import/export dialog (tab page ‘Options’). - Added option
»
in the import/export dialog (tab page ‘Options’). - Added options ‘Open exported file (with associated
application)’ and ‘Show exported file (with file manager)’ in
the import/export dialog (tab page ‘Options’). - The ‘About’ dialog now shows whether KeePass is currently
running as 32- or application. -
Plugins can now disable/enable
specific Mono workarounds. - Added workaround for Mono URL opening bug.
- Added workaround for Mono HTML document opening bug.
Improvements:
- Improved performance of certain searches.
- Various user interface improvements in the search dialog.
- Improved keyboard shortcut
handling (e.g. Ctrl+Tab
and Ctrl+Shift+Tab
now also work when the
is focused). - The local configuration file is now loaded only if necessary.
- Improved performance of configuration saving.
- Changed default key file extension from ‘key’ to ‘keyx’.
- Most key file dialogs now only show ‘*.keyx’ and ‘*.key’
files by default. - When clicking the key file ‘Browse’ button in the master key
creation dialog and selecting a file that is not an XML key
file, KeePass now asks whether to use the file as key file
anyway. - Improved key file loading/saving error messages.
- Various user interface improvements in the import/export
dialog. - The import/export dialog does not accept relative file paths
anymore. - The import/export dialog now shows an error message when
trying to export to multiple files. - Removed indeterminate progress indicators while displaying
the import/export dialog. - Improved field to standard field mapping function.
- Moved command ‘Empty Recycle Bin’ directly below the ‘Delete
Group’ command. - Moved commands ‘Print Group’ and ‘Export Group’ into the
‘Data Exchange’ popup menu. - Improved quality of some icons.
- Improved
caching. - Improved performance of certain object collection operations.
- History entry UUIDs are now fixed automatically.
- Increased default value of Argon2 memory parameter.
- Improved task dialog parent determination.
- The setup program now installs KeePass into a folder in
‘C:\Program Files’ by default (i.e. without ‘(x86)’ suffix;
this is reasonable, because on a 64-bit operating system,
KeePass runs as 64-bit application). - Upgraded installer.
- Various UI text improvements.
- Various code optimizations.
- Minor other improvements.
Bugfixes:
- Search:
starting with a » are not
treated as anymore. - Fixed a bug that caused KeePass to hang when trying to read a
configuration file that contains certain unsupported nodes.
FAQ
ВОПРОС. Есть ли способ восстановить забытый пароль к базе?
ОТВЕТ. Нет. По соображениям безопасности.
ВОПРОС. А двухфакторную аутенификацию в KeePassXC можно включить?
ОТВЕТ. Да. Например, можно добавить к паролю ключевой файл. Тогда при каждом открытии парольной базы нужно будет не только знать пароль, но и иметь ключевой файл.
ВОПРОС. Можно ли скопировать файл с базой паролей KeePassXC, например, на флешку?
ОТВЕТ. Да. Можно делать копии этого файла
Вообще, создавать резервные копии очень важно. Обязательно делайте это, и лучше чаще (после всех существенных изменений в базе).
ВОПРОС. А на мобильных устройствах это работает?
ОТВЕТ. Да, через сторонние приложения. Вот их полный список. Рекомендуем Keepass2Android для Android, Strongbox – для iOS. Поскольку KeePassXC хранит базу паролей локально, а не в интернете, синхронизировать базы придётся вручную. Например, загрузить заполненную базу с компьютера в «облако», а затем открыть ее из облака на смартфоне.
ВОПРОС. Есть еще программы KeePass и KeePassX. Это то же самое или что-то другое?
ОТВЕТ. KeePass – менеджер паролей для Windows. KeePassX – заброшенный проект, больше не обновляется. Все они совместимы по формату парольной базы. Например, парольная база, созданная в KeePass, может быть открыта и использована в KeePassXC.
ВОПРОС. А программа LastPass – она хуже или лучше? А 1Password? A Roboform? А…
ОТВЕТ. Всё это представители семейства парольных менеджеров. Мы рекомендуем KeePassXC по ряду критериев: функциональность, открытый код, бесплатность, известность, поддержка русского языка и др. Это прекрасный выбор, если вы хотите держать свои пароли под рукой, не доверяя сторонним хранилищам. Если вы предпочитаете облачное хранение паролей (может быть менее безопасно, однако удобнее в смысле синхронизации баз), мы рекомендуем Bitwarden.
Версия для печати
Internet Explorer и Microsoft Edge
Пароли Internet Explorer и Microsoft Edge хранятся в одном хранилище учетных данных Windows, а доступ к нему можно получить сразу несколькими способами.
Самый универсальный (на мой взгляд):
- Зайти в панель управления (в Windows 10 и 8 это можно сделать через меню Win+X, или кликнув правой кнопкой мыши по пуску).
- Открыть пункт «Диспетчер учетных данных» (в поле «Просмотр» вверху справа окна панели управления должно быть установлено «Значки», а не «Категории»).
- В разделе «Учетные данные для Интернета» вы можете посмотреть все сохраненные и используемые в Internet Explorer и Microsoft Edge пароли, нажав по стрелке рядом справа от пункта, а затем — «Показать» рядом с символами пароля.
- Вам потребуется ввести пароль текущей учетной записи Windows для того, чтобы пароль отобразился.
Дополнительные способы попасть в управление сохраненными паролями этих браузеров:
- Internet Explorer — Кнопка настроек — Свойства браузера — вкладка «Содержание» — кнопка «Параметры» в разделе «Содержание» — «Управление паролями».
- Microsoft Edge — кнопка настроек — Параметры — Посмотреть дополнительные параметры — «Управление сохраненными паролями» в разделе «Конфиденциальность и службы». Однако здесь вы можете лишь удалить или изменить сохраненный пароль, но не просмотреть его.
Как видите, просмотр сохраненных паролей во всех браузерах — достаточно простое действие. За исключением тех случаев, если по какой-то причине вы не можете ввести текущий пароль Windows (например, у вас установлен автоматический вход в систему, а пароль вы давно забыли). Здесь можно использовать сторонние программы для просмотра, которые не требуют ввода этих данных. См. также обзор и возможности: Браузер Microsoft Edge в Windows 10
.
Где хранить пароли?
Хранение паролей на бумажке довольно сомнительное удовольствие. Доступ к ней может получить кто угодно. Текстовый файл с паролями по надежности тоже не далеко ушел от обычной бумажки. Ведь текстовый файл легко может открыть любой желающий, кому не лень его будет открыть.
Мы сегодня рассмотрим, как организовать хранение паролей, чтобы оно было:
- Надежным. Для этого будет использоваться шифрование данных. Кроме вас никто не будет иметь доступ к паролям.
- Удобным. Удобство обеспечит синхронизация списка логинов и паролей между разными устройствами. Вы сможете получить доступ к своим логинам и паролям в любое время и в любом месте.
Подключаем базу паролей к смартфону
Подключаем смартфон кабелем к компьютеру и закидываем ранее созданный файл-ключ Token.key в память смартфона.
Теперь устанавливаем Keepas2Android на смартфон и запускаем. На главном экране программы нажимаем «Открыть файл…»:

На следующем экране выбираем «Диск Google»:

Далее выбираем свой аккаунт и нажимаем OK:

После того, как загрузится содержимое вашего гугл диска, выбираем файл нашей базы паролей. Напомню, что база имеет расширение *.kdbx:

Теперь в поле «Выберите тип мастер-ключа» нужно установить «Пароль + файл-ключ». После этого ниже появится кнопка «Изменить расположение», которую мы и нажимаем. На скриншоте ниже она обозначена цифрой 2:

После нажатия этой кнопки появится выбор хранилища. Выбираем «Системное средство выбора файлов», находим наш ранее помещенный в память телефона файл-ключ и нажимаем на него. Таким образом мы указали путь к нашему ключу шифрования базы паролей.
Обратите внимание на скриншот ниже. Если вы все сделали правильно, то в верхнем поле будет указан путь к вашей базе паролей, а в разделе «файл-ключ» будет указано имя файла-ключа:

После всех проделанных выше манипуляций вводите ваш пароль от созданной базы в поле «Пароль:» и нажимаете кнопку «РАЗБЛОКИРОВКА» снизу справа.
Если ваш смартфон оборудован сканером отпечатков пальцев, то вы можете использовать его вместо ввода пароля. Для этого необходимо перейти в настройки программы — пункт «База данных» — «Разблокировка отпечатком пальцев» — включить полную «разблокировку отпечатком пальца». После этого пароль вводить больше не потребуется, база будет открываться с помощью отпечатка пальца.
После того, как вы в базе откроете любую запись c логином и паролем, в шторке появятся 2 кнопки — «Скопировать пользователя» и «Скопировать пароль»:
Эти кнопки нужны для быстрого копирования данных в буфер обмена. Скопированные данные потом удобно вставлять в поля программ и сайтов.
Database Encryption
KeePass database files are encrypted. KeePass encrypts the whole
database, i.e. not only your passwords, but also your user names, URLs,
notes, etc.
The following encryption algorithms are supported:
KeePass 1.x:
| Algorithm | Key Size | Std. / Ref. |
|---|---|---|
| Advanced Encryption Standard (AES / Rijndael) | 256 bits | NIST FIPS 197 |
| Twofish | 256 bits | Info |
KeePass 2.x:
| Algorithm | Key Size | Std. / Ref. |
|---|---|---|
| Advanced Encryption Standard (AES / Rijndael) | 256 bits | NIST FIPS 197 |
| ChaCha20 | 256 bits | RFC 7539 |
| There exist various plugins that provide support for additional encryption algorithms, including but not limited to Twofish, Serpent and GOST. |
These well-known and thoroughly analyzed algorithms are
considered to be very secure.
AES (Rijndael) became effective as a U.S. federal government standard
and is approved by the National Security Agency (NSA)
for top secret information.
Twofish was one of the other four AES finalists.
ChaCha20 is the successor of the Salsa20 algorithm (which is included in the
eSTREAM portfolio).
The block ciphers are used in the Cipher Block Chaining (CBC)
block cipher mode.
In CBC mode, plaintext patterns are concealed.
An initialization vector (IV) is generated
each time
a database is saved. Thus, multiple databases encrypted with the same
master key (e.g. backups) are no problem.
Data authenticity and integrity:
KeePass 1.x Only
The authenticity and integrity of the data is ensured using
a SHA-256 hash of the plaintext.
KeePass 2.x Only
The authenticity and integrity of the data is ensured using
a HMAC-SHA-256 hash of the ciphertext (Encrypt-then-MAC scheme).
Создание, редактирование, удаление записи
Попробуем сохранить в созданной базе какой-нибудь пароль. Каждому аккаунту, каждому паролю соответствует запись.
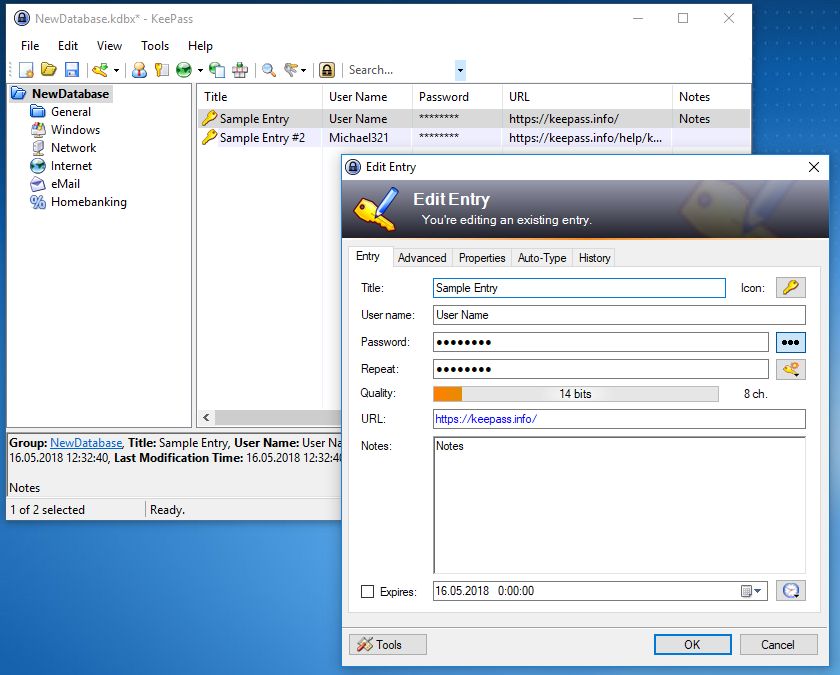
1. Нажмите третью кнопку на панели инструментов KeePassXC (кнопка с плюсиком, «Добавить новую запись»). Откроется новое окно. По умолчанию слева выбран пункт «Запись». Посмотрим, какие поля предлагает заполнить KeePassXC.
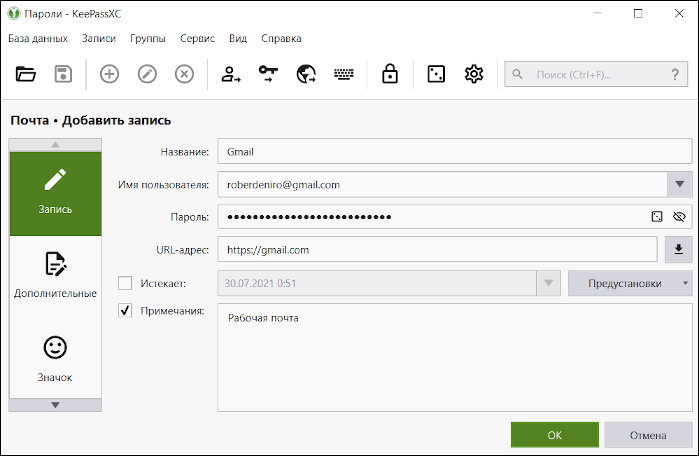
- Название. Позволяет идентифицировать запись. По названию вы сможете ориентироваться в базе.
- Имя пользователя. То, что вы указываете на сайте в поле «Логин».
- Пароль. Собственно, ваш пароль к этому аккаунту. Изображение кубика справа от этого поля – генератор паролей, о нем позже.
- URL-адрес. Адрес страницы, где вы вводите логин и пароль.
- Истекает. Автоматическое напоминание того, что следует изменить пароль. (Сам пароль при этом, конечно, не меняется).
- Примечания. В этом поле можно сохранить любую полезную информацию. Например, дополнительный адрес сайта, ответ на «секретный вопрос».
2. Заполните поля и нажмите кнопку «ОК». Новая запись создана.

Таким образом вы создадите записи для всех аккаунтов: почты, социальных сетей, любимых веб-сайтов, на которых зарегистрированы.
- Для редактирования записи достаточно дважды щёлкнуть по заголовку. Или щёлкнуть по записи правой кнопкой мыши и выбрать в контекстном меню «Изменить запись».
- Для удаления записи можно нажать на клавиатуре кнопку Delete или щёлкнуть по записи правой кнопкой мыши и выбрать в контекстном меню «Удалить запись».
Помните, что когда вы создаете или изменяете записи в KeePassXC, пароли в аккаунтах автоматически не меняются. И наоборот: когда вы меняете пароль на сайте, это не значит, что KeePassXC автоматически изменит его в своей базе. База служит только для хранения паролей, как записная книжка – для хранения номеров телефонов.
Printing creates a temporary file. Will it be erased securely?
KeePass creates a temporary HTML file when printing password lists and showing
print previews. This file is securely deleted when closing the database.
You must wait for the file being printed completely before closing KeePass
(and close the print preview before closing KeePass), otherwise it could happen
that the printing application blocks KeePass from deleting the file.
There is no way around the temporary file in the current printing system.
If you want to write a plugin that directly sends the data to the printer, you can
find a plugin development tutorial here:
KeePass 2.x Plugin Development.
Преимущества
- Очень высокая безопасность. Кроме технических деталей таких как: используемые алгоритмы кеширования и шифрования, важна для нас и поддержка двухфакторной аутентификации.
- Открыт исходный код. Есть такое мнение разработчиков и программистов, что надёжный и хороший криптографический софт просто не может быть закрытым. KeePass программа сертифицированная OSI Certified.
- Полная кроссплатформенность включая все операционные системы для мобильных устройств, исключение Symbian и WebOS.
- Что поражает так это бесплатность программы такого уровня, мощности и функциональности.
- Огромный плюс это — портативность. Кипас не нуждается в установке, легко может работать с флешки, она не создает и ничего не хранит в системе.
- Не нужна установка по строгой инструкции. Доступны два формата загрузки: инсталлятор и zip-файл. В сервис встроен генератор паролей.
Installer program (KeePass-2.xx-Setup.exe file)
The KeePass development team provides an installer, which copies KeePass
to your hard disk, creates shortcuts in the start menu and associates
KDBX files with KeePass, if desired.
Additionally, KeePass is automatically configured to store its settings in
the application data directory of the current user.
This way multiple users can use one KeePass
installation without overwriting each other’s settings (each user has his
own configuration file).
The setup program must run with administrative
rights, however KeePass runs fine without administrative rights once it
is installed.
Installation:
To install KeePass, run the file
and follow the wizard.
Updating:
Run the file.
You do not need to uninstall the old version first.
Your configuration options will not be lost.
Uninstallation:
In order to uninstall KeePass, run the uninstallation program, which is
accessible by a shortcut in the start menu folder of KeePass, or in
the program section of the system control panel. If you also want
to remove your configuration settings, you need to delete the configuration
file in the application data directory of your user profile, see
Configuration.
Silent Installation:
The KeePass installer supports command line
switches for silent installation, i.e. the program gets installed without
asking the user for target directory or association options. The default settings
of the installer are used.
The command line switch performs a silent
installation and shows a status dialog during the setup process. No questions
will be asked though.
The command line switch performs a silent
installation and does not show a status dialog during the setup process.
Destination Path:
The installer allows to choose the destination path to which KeePass is
installed.
However, when the installer detects an existing KeePass installation, it
assumes that the user wants to perform an upgrade and thus doesn’t
display the destination path selection page; the old version will be overwritten
by the new version.
If you want to move an existing KeePass installation to a different path,
first uninstall the old version; the installer of the new version will then
display the destination path selection page again.
Options/Components:
The installation options/components are explained in detail here:
.
Key Hashing and Key Derivation
SHA-256 is used for compressing the components
of the master key
(consisting of a master password, a key file, a Windows user account key
and/or a key provided by a plugin) to a 256-bit key K.
SHA-256 is a cryptographic hash function that is considered to be
very secure. It has been standardized in
NIST FIPS 180-4.
The attack against SHA-1 discovered in 2005 does not affect
the security of SHA-256.
In order to generate the key for the encryption algorithm,
K is transformed using a key derivation function (with
a random salt). This prevents precomputation of keys and makes dictionary
and guessing attacks harder. For details, see the section
».