How to use video converter ultimate
Содержание:
- Part 17: Set Preferences for Different Needs
- Part 10: Tool 6 – Video Trimmer
- Part 3: Make a Split Screen Video
- Part 1: Convert Video/Audio to Various Formats
- Part 9: Tool 5 — Video Enhancer
- The ultimate tool for ripping and converting videos
- Hot Tutorials
- 4K UHD VS 1080p Full HD
- Part 13: Tool 9 — Video Merger
- How to use HD Video Converter
- Affordable Pricing
- HD Video Converter Review
- Tips & Tricks
- Our Customers Also Like
- Описание программы Aiseesoft Video Converter Ultimate 9.2.8
- Part 2: Make MV
- Part 4: Edit Video/Audio with Multiple Effects
- Part 8: Tool 4 — 3D Maker
Part 17: Set Preferences for Different Needs
When you are using converter function, you can click the Gear icon on the bottom on the interface. This is the button of Preferences.
There are five options in it.
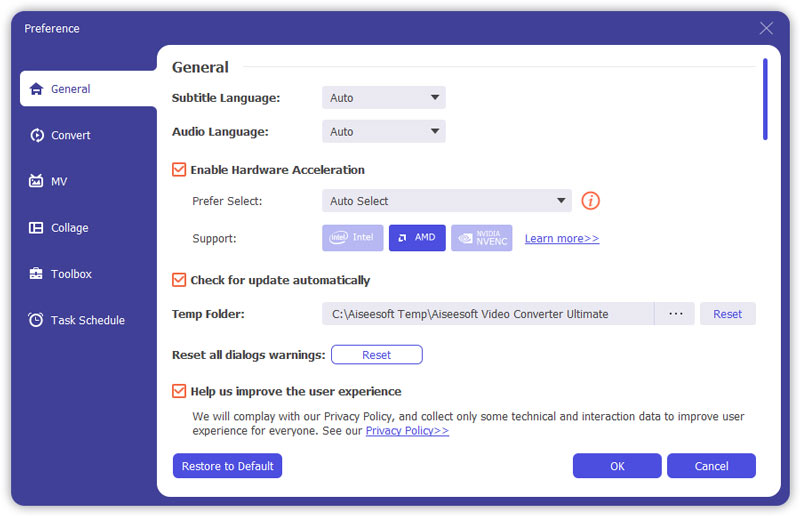
1. General
In General option, you can set Subtitle Language, Audio Language, GPU Acceleration and Update settings.
2. Convert
In Convert option, you can set output folder, snapshot folder, convert tasks, etc.

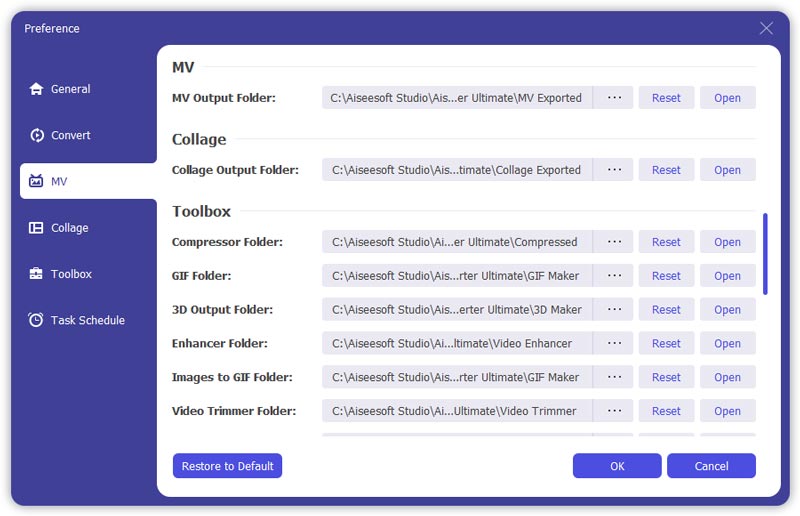
3. MV
In MV option, you can change the MV output folder.
4. Collage
In Collage option, the Collage output folder can be reset.
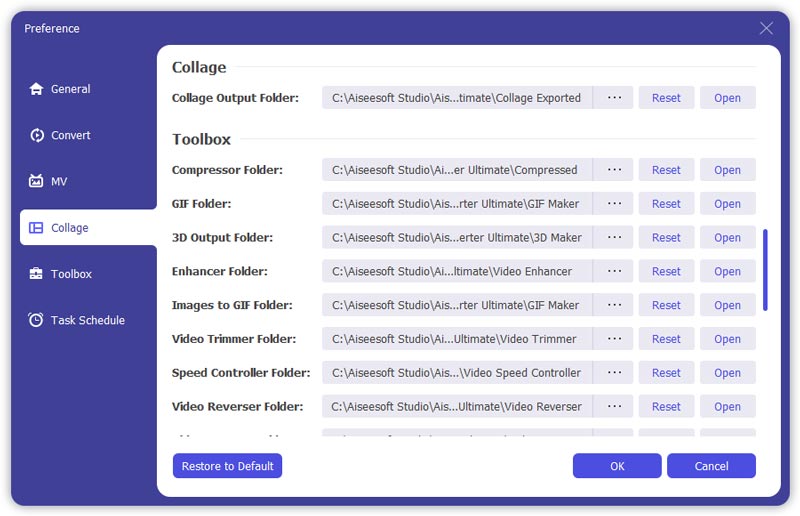
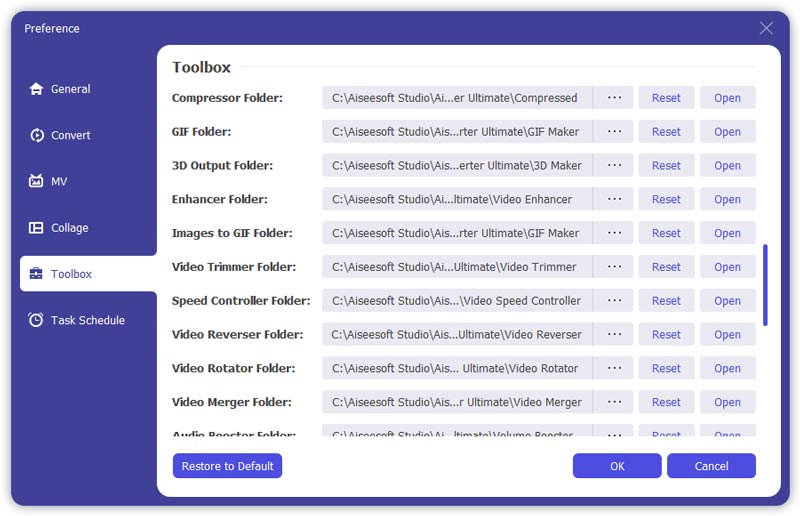
5. Toolbox
In Toolbox option, you can set the saving path for compressed files and GIF files.
6. Task Schedule
Part 10: Tool 6 – Video Trimmer
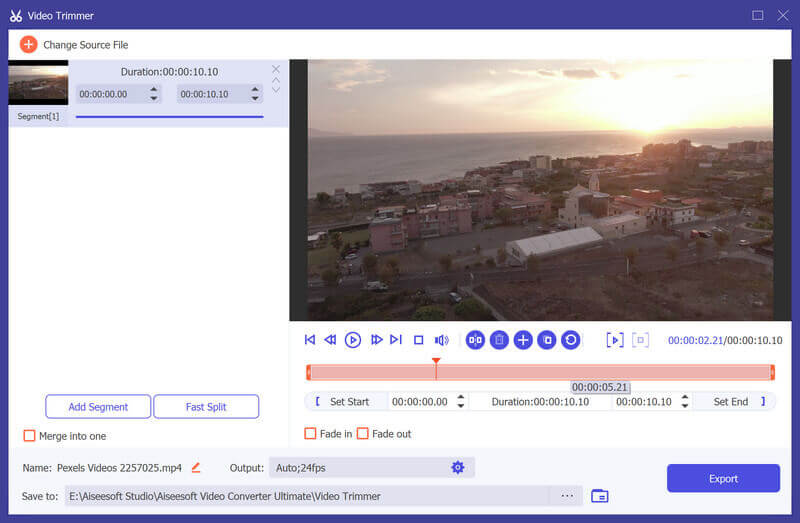
Step 1. Find Video Trimmer in Toolbox. Add the video to Video Trimmer.
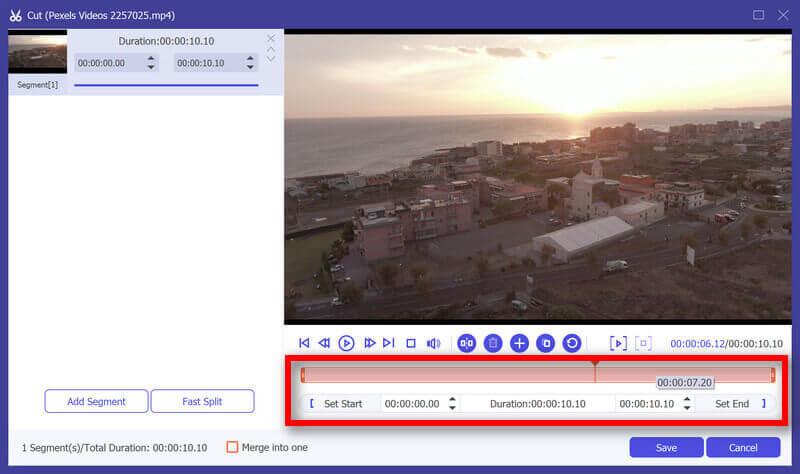
Step 2. To cut off unwanted parts, you can drag the clipper on the progress bar or enter the start and end time directly on the bottom Duration bar. The part you chose is what will be left. If you want more segments, click Add Segment and a new clip will be created. Choose another wanted part in the same way. You can also use the Fast Split feature to split the current segment into pieces by average or by time.
Step 3. If you need to add the Fade in/out effect, just enable the options under the progress bar. After you make all right, you can rename the video, adjust the output settings, and select the destination. If you want to merge all clips into one, check on Merge into one on the bottom left of the Video Trimmer window. Click on the Export button to export the trimmed video.
Part 3: Make a Split Screen Video
Combining more than one shot into the one video screen could be a creative and engaging thing to impress your viewers. In this program, you can use its built-in split-screen video editor to perform the task of putting vides side by side and play them at once.
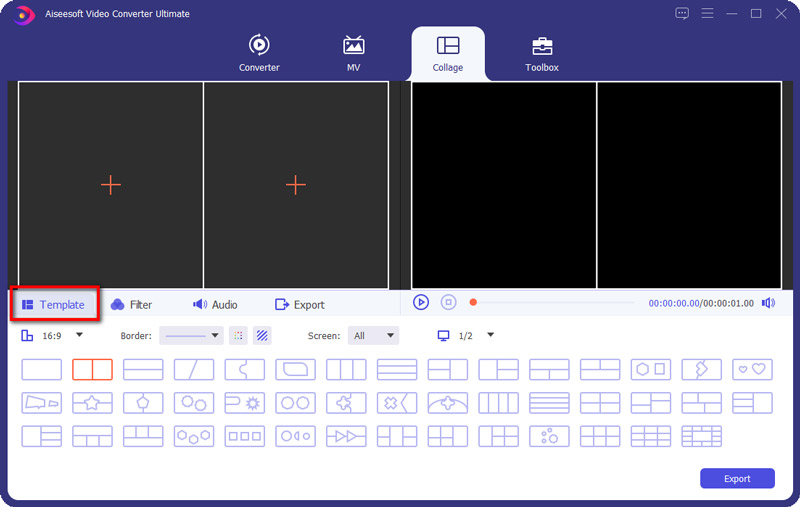
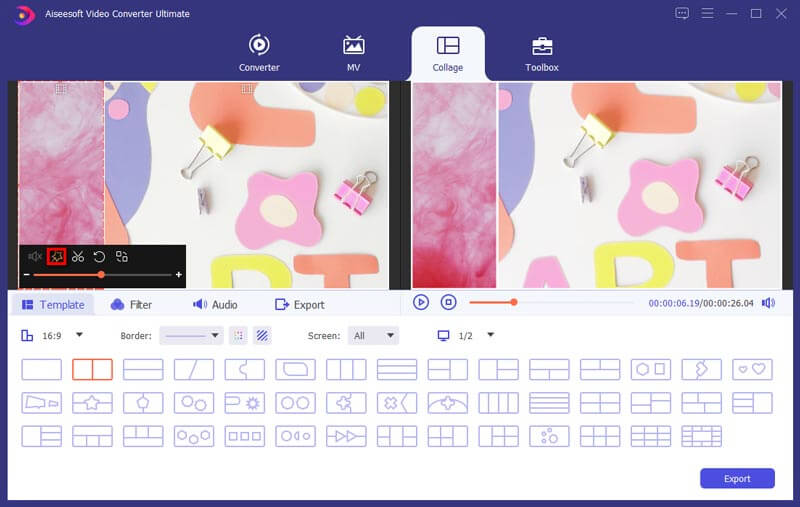
Step 1. Choose split-screen style
Launch the program and choose the Collage feature from the main menu bar. Then, go to the Template tab to select a split-screen layout.
Step 2. Add files
Click + to add the video files you want to position onto the one video screen.
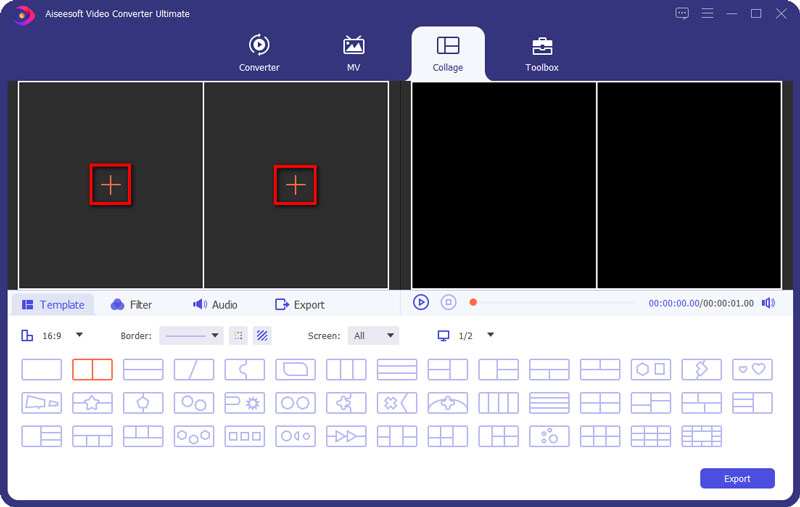
After importing your files, you can resize your videos by dragging the split line.

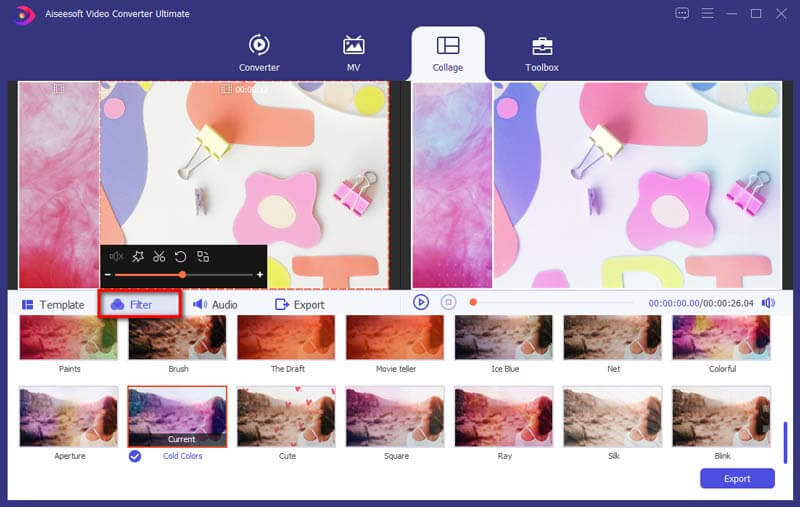
Step 3. Edit and apply filters
This split-screen video editor also allows you to edit your video clip. Select the video clip you want to edit and then click the Edit icon. Then, you can crop, rotate, add watermark, add subtitle, and more.
After editing your video clips, you can select a filter to use based on your video content by going to the Filter tab.
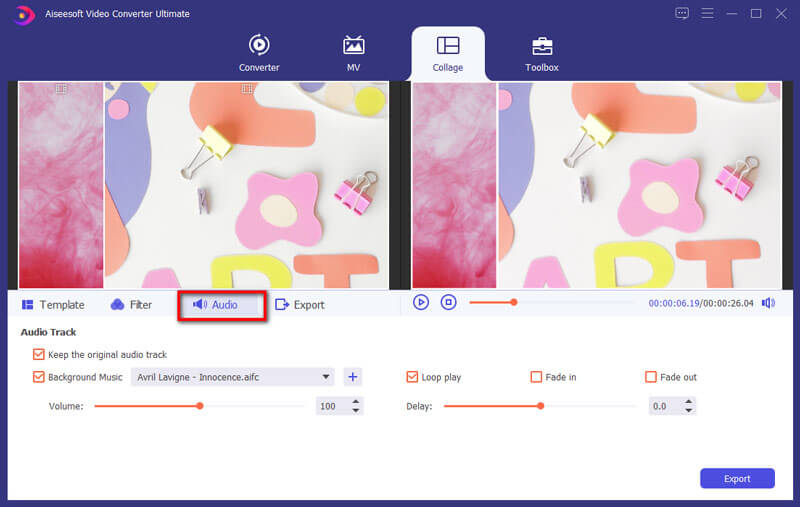
Step 4. Add background music
To keep the original audio in the video, you should enable the Keep original audio option. If you want to add a song as the background music, navigate to the Audio tab. check the box next to Background Music and then choose the song from your computer. It also offers other audio settings to configure, such as loop play, fade in or out, volume, etc.
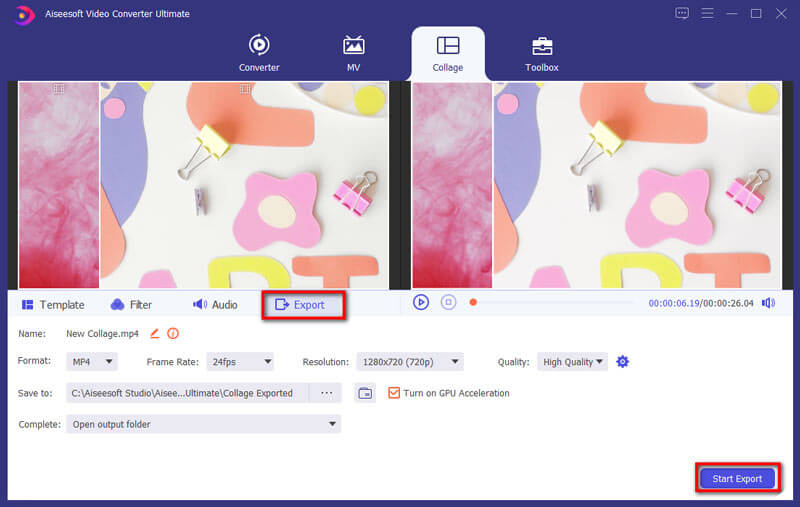
Step 5. Produce and share
Find the Export tab, and then you can change project name, select output format, resolution, destination folder, and turn on hardware acceleration.
When the video is ready, click Start Export to save the split-screen video to your computer. Or you can choose to share it to social media platforms directly.
Part 1: Convert Video/Audio to Various Formats
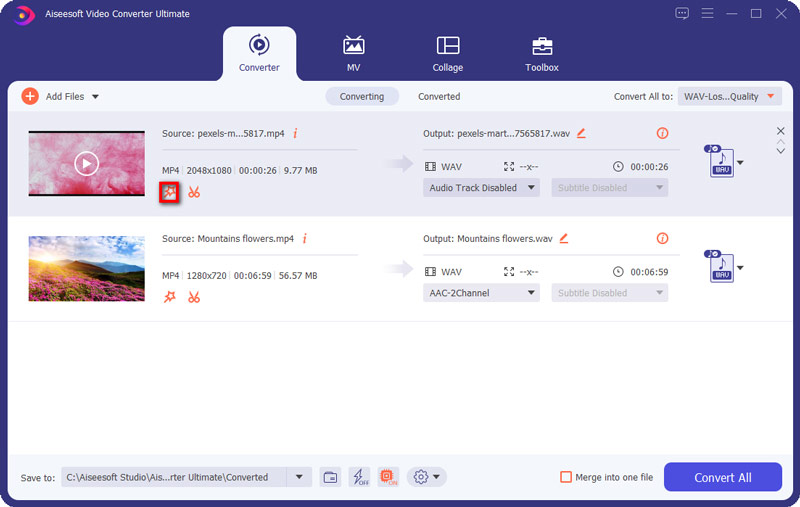
Step 2. Click Add File and select the Add File or Add Folders to add files. Or directly drag multiple video and audio files to this program.
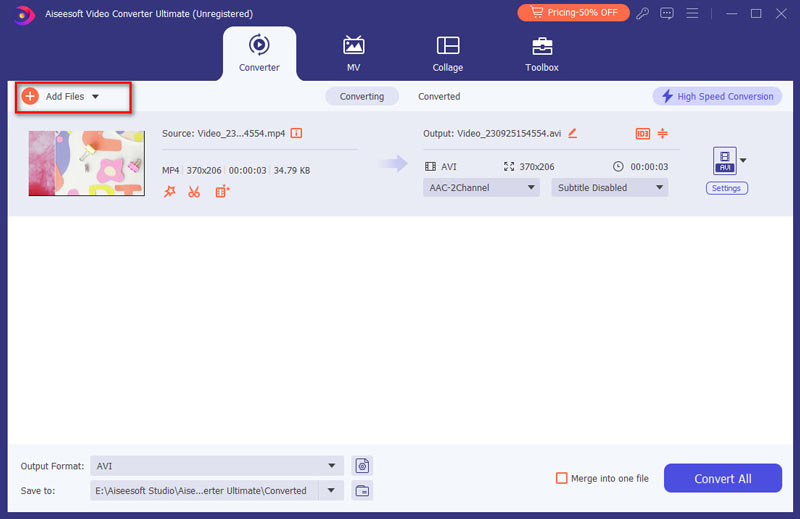
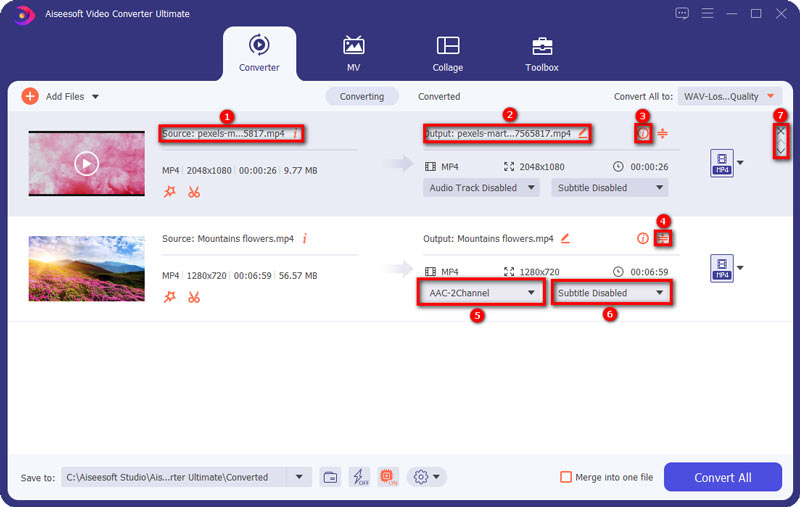
After adding files, you can see its information on the interface, like the original format, the screen size and the time length. And here are some options you can choose.
1. See the information of the video
2. Rename the files
3. Edit Metadata
4. Compress the file
5. Add audio track or not
6. Add subtitle or not
7. Put the video on the first or the last
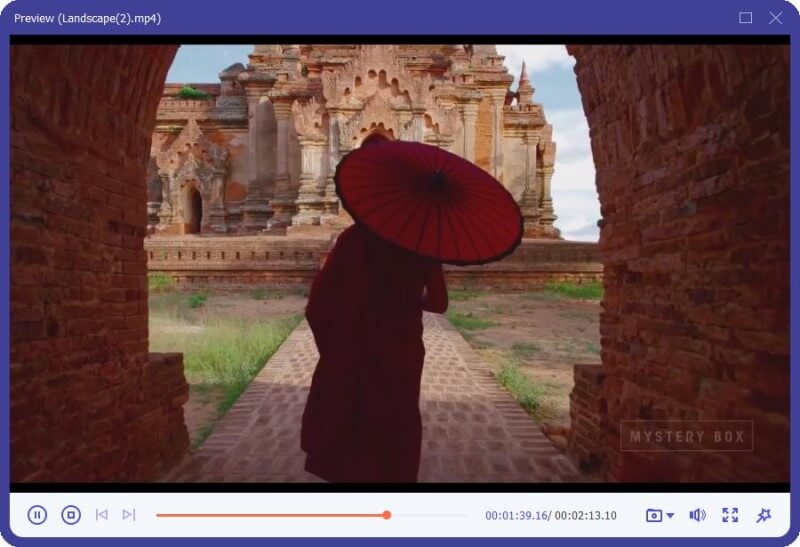
You can click the video to play it. On the playing interface, you also can take snapshot and edit the video.
If you want to edit videos or cut them, you can click the Cut icon or the Edit icon. .
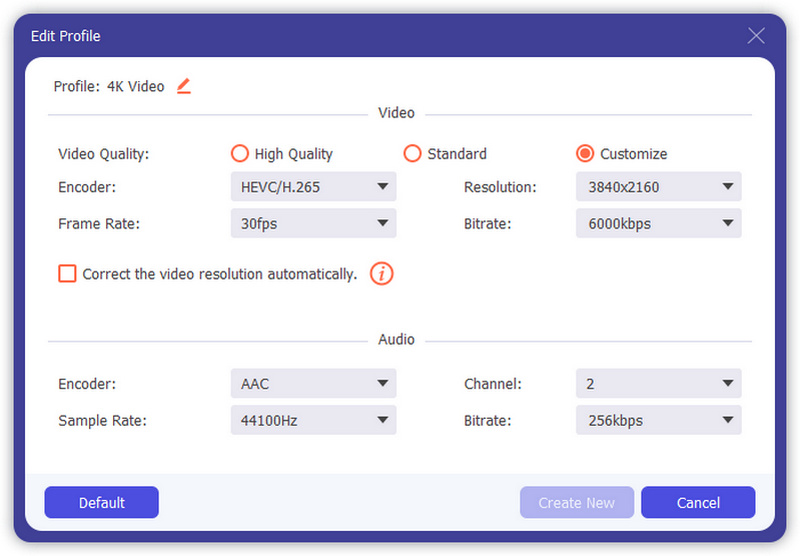
Step 3. Click on the format icon on the right side of the video file. Then you can see a list of presets. Choose a preset and adjust the profile settings according to your need.
![]()
If you want to change the format settings, you can click the Gear icon on the right to custom profile. In the pop-up-window, you can change settings as follows.
Video: Quality, Encorder, Resolution, Frame Rate and Bitrate.
Audio:Encorder, Channel, Sample Rate and Bittrate.
Step 4. Select a path for the converted files on the bottom bar. And then click the Convert All button on the main interface to start converting on your computer.
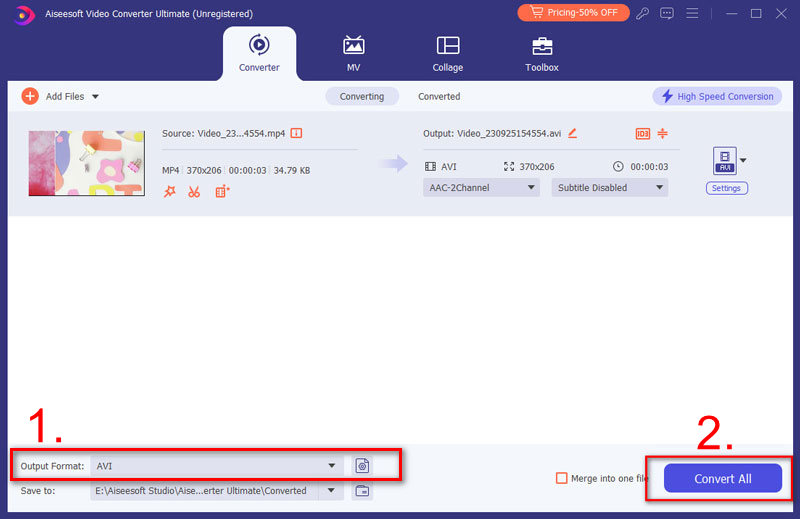
Note: If you want to merge them into one, tap on Merge into one file on the left of Convert All.
Part 9: Tool 5 — Video Enhancer
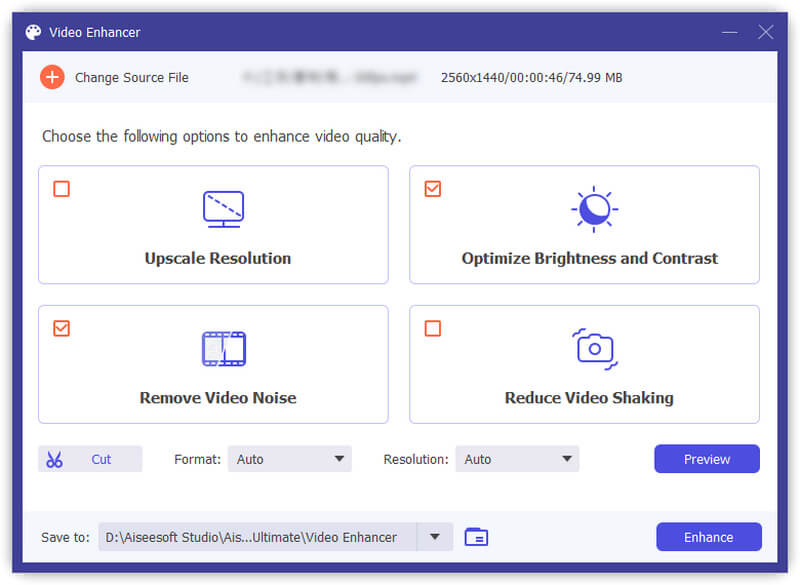
Step 1. Find Video Enhancer in Toolbox. Add the video to Video Enhancer.
Step 2. There are 4 options you can choose to enhance your video file.
Upscale Resolution: With this function, you will get a high-resolution video from a low-resolution video.
Optimize Brightness and Contrast: It will optimize the brightness and contrast automatically to make your video more enjoyable.
Remove Video Noise: This feature can remove dirt-like video noise from your video.
Reduce Video Shaking: It can stabilize your shaky video footage to make it more smoother and more watchable.
Step 3. Click Enhance button to enhance your video.
The ultimate tool for ripping and converting videos
Need to rip a DVD or convert a video file? Aiseesoft Video Converter Ultimate is a handy one-stop shop for video conversion, giving you complete control over the resulting file. It also includes some video editing tools, including support for 3D video conversion.
What can it do?
Aiseesoft Video Converter Ultimate certainly lives up to its name. It contains pretty much everything you could imagine you’d need to convert video files on your computer. The software allows you to rip DVDs, convert video files, or download online videos and save them to your PC.
The software supports conversion to and from a huge range of different file formats, including all the usual suspects such as MP4, AVI, MOV, WMV, FLV, etc. Aiseesoft Video Converter Ultimate makes it easy for you to convert video files to the right format, with custom conversion presets for a wide range of mobile devices, online streaming video, as well as user-defined profiles.
There are plenty of video conversion settings that you can tweak, including the encoding method, frame rate, aspect ratio, and resolution.
One of the standout features of Aiseesoft Video Converter Ultimate is its support for 3D video, allowing you to make 3D videos using one of several supported output methods. Besides this 3D option, there are various other video editing tools within the software, such as Crop, Watermark, Audio, and Effects. The Effects option allows you to control visual elements of the video, such as brightness, contrasts, saturation, etc.
There’s also a Clip option within Aiseesoft Video Converter Ultimate that lets you trim your videos down. You can split videos into segments and set the start and end points of clips, which is a useful feature to have within a conversion suite.
What’s it like to use?
For such a powerful application, Aiseesoft Video Converter Ultimate is refreshingly simple to use. The skinnable user interface lays everything out in an intuitive manner, making it easy to navigate. The basic options are listed in the toolbar at the top (Load Disc, Add File, Download, Clip, and Edit), and there are video preview panels throughout the software so you’re never in doubt about how the converted video will turn out.
The conversion profiles are particularly useful and well laid out. The inclusion of a profile search makes it very easy to find which particular device you want to use your video on, then apply the conversion profile.
Conversion in Aiseesoft Video Converter Ultimate is fast enough and I experienced no issues with videos failing to convert during my tests of the application. The only feature I really would’ve liked to see added to the software would be the ability to rip Blu Ray disks, but perhaps this is too much to ask!
A converter for all seasons
Whatever your video converting needs, Aiseesoft Video Converter Ultimate is sure to have the right tools for you. It supports a wide range of file formats, it’s easy to use, and its video editing and 3D features come in very handy.
Hot Tutorials
-
-
How to Convert Videos to HD?
-
Best Video Cutters/Trimmers to Chop Your Video
-
5 Ways to Recover Overwritten Excel File
-
How to Recover Deleted Kik Pictures
-
How to Play DVDs on Wii?
-
Play MPG Video with Best MPG Player
-
-
-
The Easiest Way to Retrieve Deleted iMessages from iPhone
-
4 Ways to Delete Everything on iPhone
-
How to Record Facetime Calls
-
Best Way to Recover Lost/Deleted Bookmarks on Android
-
How to Recover Deleted Text Messages on Android?
-
How to Sync Contacts from iPhone to iPad?
-
-
-
How to Convert Videos to HD?
-
Best Video Cutters/Trimmers to Chop Your Video
-
5 Ways to Recover Overwritten Excel File
-
How to Recover Deleted Kik Pictures
-
-
-
How to Play DVDs on Wii?
-
Play MPG Video with Best MPG Player
-
The Easiest Way to Retrieve Deleted iMessages from iPhone
-
4 Ways to Delete Everything on iPhone
-
-
-
How to Record Facetime Calls
-
Best Way to Recover Lost/Deleted Bookmarks on Android
-
How to Recover Deleted Text Messages on Android?
-
How to Sync Contacts from iPhone to iPad?
-
-
-
How to Convert Videos to HD?
-
Best Video Cutters/Trimmers to Chop Your Video
-
5 Ways to Recover Overwritten Excel File
-
-
-
How to Recover Deleted Kik Pictures
-
How to Play DVDs on Wii?
-
Play MPG Video with Best MPG Player
-
-
-
The Easiest Way to Retrieve Deleted iMessages from iPhone
-
4 Ways to Delete Everything on iPhone
-
How to Record Facetime Calls
-
-
-
Best Way to Recover Lost/Deleted Bookmarks on Android
-
How to Recover Deleted Text Messages on Android?
-
How to Sync Contacts from iPhone to iPad?
-
-
-
How to Convert Videos to HD?
-
Best Video Cutters/Trimmers to Chop Your Video
-
-
-
5 Ways to Recover Overwritten Excel File
-
How to Recover Deleted Kik Pictures
-
-
-
How to Play DVDs on Wii?
-
Play MPG Video with Best MPG Player
-
-
-
The Easiest Way to Retrieve Deleted iMessages from iPhone
-
4 Ways to Delete Everything on iPhone
-
-
-
How to Record Facetime Calls
-
Best Way to Recover Lost/Deleted Bookmarks on Android
-
-
-
How to Recover Deleted Text Messages on Android?
-
How to Sync Contacts from iPhone to iPad?
-
4K UHD VS 1080p Full HD
Offering wider color gamut and greater bit depth, 4K videos show you much more details of the original images than 1080p full HD videos. The common UHD video is 3840*2160, 2 times on both horizontal and vertical resolution of 1080p (1920*1080). The 4K video is actually DCI 4K, which has a resolution of 4096*2160 with 1.9:1 aspect ratio while the UHD is 16:9. You can easily tell the differences between 4K UHD and 1080p Full HD when you watch them on UHDTVs. If you do not have any 4K TV to play the 4K videos, you can use this HD converter to convert your 4K videos to lower resolution for common use (See 4K VS 1080p).
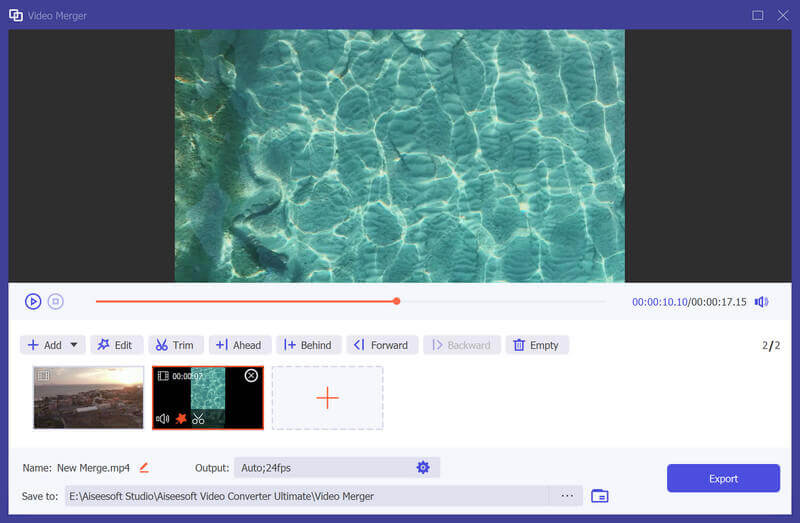
Part 13: Tool 9 — Video Merger
Step 1. Find Video Merger in Toolbox. Add the video(s) to Video Merger.
Step 2. After importing your files, you are able to adjust the order by dragging the clips to the correct position or use the Forward/Backward feature. If you need to add new clips, you can simply click on the Add/Plus button or click Ahead/Behind to locate the clip to the right place directly. You can also edit and trim the video clips according to your need. To remove all the clips please hit on Empty button.
Step 3. Once you finish editing, you can change the name, settings, and saving path for the output file. Then click on the Export button to export the merged video.
How to use HD Video Converter
- Step 1. Run this software on your Windows computer. Click «Add File» and load the HD video to the program.
- Step 2. (Optional) Click «Edit» to edit your video files before converting. You are able to rotate, crop, watermark, enable 3D, and adjust effects for your video file
- Step 3. Click the drop-down list from «Profile», choose the one format hat suit your player or editor best. Click «Convert» to start to make the HD video conversion.
Affordable Pricing
1 Year License
$32.00$25.60
Use it 1 Year
Use it on 1 PC
30-Day Money Back Guarantee
Lifetime License
$45.00$36.00
Use it lifetime
Use it on 1 PC
30-Day Money Back Guarantee
Multiple-User Personal License (Up to 8 PCs)
$229.00$183.20
Use it lifetime
Use it on 8 PCs
30-Day Money Back Guarantee
HD Video Converter Review
Check what famous editor and our customer talk about our product.
-
Wow, so fantastic. I have many HD video files from my Sony Camcorder, and I cannot play on my iPad. With this software, now I can convert the M2TS files to MP4 and play on my iPad Pro easily.
From Leah
-
I download some online SD video files, but the definition seems not good. Using your program, and the video files are clearer than before. Thanks.
By Edwards
-
I know a lot of video converters called themselves as HD video converter but they are really not. I have test this HD video converter the results really satisfies me.
By Jones
-
I used this software to convert HD videos, the output video quality are surprisingly great. high recommend it.
By Nelson
Write a Review ->
Convert Any AVCHD, H.264/AVC, H.265/HEVC, DivX and other HD Video.
Free Download
Buy Now-20%
Tips & Tricks
- How to Convert 4K UHD to 1080p HD Videos With Ease
- How to Convert HD Video to SD with Super Fast Speed
- How to Convert 4K UHD to 1080p HD Videos With Ease
- Top 5 4K Video Editing Software for Mac and Windows
- Best Way to Convert AVCHD to MP4 without Losing Quality
- How to Enhance and Convert Video to 4K UHD Resolution
- How to Convert Common Videos to HD Quality (4K, 1080p and 720p)
- How to Burn HD Video to Blu-ray Disc/ISO File/Folder
- How to Convert QuickTime HD Video Without Loss
Our Customers Also Like
-
The best video recording tool to easily record screen, meetings, game, webinar, audio, and webcam videos.
BUY NOW BUY NOW
-
Multi-media helper to convert, edit and enhance video and audio file in one click.
BUY NOW BUY NOW
-
Best DVD/Blu-ray burner to edit and burn video to DVD disc/folder/ISO file or Blu-ray disc/folder/ISO file.
BUY NOW
Video HD Video Converter
Описание программы Aiseesoft Video Converter Ultimate 9.2.8
Aiseesoft Video Converter Ultimate — мощная программа для конвертации DVD и видеофайлов и папок Blu-Ray в популярные видео форматы и 3D-видеофайлы. Умеет извлекать аудиодорожки из видео, а затем преобразовать их в популярные форматы аудио. Программа имеет встроенный видео-редактор, который позволяет настроить видео эффекты, обрезку видеоклипов, добавить водяные знаки на видео и объединить несколько исходных файлов в один. Поддерживаются AMD, NVIDIA CUDA и Intel технологии, каждую из которых будет определять многоядерный процессор компьютера, чтобы сделать преобразование быстрее в несколько раз.Основные функции Aiseesoft Video Converter Ultimate: Добавление большей визуальной динамичности, обновление качества видео Новая функция обновления видео позволит вам улучшить качество видео и добавить больше эффектов. В новом окне обновления вы сможете улучшить качество видео от SD до HD, улучшить яркость и контраст или удалить шумы. Функции редактирования видео также позволят вам применить тон и насыщенность. После редактирования вы сможете получить видео в любом понравившемся эффекте: ужасы, романтика, комедия и т. д.Переворачивание и зеркальное отражение видео Смартфоны и планшеты заменили собой видеокамеры в значительной степени. Иногда мы снимаем видео, повернув устройство на бок, после чего нам необходимо перевернуть видеоряд. Функция поворачивания позволит вам с легкостью доработать свои видеоролики. Вы сможете поворачивать видео по/против часовой стрелки или сделать зеркальное отображение (по горизонтали или вертикали), что решает проблему угла зрения всего одним кликом.Преобразование видеороликов в файлы 3D-видео Вы сможете конвертировать видео формата 2D в 3D, используя пять режимов: Anaglyph (стереоизображение), Side by Side (полностью), Side by Side (в половину ширины), Top and Bottom (полностью), Top and Bottom (в половину высоты).Поддержка конвертирования форматов HD и 4K UHD Aiseesoft Video Converter Ultimate применяет наиболее современные технологии преобразования видео. Теперь поддерживаются все форматы кодирования, включая H.265/HEVC, H.264, MPEG, Xvid, VP8, VP9 и т. д. Благодаря новейшей системе преобразования видео в другие форматы вы сможете оценить быструю скорость вкупе с идеальным изображением и качеством звука. Если вы хотите преобразовать видео формата 4K в 1080p, HD в HD или просто конвертировать 4K-форматы, Aiseesoft Video Converter Ultimate станет для вас отличным выбором.Стандартные настройки для различных устройств Программное обеспечение обладает различными настройками для устройств iPhone/iPad/iPod/Apple TV, Android, Samsung и т. д. Теперь легко обрабатывать DVD и видео, редактировать и настраивать видео путем корректировки яркости, контраста, тона, насыщенности, громкости, кадрирования, добавления водяных знаков и объединения нескольких видеофайлов.Преобразование любительского DVD в форматы видео 2D/3D Вы сможете преобразовать свои DVD в видео различных форматов: MP4, AVI, WMV, 3GP, FLV и многие другие форматы, а также файлы 3D-видео. Более того, это всеобъемлющее программное обеспечение поддерживает пакетное конвертирование, что позволяет с легкостью преобразовать несколько файлов в один или различные форматы видео, используя всего лишь одно действие.Другие возможностиданное программное обеспечение обладает различными параметрами настроек, среди которых вы сможете найти наиболее подходящие для себя;извлечение звуковых дорожек из DVD и видеофайлов без потери качества и их последующее преобразование в файлы форматов FLAC, WAV, MP3, APE, WMA и т. д.;поддержка технологий AMD APP, NVIDIA CUDA и Intel, каждая из которых совместима с многоядерным процессором ПК, что делает процесс преобразования файлов быстрее.
Скачать Aiseesoft Video Converter Ultimate 9.2.8 + Rus:
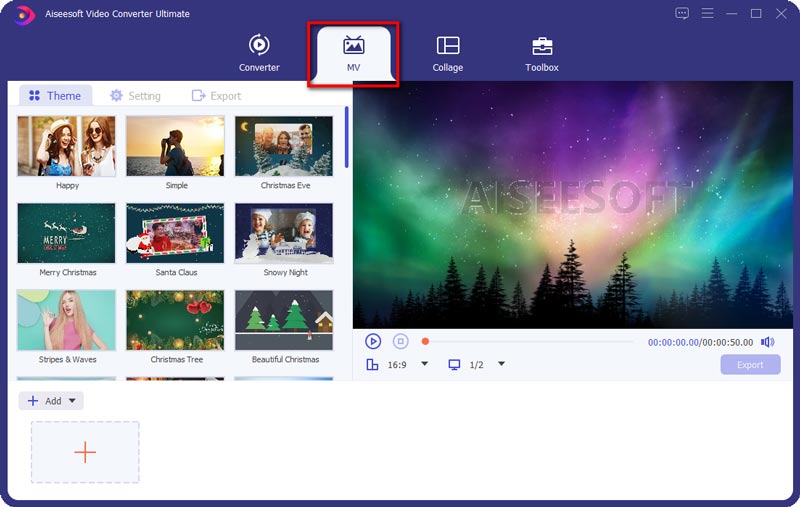
Part 2: Make MV
The program also has an MV maker that enables you to make a stunning video using video footages and pictures.
Step 1. Choose MV feature
After launching the program, choose the MV tab and then you will enter into the MV creating interface.
Step 2. Add file
Click the Add button from the lower left of the window to import your video footages or pictures to this MV maker. The file will be displayed instantly in the player on the top right section where you can play and preview the MV you make before saving it.
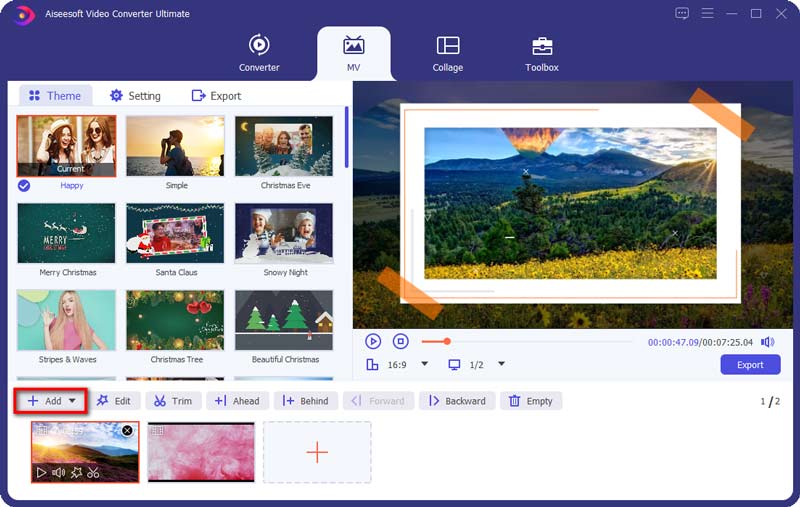
After importing your files, you are able to adjust the order with the mouse.
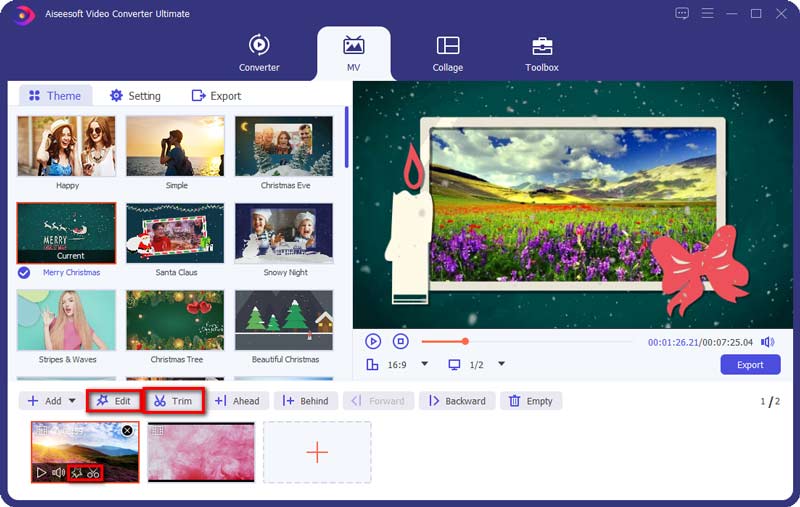
Step 3. Edit videos
Before making your files into MV, you can edit or trim the whole video by clicking the Edit button or Trim button, or you can edit or trim your videos or pictures separately.
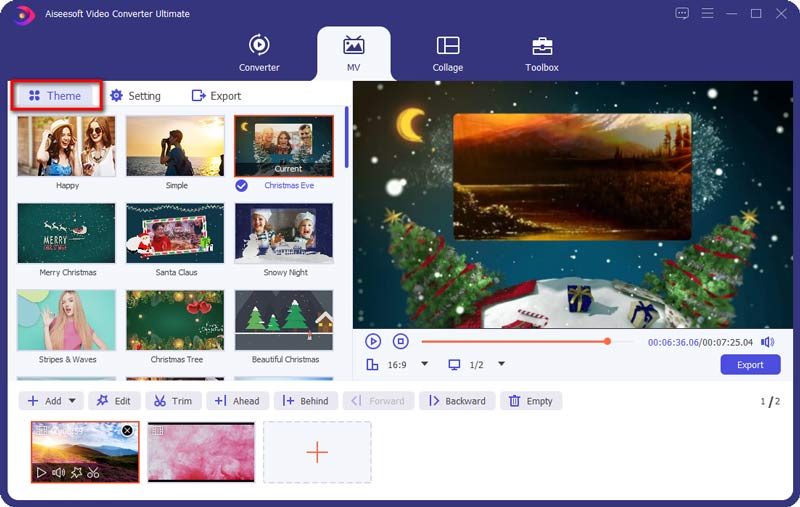
Step 4. Select a theme
When you finish editing, you can select a theme for your MV. On the left section, click the Theme tab and then choose your desired theme for your MV. Then, the theme will be applied to the MV automatically and you can preview the video on the player.
Step 5. Configure the title and audio track settings
If you would like to add the title in the beginning or end, just click the Setting tab, navigate to the Start & End option, and then tick off the box behind the Start Title, End Title, or both to enter your text.
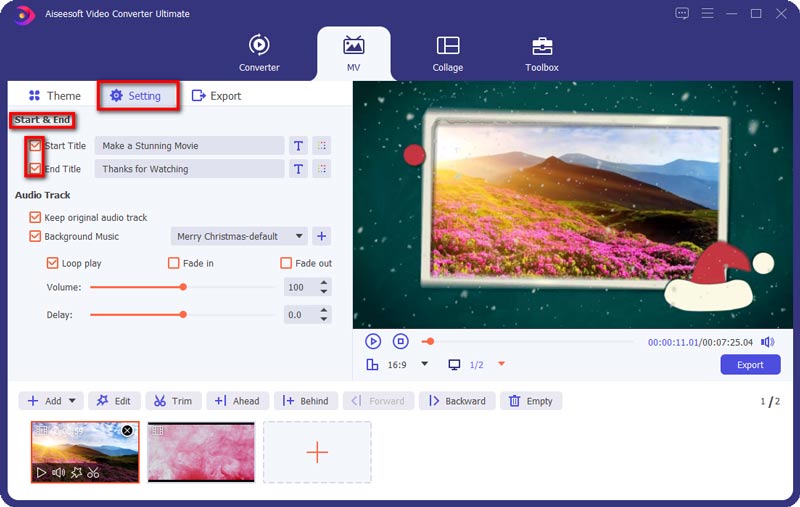
Additionally, you can choose to add the background music for your MV while maintaining the original audio track. And, you can enable Loop Play to let your MV play a continuous loop of your background music. To configure audio transition, you can enable Fade in, Fade out, or both.

Step 6. Export MV
By default, the output format is MP4. If you’d like to save it in other video formats, you can choose your preferred format by clicking on the arrow down located beside the format icon.
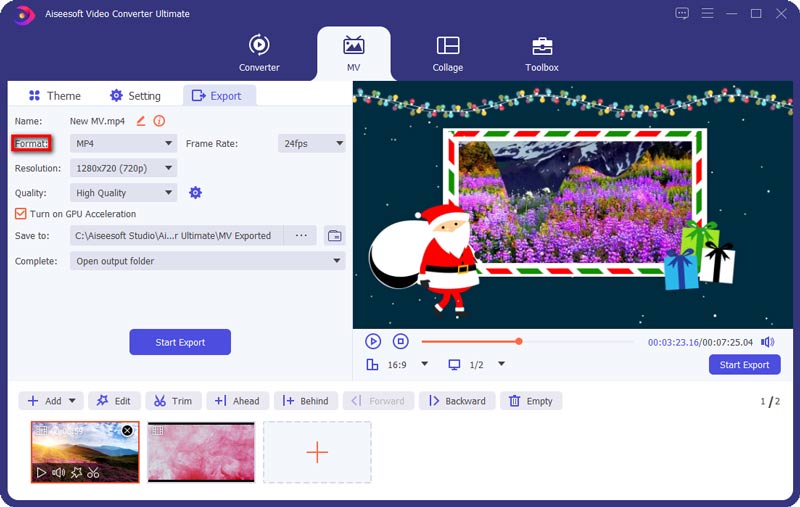
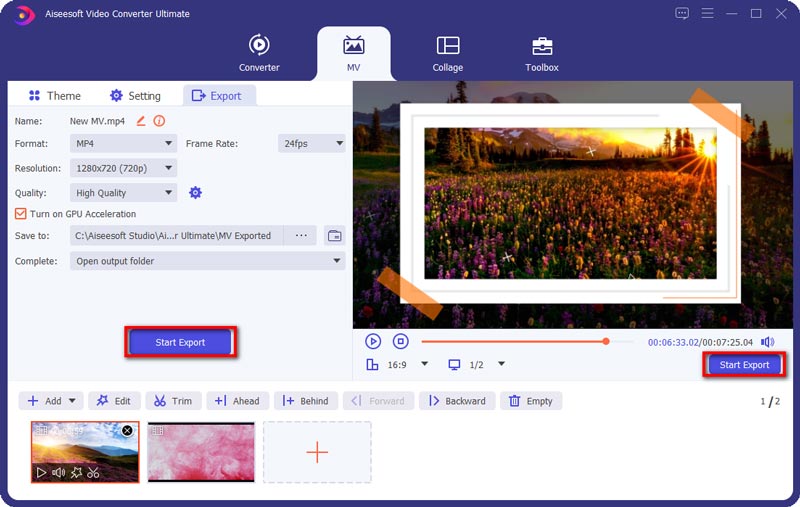
Once you are ready to export your MV, you can go to the Export tab to give a name for your project, and set the path to store it. You can also enable the Turn on GPU Acceleration option to speed up the exporting process. In the end, click on the Start Export button to produce your MV.
Part 4: Edit Video/Audio with Multiple Effects
Trim & Split Video
Step 1. Select a video file and click the Cut icon.
![]()
Step 2. To cut off unwanted parts, you can drag the clipper on the progress bar or enter the start and end time directly on the bottom Duration bar. The part you chose is what will be left. If you want more segments, click Add Segment and a new clip will be created. Choose another wanted part in the same way.
Step 3. After you make all right, you can click Save. If you want to merge them into one, check on Merge into one on the bottom left of the Cut window.
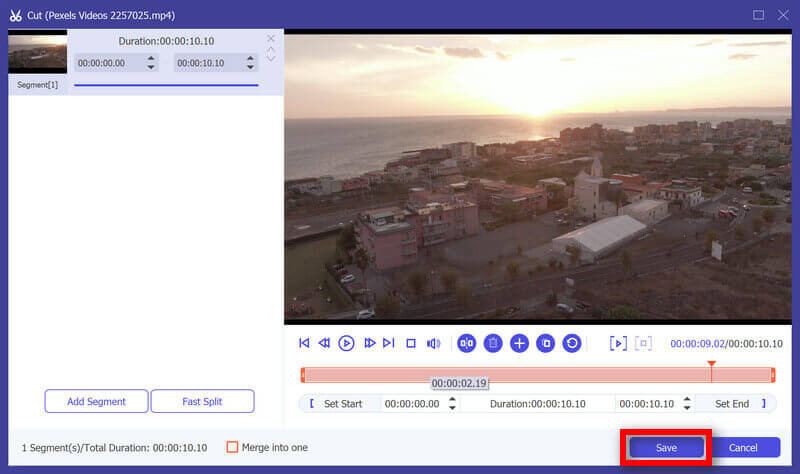
Step 4. Now you are back to the main interface. Preview the video by clicking the thumbnail. If that’s just what you want, Click Convert All. If you still need to modify the video, click the scissor icon again, the segments are still there.
Rotate & Crop Video
Step 1. Click the Edit icon. Find Rotate & Crop in pop-up window. And you can see other editing features in this window.
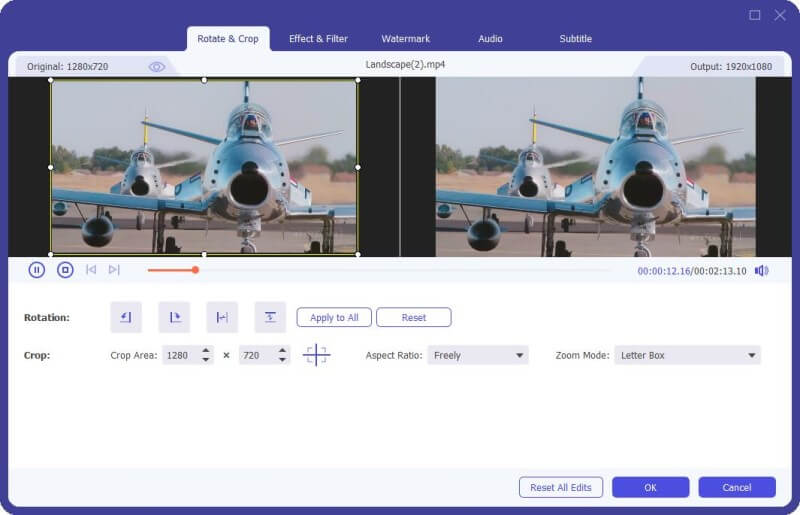
Step 2. Here you can flip video vertically and horizontally, rotate 90 degrees, rotate 180 degrees or rotate 270 degrees. Then, you can check the result in the preview.
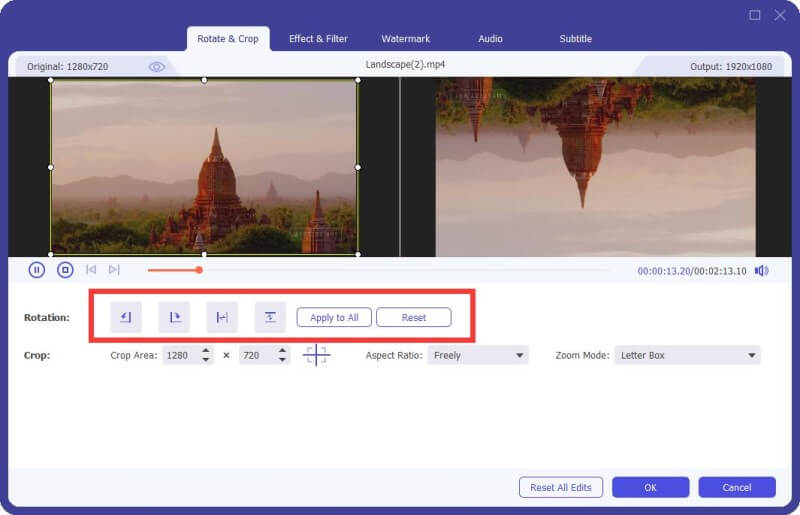
Step 3. Below the Rotate option is the Crop option. there are several types in Aspect Ratio, like 16:9, 4:3, 1:1 and 9:16. It can help you quickly get the size you want.
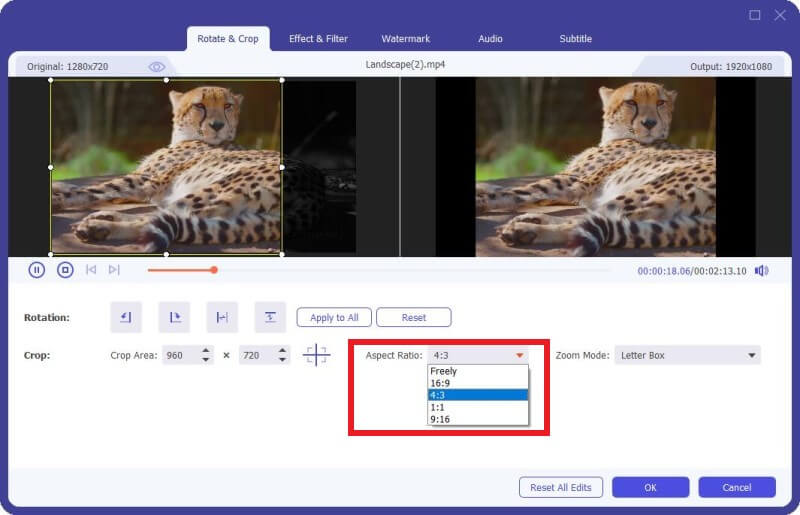
If you have other size needs, you need to select Freely in Aspect Ratio first, then input number in Crop Area to set the size. Dragging the frame of the left playing screen is also the same. If you want the center screen, click Cross icon after setting the size and it will put the cropped screen in the center.
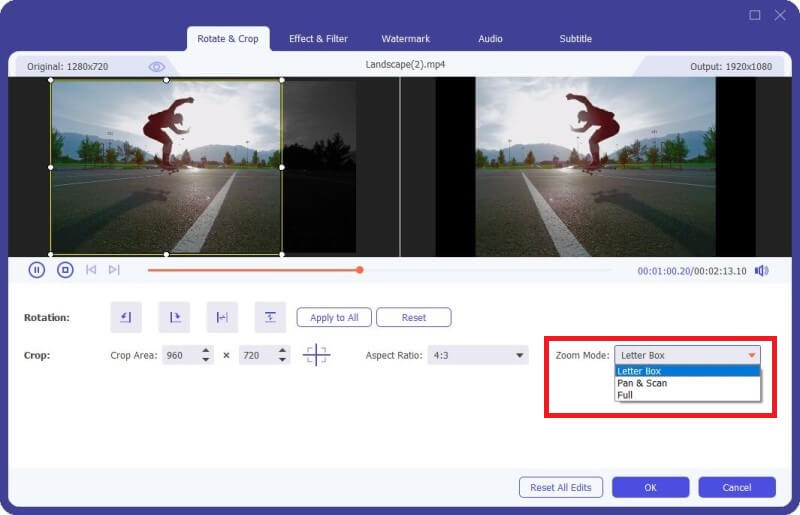
Besides Ratio, you can also select the right Zoom Mode to get the best effect.
Full Mode: Make the selected screen become the biggest size, which would stretch the screen.
Letter Box: Add black edges up and down.
Pan & Scan: Make the screen size to 16:9. But it would not show left and right edges in 16:9 or up and down in other size.
It is up to your needs.
Step 4. Click the OK button to save the changes.
Effect & Filter
Step 1. Find Effect & Filter in the Edit window. You can adjust brightness, contrast, saturation, hue and select deinterlacing as you need. Besides, you can choose a filter to beautify your video.
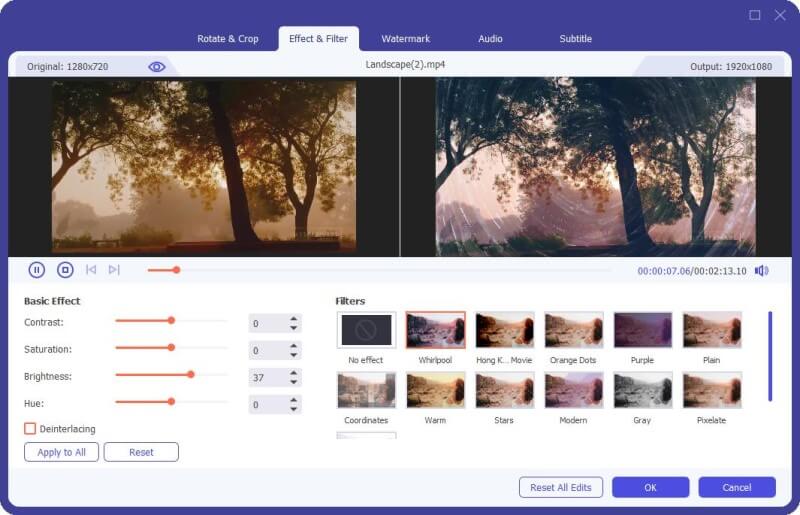
Step 2. Click the OK button to save the changes.
Watermark
Step 1. Find Watermark in the Edit window. If you want to add a text watermark, check Text and enter the text to the blank. You can adjust the text fonts, colors, writing system and size. Then place the text watermark by dragging or setting size.
Furthermore, you also can rotate text and set opacity.
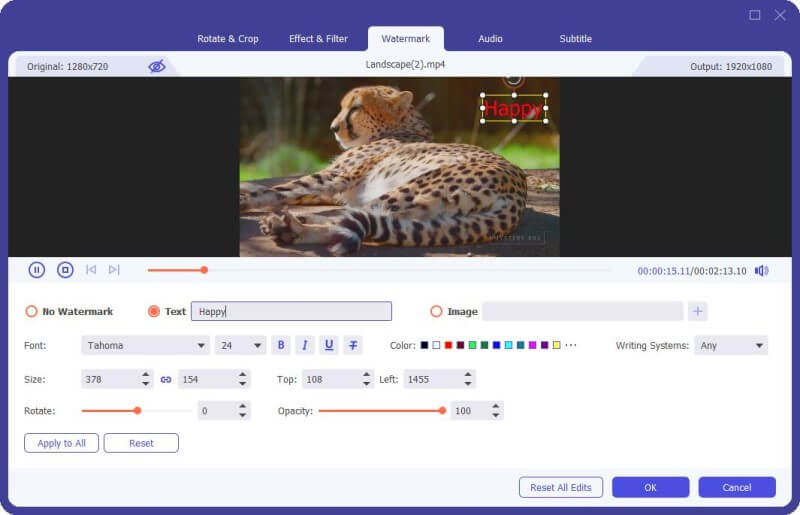
If you want to add an image watermark, check image and click the Add icon to select an image. And then adjust the size and place it on your video. You can also rotate text and set opacity.
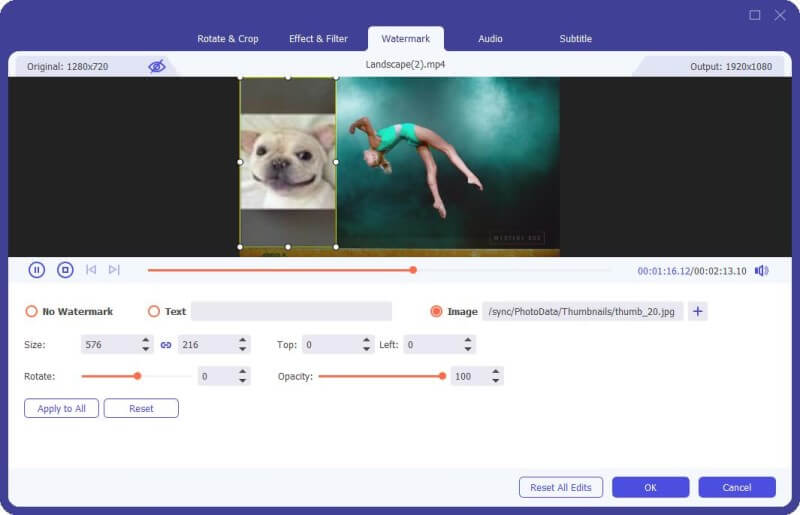
Step 2. Click the OK button to save your settings.
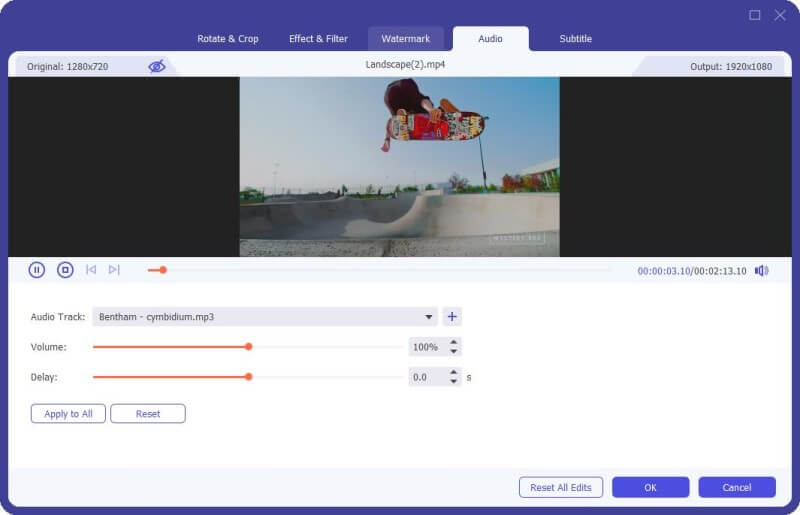
Audio
Step 1. Find Audio in the Edit window. Select the audio track you would like to play. Or click the Plus icon besides the Audio Track bar. You can adjust the audio volume and change the delay time to decide when to play audio track.
Step 2. Click the OK button to save your settings.
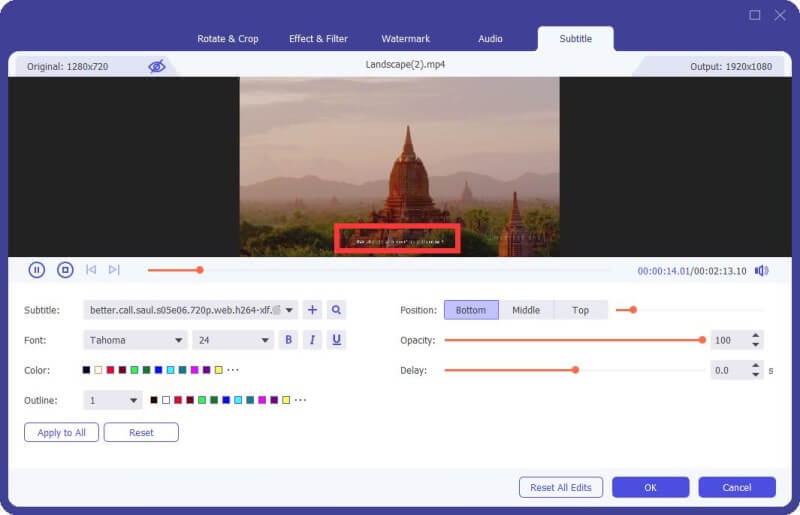
Subtitle
Step 1. Find Subtitle in the Edit window. Click + to import the subtitle file (*.srt; *.ssa; *.ass) from your computer. After that, you can adjust the position, font, color, opacity, delay time and outline.
Step 2. Click OK to save the adjustments.
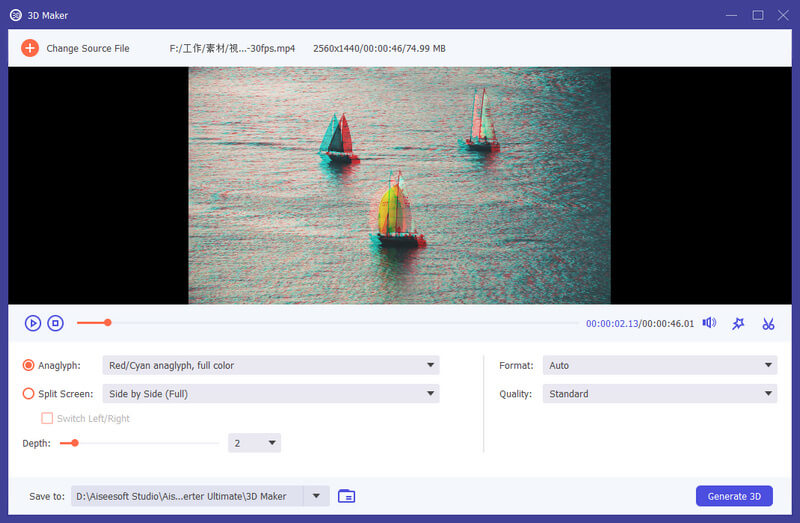
Part 8: Tool 4 — 3D Maker
Step 1. Find 3D Maker in Toolbox. Add the video to 3D Maker.
Step 2. It offers various options to make 3D video.
Anaglyph: You can choose one 3D anaglyph effect from Red/Cyan anaglyph, monochrome/half color/full color/quality Dubois; Green/Magenta anaglyph/half color/full color; Amber/Blue anaglyph, monochrome/half color/full color.
Split Screen: Side by Side (Half-Width), Side by Side (Full), Top and Bottom (Half-Height), Top and Bottom (Full)
Depth: You can change the depth of an anaglyph 3D image from 0 to 15.
Switch Left/Right: Use the Switch Left/Right option to change from Left/Right to Right/Left or Right/Left to Left/Right.
Step 3. Click Generate 3D to create your 3D video.