Как работать в опен офисе для чайников
Содержание:
- OpenCalc
- Описание OpenOffice
- Функциональные возможности, макросы, преимущества
- Как сделать таблицу в Опен Офисе
- LOOKUP
- What we need to create an add-in
- Current Development
- Spreadsheets, sheets and cells[edit| edit source]
- The database (preconditions)[edit| edit source]
- Imprimir
- Porque é que o Calc imprime todas as folhas do ficheiro?
- Como posso imprimir algumas, mas não todas, as células da minha folha?
- Como posso definir a impressão na vertical para a folha1 e na horizontal para a folha2?
- Como posso seleccionar uma ou mais linhas para que sejam impressas em todas as folahs?
- Como posso imprimir as minhas folhas?
- Using an add-in
OpenCalc
Это достаточно удобный плагин, который позволяет не только заниматься обработкой текста, но также и анализировать данные. Касательно этого программного обеспечения стоит рассмотреть следующее:
- как происходит ввод текста и формул в текстовый документ;
- как осуществляется создание и последующее редактирование таблиц;
- как запустить и использовать мастер функций;
- как меняется формат ячеек, устанавливаются ссылки и диаграммы;
- как пользователю создать базу данных.
Это наиболее популярные вопросы юзеров, кто впервые сталкивается с таким универсальным инструментом, как Опен Офис Calc. Чтобы не возникало проблем, потребуется более детально рассмотреть все моменты.
Ввод текста и формул
Первое, что вам потребуется в данном случае, это сделать запуск программного обеспечения на своем компьютере или ноутбуке. Следующим этапом вы создаете новый документ, либо открываете уже существующий файл для редактирования. Далее, для ввода текста останется лишь что-либо напечатать на клавиатуре, предварительно переведя курсор на свободную область. Что касается создания формул, то в главном разделе, на панели инструментов нужно отметить необходимое значение, после чего посредством клавиатуры вписывать соответствующие параметры. Программа с помощью активированного инструмента автоматически будет отображать необходимые для вас значения в нужном формате.
Создание и редактирование таблиц
Еще одна полезная и довольно востребованная опция, которая присутствует в этом программном обеспечении. Для того чтобы создать таблицу, вам потребуется открыть утилиту, и запустить новый или существующий документ. Далее, также потребуется навести курсор на то место, где планируется размещение таблицы. Впоследствии, вы переходите в раздел «Вставка». Здесь необходимо выбрать интересующий вас формат. Далее он будет автоматически размещен в документе. При необходимости, можно самостоятельно нарисовать табличку в соответствии с необходимым для вас количеством ячеек, строк и столбцов. Редактировать формат можно посредством инструментов, или через свойства, вызываемые правой кнопкой мыши для выбранной области.
Мастер функций
Следует отметить, что используя этот вариант программного обеспечения, вы также можете делать расчет математических функций. Все что для этого требуется, это запустить утилиту, после чего перейти в соответствующий раздел «Мастер функций». Здесь пользователь должен выбрать, какой вариант исчисления будет использоваться для выполнения расчета и построения графика. Впоследствии, вам предстоит занести корректные значения в соответствующие поля, чтобы в дальнейшем произошло отображение на графике. Очень часто, этот инструмент позволяет вам рассчитать сложные математические моменты, которые нет возможности вычислить на бумаге, либо используя другие доступные средства.
Формат ячеек, ссылки и диаграммы
Еще одна полезная функция программного обеспечения, которая позволит вам без всяких затруднений построить диаграмму, установить ссылку, либо отредактировать формат ячеек. Для выполнения манипуляций, требуется запустить программу на своем устройстве. Далее вы создаете таблицу, после чего переходите к свойствам ячеек, посредством нажатия на выделенной области правой клавишей мышки. Что касается диаграмм, то для их создания необходимо перейти в раздел «Вставка», а после нажать на соответствующий инструмент. Здесь вы можете выбрать наиболее подходящий для себя формат отображения, установить корректные значения, а после отобразить в документе все необходимое. Касательно ссылок, стоит отметить, что они устанавливаются посредством копирования конкретного адреса. После чего, вы выделяете нужную область текста, нажимаете правую клавишу мышки, и выбираете соответствующий подраздел. Здесь остается только вставить скопированный адрес веб-ресурса.
Создание и редактирование баз данных
Еще один удобный инструмент, который присутствует в этой версии программного обеспечения. Для того чтобы выполнить создание базы данных, вам предстоит выбрать соответствующий формат нового документа. Здесь также необходимо установить корректные значения, прописать название, и уже после приступить к редактированию. Сам по себе процесс не сильно отличается от работы с обычными текстовыми документами, за тем лишь исключением, что создается другой формат файла. В базу данных вы сможете в любой момент внести необходимые правки и коррективы посредством встроенных инструментов в программу
Важно лишь после окончания работы сохранять новые параметры
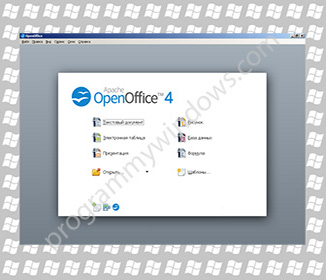
Описание OpenOffice
OpenOffice — многофункциональный, кроссплатформенный офисный пакет, доступный на бесплатной основе с открытым исходным кодом. По сути, программный продукт является ответвлением от основной ветки проекта LibreOffice и во многом наследует его функциональные особенности и функции. Дистрибутив программы OpenOffice включает в себя следующие индивидуальные компоненты:
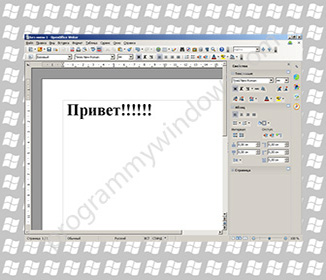
- OpenOffice Writer — визуальный редактор HTML и текстовый редактор, бесплатная альтернатива проприетарному Microsoft Word. В редакторе можно создавать документы практически любой степени сложности, менять размер шрифта, цвет или форматирование, применять один из пользовательских или стандартных стилей, вставлять указатели и оглавления, искать и заменять фрагменты текста и выполнять массу других действий. Результаты работы можно сохранить в DOCX, DOC, ODT или PDF-файле
- OpenOffice Calc — цифровое средство для создания, редактирования, обработки и экспорта электронных таблиц и визуализации данных посредством графиков, аналог коммерческого инструмента для работы с таблицами Microsoft Excel. В Calc вы можете строить отчеты, сводить данные с разных таблиц и листов, прогнозировать, заниматься расчетами, анализировать вводимые данные и т.д.
- OpenOffice Draw — векторный графический редактор для работы с изображениями и графическими документами
- OpenOffice Impress — утилита для создания анимированных презентаций с эффектами, переходами и мультимедиа вставками. Слайды могут содержать любые элементы: рисунки, диаграммы, таблицы, нумерованные и маркированные списки, видео, изображения, текст и пр. Вы можете экспортировать свои творения напрямую в SWF-формат, дабы получатель презентации мог просмотреть ваш контент без установки дистрибутива на свой компьютер
- OpenOffice Base — приложение для подключения к внешним системам управления базами данных, включающее в себя интегрированную СУБД HSQLDB с наглядным интерфейсом и полным набором инструментов для генерации SQL-запросов
- OpenOffice Math — гибкий и кастомизируемый редактор формул.
Приложение OpenOffice прекрасно подойдет в качестве замены проприетарного офисного решения (того же Microsoft Office) для использования в школах и малых организациях, поскольку обладает всеми необходимыми преимуществами развернутого, полноформатного механизма для штатных операций.
Функциональные возможности, макросы, преимущества
К основным возможностям ОпенОфис можно отнести то, что:
— программа оснащена отличным редактором текстов и web-страниц;
— возможно редактирование таблиц;
— при помощи Апач Опен Офиса можно создать или отредактировать презентации;
— графический редактор, в принципе, может заменить популярный Adobe Illustrator;
— есть возможность управлять базами данных;
— можно создавать и форматировать формулы, изменить кодировку и даже программировать;
— и он поддерживает макросы.
Инструменты для работы с документами:
— менеджер изменения стилей форматирования файла;
— нумерация страниц;
— параметры страницы;
— проверка орфографии;
— настройка рамок;
— собрание изображений;
— графика в стиле Office XP;
— с помощью навигатора страниц работает поиск и перемещение по тексту документа;
— дополнительными плагинами можно настроить проверку орфографии при помощи русских словарей для текстового редактора.
Русская версия Апач ОпенОфиса оснащена многими функциями, которых либо нет, либо не все присутствуют в других пакетах для офиса, и ради этого имеет смысл скачать Опен Офис бесплатно. Набор офисных программ Опен Офис включает в свой состав популярные: (calc, writer, draw, base, impress) и другие.
Пакет поддерживает формат MS Office с 97 по 2003 и импортирует файл в формате Office OpenXML, MS Office 2007, MS Office 2010. Если установить дополнительное расширение со словарями, он проверит орфографию, используя русский словарь для данного текстового редактора. Так же программа без труда экспортирует файлы PDF формата, поддерживается всеми компонентами, кроме Base. OpenOffice.org способен разрабатывать руками своих фанов независимые дополнительные расширения, которые предоставят владельцу нового расширения еще большую функциональность. Все эти расширения можно легко установить и удалить.
Как сделать таблицу в Опен Офисе
Первый и самый важный момент – это непосредственно создание таблицы, в которую вы будете вносить различные данные. В случае с рассматриваемым примером получится объект с равными по размеру ячейками.

Предварительно продумайте то, сколько у вас должно быть столбцов и строк, ориентируйтесь на то количество данных, которые вы планируете вносить. Когда полностью будете готовы, запускайте программу и следуйте инструкции:
- Нажмите по любой ячейке левой кнопкой мыши, начинайте её удерживать.
- Потяните курсор в ту или иную сторону, чтобы начать выделение объектов.
- Остановитесь в тот момент, когда вы захватите необходимое вам количество столбцов и строк. В результате вы получите зону, которая подсвечивается синим цветом.
- Следующим этапом потребуется воспользоваться специальным инструментом под названием «Обрамление». Благодаря ему ячейки будут иметь ярко выраженные границы, то есть, таким образом вы чертите «скелет». Кликните по кнопке, указанной на изображении ниже, а затем в выпавшем наборе инструментов выберите то, что вам на данный момент подходит.

LOOKUP
Returns a value from a single-cell-wide table, in a position found by lookup in another table.
Syntax:
LOOKUP(lookupvalue; searchtable; resulttable)
- lookupvalue is a value (number, text or logical value) to look up in the single row or single column range/array searchtable. searchtable must be sorted, with numbers in ascending order appearing before text values in alphabetic order.
- resulttable is a range/array of the same size as searchtable. LOOKUP returns the value in resulttable in the position where the match was found in searchtable.
- LOOKUP decides where in searchtable lookupvalue would appear. If there is an exact match, that is the position found; if there is more than one exact match, the position found is not necessarily the leftmost/ topmost. If there is no exact match, the position just before where lookupvalue would appear is found; the #N/A error results if that position is not in searchtable.
- Matching is always case-insensitive — the case setting on the Tools — Options — OpenOffice.org Calc — Calculate dialog does not apply.
- Advanced topics:
- If regular expressions are enabled on the Tools — Options — OpenOffice.org Calc — Calculate dialog, LOOKUP will find exact matches treating lookupvalue as a regular expression. This only makes sense, and should only be used, if you expect there to be unique exact matches.
- If ‘Search criteria = and <> must apply to whole cells‘ is enabled on the Tools — Options — OpenOffice.org Calc — Calculate dialog, lookupvalue must match the whole text in the cell; if not, it can match just part of the text.
Examples:
In these examples, cells A1, B1, C1, D1, E1 contain 3, 5, cat, mat, matter, and cells
A3, B3, C3, D3, E3 contain A, B, C, D, E.

LOOKUP(3; A1:E1; A3:E3)
- returns A. Cell A1 matches 3. The contents of the corresponding cell in A3:E3 are returned.
LOOKUP(7; A1:E1; A3:E3)
- returns B. 7 would appear between 5 and cat, so the position to the left is found.
LOOKUP(1; A1:E1; A3:E3)
- returns #N/A. 1 would appear before 3 in the top row, and there is no position to the left of that in the table.
LOOKUP("CAT"; A1:E1; A3:E3)
- returns C. The difference between lower and upper case is ignored, so CAT matches cat.
LOOKUP("mate"; A1:E1; A3:E3)
- returns D. mate would appear between mat and matter, so the position to the left is found.
Advanced topic: regular expressions
LOOKUP("c.t"; A1:E1; A3:E3)
- returns C if regular expressions are enabled (and #N/A if not). The dot ‘.’ stands for ‘any single character’ in a regular expression, so c.t matches cat.
LOOKUP(".at"; A1:E1; A3:E3)
- ".at" matches both cat and mat if regular expressions are enabled. It also matches matter if whole cell matching is off. It is not possible to predict which of these will be matched, nor which result will be returned. Use regular expressions with care.
Issues:
- The case sensitivity behaviour is discussed in issue 71000
- In Excel, any logical values in searchtable must appear after any text values. In Calc, logical values are assumed to have the numerical values (FALSE) and 1 (TRUE).
- The flexibility and power of regular expressions and the option to disable whole cell matching make this function a lot more complex. The safest and easiest way to use this function is to disable regular expressions and enable whole cell matching.
- The forthcoming ODFF standard defines a 2 parameter version of this function, which will implemented in Calc (issue 74245).
- The forthcoming ODFF standard suggests that the searchtable and resulttable parameters are evaluated as array formulas. This is not so in Calc (issue 90628).
See Also
- CHOOSE
- HLOOKUP
- INDEX
- MATCH
- OFFSET
- VLOOKUP
PROB
Regular Expressions in Calc
Spreadsheet functions
- Functions listed alphabetically
- Functions listed by category
What we need to create an add-in
-
UDK
The so called «UNO Development Kit» is necessary to
deal with the OpenOffice.org API. Descriptions and other important
things around this theme are located on http://udk.openoffice.org/ -
OpenOffice.org Calc
If you want to run an add-in, the easiest way is to use
OpenOffice.org Calc. The AutoPilot for functions is a good place,
where the functionality of the add-in can be checked. -
Solver Tarball
The Analysis add-in makes use of a library called «tools»,
which contains e.g. the resource manager and other usable stuff.
This is not always necessary for another add-in, but in this case it
was a great help. -
Appropriate compiler
Find more infos on which environment to use on homepage of the
UDK. -
Additional descriptions
The OpenOffice.org Calc project has got its own homepage on
http://sc.openoffice.org/.
There you will also find a link to description of the add-in service.
Current Development
To see what the Calc team at Sun is doing, look for the weekly
update entries in the GullFOSS
blog.
Currently, the major topics of Calc development are:
-
Performance
Current Calc activities within the performance
project are listed on the performance
wiki page. -
Excel 2007 import filter
The import filter for Excel 2007 files is continually improved.
For details about the filter implementation, see its
wiki page. -
ODF formula specification
Within the OASIS OpenDocument Formula
Subcommittee, a specification for spreadsheet formulas is being
created. Necessary changes are being implemented. -
Integration of R into Calc
A Summer of Code project has integrated the R environment with
Calc, see the
page in the wiki. The Summer of Code project is completed, but
the integration will continue to be improved. -
Usability improvements
There’s a separate wiki
page about our usability activities. -
Solver
Calc has a built-in
dialog to control different solver components, and a linear
solver component included in the installation set. A non-linear
component is available as a preliminary
version.
Spreadsheets, sheets and cells[edit| edit source]
Calc works with elements called spreadsheets. Spreadsheets consist of a number of individual sheets, each containing a block of cells arranged in rows and columns.
These cells hold the individual elements—text, numbers, formulas etc.—which make up the data to be displayed and manipulated.
Each spreadsheet can have many sheets and each sheet can have many individual cells. In version 3.0 of OOo, each sheet can have a maximum of 65,536 rows and a maximum of 1024 columns.
You can enter data into Calc in several ways: using the keyboard, the mouse (dragging and dropping), the Fill tool, and selection lists. Calc also provides the ability to input information into multiple sheets of the same document at one time.
After entering data, you can format and display it in various ways.
A function is a pre-defined calculation entered in a cell to help you analyze or manipulate data in a spreadsheet. All you have to do is add the arguments, and the calculation is automatically made for you. Functions are the main reason for spreadsheets. If you understand functions, then you can start to use the real power of a spreadsheet.
The database (preconditions)[edit| edit source]
The basis for work with the DataPilot is always a list with your data in raw format. Such a list is comparable to a database table. The table consists of rows (data sets) and columns (data fields). The field names are in the first row above the list.
Later we will explain that the data source could be an external file or database. The simplest use case is that your data is contained in a Calc spreadsheet. For such a list, Calc offers sorting functions that do not depend on the DataPilot.
For processing data in lists, the program must know in which area of the spreadsheet the table is. A Calc table can be anywhere in the sheet, in any position. It is also possible, that a spreadsheet contains several unrelated tables.
Calc recognizes your lists automatically. It uses the following logic:
Starting from the cell you’ve selected (which must be within your list), Calc checks the surrounding cells in all 4 directions (left, right, above, below). The border is recognized if the program discovers an empty row or column, or if it hits the left or upper border of the spreadsheet.
This means that the described functions can only work correctly if there are no empty rows or columns in your list. Avoid empty lines (for example for formatting). You can format your list by using cell formats.
If you select more than one single cell before you start sorting, filtering or calling the DataPilot, then the automatic list recognition is switched off. Calc assumes that the list matches exactly the cells you have selected. This might be useful in only very few cases.
A relatively big source for errors is that you might declare a list by mistake and you sort your list. If you select multiple cells (for example, a whole column) then the sorting mixes up the data that should be together in one row.
In addition to these formal aspects, the logical structure of your table is very important for using the DataPilot.
When entering the data, do not add outlines, groups. or summaries. This becomes clear when we think about what we could have done wrong in our Sales list example. This will give you a list of bad ideas, that you can find very often among spreadsheet users who are not informed about the possibilities of processing lists within a spreadsheet.
First bad idea: You could have made several sheets. For example, you could have made a sheet for each group of articles. Analyses are then only possible within each group. Analyses for several groups would then be a lot of hassle.
Second bad idea: In the turnover list, instead of only one column for the amount, you could have made a column for the amounts for each employee. The amounts than had to be entered into the appropriate column. An analysis with the DataPilot would not be possible any more. In contrast, one result of the DataPilot is that you can get results for each employee if you have entered everything in one column.
Third bad idea: You could have entered the amounts in chronological order. At the end of each month you could have made a sum. In this case, a sorting of the list for different criteria is not possible, and you could not use the DataPilot. The rows with the sums would be treated by the DataPilot like any other amount you have entered. Getting monthly results is one of the very fast and easy features of the DataPilot.
You start the DataPilot with Data > DataPilot > Start. If the list to be analyzed is in a spreadsheet table, select one cell within this list. Calc recognizes and selects the list automatically for use with the DataPilot.
Imprimir
Porque é que o Calc imprime todas as folhas do ficheiro?
por omissão, o Calc está configurado para essa situação mas é possível alterar essa definição para que apenas a folha activa seja impressa:
- Seleccione Ficheiro->Imprimir a partir do menu
- Pressione o botão Opções
- Active a opção Imprimir apenas folhas seleccionadas
Para que estas definições sejam permanentes
- Seleccione Ferramentas->Opções
- Do lado direito da nova janela seleccione OpenOffice.org Calc->Imprimir e active a opção Imprimir apenas folhas seleccionadas
Como posso imprimir algumas, mas não todas, as células da minha folha?
- Seleccione as células que pretende imprimir
- Seleccione Formatar->Intervalos de impressão->Definir a partir do menu
Notas:
É possível ter intervalos de impressão diferentes em cada folha
Como posso definir a impressão na vertical para a folha1 e na horizontal para a folha2?
É possível atribuir diferentes estilos para cada folha. Para imprimir com diferentes orientações de texto é necessário criar uma nova página de estilos com o formato desejado para cada folha.
- Seleccione Formatar->Estilos e formatação ou pressione a tecla F11
- Seleccione ícone Página de Estilos (segundo ícone a contar da esquerda)
- Clique com o botão direito do rato na página de estilos e seleccione Novo…
- Atribua um nome à página de estilos como por exemplo, Estilo Horizontal
- No separador Página altere o campo Orientação para Horizontal
- Pressione OK
- Seleccione a folha que pretende que seja impressa na horizontal
- Faça duplo clique sobre o estilo criado nos passos anteriores (neste caso Estilo Horizontal) para que a folha adquira esse estilo.
Como posso seleccionar uma ou mais linhas para que sejam impressas em todas as folahs?
- Seleccione Formatar->Intervalos de impressão->Editar a partir do menu
- Posicione o cursor no campo Linhas a repetir
- Insira as linhas a repetir (exemplo: $4 para a linha 4, $4:$6 para repetir as linhas de 4 a 6), ou
- Clique no botão ao lado do campo de entrada do intervalo e de seguida seleccione uma célula da linha desejada.Poedrá escolher múltiplas células arrastanto o rato.
- Pressione OK.
Como posso imprimir as minhas folhas?
Em geral, para imprimir folhas de cálculo deverá seleccionar primeiro Ficheiro->Pré-visualizar página e, partir daqui, configurar as definições de impressão para obter o efreito desejado. Os próximos procedimentos explicam as opções principais para imprimir folhas de cálculo.
Pré-visualizar a área de impressão
- Seleccionar Ficheiro->Pré-visualizar página a partir do menu
- Caso a área de impressão seja muito grande podem surgir colunas adicionais
- Pressione Fechar pré-visualização para voltar ao modo de edição da folha de cálculo.
- Execute ajustes às definições de impressão e pré-visualize de novo. Repita este procedimento até obter o efeito de impressão desejado.
Formatar a página
- Seleccionar Formatar->Página…’ a partir do menu
- Seleccione o separador Página na caixa de diálogo que surge
- Especifique o tamanho da página
- Especifique a orientação da página desejada (vertical ou horizontal)
- Ajuste as margens se necessário
- Especifique o alinhamento da tabela para alinhar a tabela à página
- Pressione OK, ou pressione outros separadores para aceder a mais opções de formatação.
Ajustar as quebras de página
- Seleccione Ver->Pré-visualizar quebras de página a partir do menu
- Posicione o cursor exactamente em cima de um dos contornos azuis e arraste para ajustar as quebras de páginas.
- Seleccione Ver->Normal para voltar ao modo de edição
Especificar a área de impressão
- Seleccionar a folha que pretende.
- Clique e arraste para seleccionar a área da folha que pretende imprimir.
- Seleccione Formatar->Área de impressão->Adicionar a partir do menu.
- Repetir estes passos para as folha do ficheiro que pretende imprimir.
Ajustar os dados da folha para imprimir num número especifico de páginas
- Seleccionar Formatar->Página…
- Seleccionar o separador Folha
- Na secção Modo de escala seleccione Ajustar intervalo(s) de impressão a número de páginas
- Pressione OK
- Use o Pré-visualizar página para pré-visualizar o documento. Reajuste se necessário
Editar a área de impressão
- Select Format — Print Ranges — Edit from the main menu
- In the print dialog that appears, look at the Print range setting.
- Adjust the cell definition in the range of cells, or select None to clear the print range.
- Click OK.
Imprimir uma folha no centro da página
- Seleccionar Formatar->Página…
- Seleccionar o separador Página
- Na seccção de Alinhamento da tabela active (ou desactivecomo desejado) as caixa Horizontal e Vertical. É possível pré-visualizar as alterações num mini-gráfico que se encontra por baixo destes parâmetros.
Using an add-in
When you’ve successfully created an add-in, Calc should know, that
this exists. So copy the created shared library into the directory
«program» and if you use resources, copy the *.res files
into «program/resource» directory. Then you have to
register this new library with the regcomp tool (wich should come
together with the Solver tarball), e.g. «regcomp -register -r
\program\applicat.rdb -c analysis638mi.dll». If you then start
OpenOffice.org and open a Calc spreadsheet, you can access your new
functions as the build in ones. To check this, open the AutoPilot for
functions an search in the list for your new ones. There they should
work like all others. You can also check, if the functions are listed
in the proper category.